Busy month ahead so back to menu planning to stay on track. I don't like to lose food in the back of the refrigerator, forget to use what (little but worthwhile!) is in the garden, or spend money on something quick-to-eat when a little planning would make all the difference.
Monday, January 31
Costa Rican-style tilapia (made w/already-cooked basmati rice, black beans and canned pineapple)
Tuesday, February 1
Beef pot roast with potatoes, carrots and onions
Rye bread (5-minute artisan - local rye and hard wheat)
Wednesday, February 2
Blender oatmeal pancakes with maple syrup
Breakfast sausage patties
Thursday, February 3
Hot roast beef sandwiches (from Tuesday's pot roast)
Mashed potatoes
Spinach or Swiss chard from the garden
Friday, February 4
Homemade pizza
Saturday, February 5
Vegetable soup (last of Tuesday's pot roast)
Homemade soda crackers
Sunday, February 6
Superbowl party at Mom's - take oatmeal-raisin cookies, crackers and cheese ball
Monday, January 31, 2011
Wednesday, January 26, 2011
Snow!
After watching at least two snowstorms pass by this winter, including one that missed us but left 10 inches of snow in Virginia Beach(!), we finally have a lot of our own. 8 inches as of an hour ago and heavy snow still falling.
Except for the fact that DH still has to drive home from work through this stuff and get the truck up the hill to the house, I'd be ecstatic. As it is, I'm merely happy, happy, happy. I think DS was on the same wavelength until a few of the backyard chickens decided to hide out under a deck.
Chickens don't like snow (anyone remember Owl?) and when it started snowing at noon, the backyard girls ran under the deck. At dusk a few refused to come out even though DS had shoveled a path and was coaxing them with a bucket of scratch.
So DS had to catch and then carry each stubborn hen (plus, Badger, one stubborn silkie roo) to their coop. The last one out was Turkey, one of the naked neck chickens. I guess I can see why she doesn't like the snow...

Friday, January 21, 2011
Canning ham or smoked picnic shoulder plus making ham salad with or without puff shells
Earlier this month I canned ham I bought on sale prior to Christmas. Hams are often on sale before the Christmas and Easter holidays so that's a good time for me to can a few jars. We don't eat a lot of ham so a couple of hams each year go a long way -- a little diced ham in a frittata, in scalloped potatoes or macaroni and cheese can make the meal. And, as I mentioned before, ham salad is another great way to use up ham. When I make ham salad, my mom always expects me to send a little bit over for her, too. It makes a quick meal with crackers, stuffed in a garden tomato or as a sandwich.
I can western ham and sometimes smoked picnic shoulder (picnic ham). Sometimes it says semi-boneless. And even though the ham I buy these days is always labeled Ready-to-Eat, which means it's already cooked, I like to cook it in the roaster oven (regular oven would work, too). That way it's hot and ready to go straight into the canning jars as fast as I can get it cut off the bone. How long I cook it depends on the size of the ham -- the package has directions as to temperature and how many minutes per pound as well as recommended internal temp.
Once the ham is cooked, I lift it out onto a cutting board and trim away all skin and fat. That goes into a stock pot along with the bone when I'm done. Makes great ham stock for canning beans or cooking potatoes for potato soup. The ham gets cut into chunks. I try to cut the meat into even-sized pieces about an inch thick. Since I'm never sure just what I'll want the ham for when the jar's opened, I go with large pieces overall -- I can always slice, cube or dice it as needed later.
Hot jars are packed with hot ham to within an inch of the rim. Wipe rim of jar clean. (I use a clean cloth dipped in vinegar as it seems to help cut any grease that may be on the glass jar.) Place lid on jar and tighten ring. Using a pressure canner, process pints and half-pints for 75 minutes and quarts for 90 minutes at the appropriate pressure for your altitude. If you've never canned before check out the latest Ball Blue Book Guide to Preserving or the USDA-funded website, National Center for Home Food Preserving, for detailed directions. The ham will yield a little juice so when you remove the jars from the canner you'll often see an inch or two of liquid in the tightly-packed jars. That's normal. If you don't take care to trim away all fat, there will be a bit of that in there, too. It will harden as the jar cools and form a white layer on top of the liquid or ham.
When I told DH I was going to post my recipe for ham salad, he just rolled his eyes and said "what recipe? You just throw it together and taste as you go!" And he's right. I have four ingredients that I combine to make ham salad but I don't measure any of them. One reason is because I rarely have the exact same amount of ham each time because ham salad is a favorite way I use up leftover ham -- after we've eaten it hot from the oven and in cold slices on a sandwich we have it ground up with mayonnaise, mustard and sweet pickles added to make ham salad. But I can give you what I start with and then suggest you let your taste buds lead you on.
Ham Salad
2 cups cold, cooked ham
1/2 cup mayonnaise
1/2 cup sweet pickles or 1/3 cup sweet pickle relish
1 to 2 tablespoons yellow mustard
Using a food processor or meat grinder, process ham and pickles. You want them to be finely chopped but not pasty.
I scrape the ham and pickles into another bowl before adding the mayo and mustard as I don't want to risk processing to much. Texture is important here.
Add mayonnaise and the smaller amount of mustard, then taste and adjust mayo or mustard till you have the right combination for you. I don't want to add so much mustard that the salad turns yellow but I definitely like to have a little tang to the salad -- it offsets the sweetness of the pickles, I think.
This is ready to eat at this point but it's even better if you can give it an hour or so in the fridge to chill and let the flavors meld.
----------
If you're tired of sandwiches or crackers, try making little puff pastries to fill. They're pretty easy and they look impressive on a plate. They're also good filled with chicken salad.
Puffs for Filling
(adapted from Better Homes & Gardens New Cook Book, 1976)
2 tablespoons butter
1/4 cup flour
dash salt
1 egg
1/4 shredded Swiss or Cheddar cheese (optional)
Melt butter in 1/4 boiling water. Add flour and dash salt; stir vigorously. Cook and stir till mixture forms a ball that doesn't separate. Remove from heat and cool slightly. Add egg and beat vigorously until smooth. Stir in cheese. Drop dough onto greased baking sheet, using 1 level teaspoon dough for each puff. Bake at 400ºF. about 20 minutes. Remove puffs from oven; cool and split. Fill each puff with 2 teaspoons of ham or chicken salad. Serve immediately or refrigerate for up to 4 hours. (They are actually still tasty the next day but will eventually soften in storage so best not to plan on storing too long.)
I can western ham and sometimes smoked picnic shoulder (picnic ham). Sometimes it says semi-boneless. And even though the ham I buy these days is always labeled Ready-to-Eat, which means it's already cooked, I like to cook it in the roaster oven (regular oven would work, too). That way it's hot and ready to go straight into the canning jars as fast as I can get it cut off the bone. How long I cook it depends on the size of the ham -- the package has directions as to temperature and how many minutes per pound as well as recommended internal temp.
Once the ham is cooked, I lift it out onto a cutting board and trim away all skin and fat. That goes into a stock pot along with the bone when I'm done. Makes great ham stock for canning beans or cooking potatoes for potato soup. The ham gets cut into chunks. I try to cut the meat into even-sized pieces about an inch thick. Since I'm never sure just what I'll want the ham for when the jar's opened, I go with large pieces overall -- I can always slice, cube or dice it as needed later.
Hot jars are packed with hot ham to within an inch of the rim. Wipe rim of jar clean. (I use a clean cloth dipped in vinegar as it seems to help cut any grease that may be on the glass jar.) Place lid on jar and tighten ring. Using a pressure canner, process pints and half-pints for 75 minutes and quarts for 90 minutes at the appropriate pressure for your altitude. If you've never canned before check out the latest Ball Blue Book Guide to Preserving
When I told DH I was going to post my recipe for ham salad, he just rolled his eyes and said "what recipe? You just throw it together and taste as you go!" And he's right. I have four ingredients that I combine to make ham salad but I don't measure any of them. One reason is because I rarely have the exact same amount of ham each time because ham salad is a favorite way I use up leftover ham -- after we've eaten it hot from the oven and in cold slices on a sandwich we have it ground up with mayonnaise, mustard and sweet pickles added to make ham salad. But I can give you what I start with and then suggest you let your taste buds lead you on.
Ham Salad
2 cups cold, cooked ham
1/2 cup mayonnaise
1/2 cup sweet pickles or 1/3 cup sweet pickle relish
1 to 2 tablespoons yellow mustard
Using a food processor or meat grinder, process ham and pickles. You want them to be finely chopped but not pasty.
I scrape the ham and pickles into another bowl before adding the mayo and mustard as I don't want to risk processing to much. Texture is important here.
Add mayonnaise and the smaller amount of mustard, then taste and adjust mayo or mustard till you have the right combination for you. I don't want to add so much mustard that the salad turns yellow but I definitely like to have a little tang to the salad -- it offsets the sweetness of the pickles, I think.
This is ready to eat at this point but it's even better if you can give it an hour or so in the fridge to chill and let the flavors meld.
----------
If you're tired of sandwiches or crackers, try making little puff pastries to fill. They're pretty easy and they look impressive on a plate. They're also good filled with chicken salad.
Puffs for Filling
(adapted from Better Homes & Gardens New Cook Book, 1976)
2 tablespoons butter
1/4 cup flour
dash salt
1 egg
1/4 shredded Swiss or Cheddar cheese (optional)
Melt butter in 1/4 boiling water. Add flour and dash salt; stir vigorously. Cook and stir till mixture forms a ball that doesn't separate. Remove from heat and cool slightly. Add egg and beat vigorously until smooth. Stir in cheese. Drop dough onto greased baking sheet, using 1 level teaspoon dough for each puff. Bake at 400ºF. about 20 minutes. Remove puffs from oven; cool and split. Fill each puff with 2 teaspoons of ham or chicken salad. Serve immediately or refrigerate for up to 4 hours. (They are actually still tasty the next day but will eventually soften in storage so best not to plan on storing too long.)
Tuesday, January 11, 2011
Seeds, sets or slips?
Onions, that is. It's January 11 and it's trying to snow and I'm searching for onion seeds. And not having much luck.
Onions are a staple here. I think it's a rare day that we don't have onions on the menu -- either added to a dish as it cooks, sliced on a sandwich or diced for topping green beans or something. You know, a day without onions is like a day without sunshine. Or something like that.
 Every year we expand our onion production. Planting more types of onions and just plain more onions. In addition to the yellow and red onion sets DH always picks up at the local farm co-op, we've planted perennial onions like Egyptian or walking onions, welsh or bunching onions, multiplier or potato onions, and slips of sweet and storage onions.
This year I want to grow plenty of onions suitable for storage. The potato onions are great for this purpose but this will only be the second year growing them and I want to have lots of good, hard onions on hand through next winter. More than a second-year crop of multiplier onions can provide and still allow for next year's planting. So I need to find some onion seeds, preferably yellow Globe, and fast.
The onions planted from sets taste great but don't keep for more than a couple of months. We let them dry after harvesting then I tie them off individually in the legs from pantyhose (never throw anything away, remember?) and hang from hooks in our storage area. But by January, if not before, I'm finding soft onions.
A few years ago we bought a flat of onion slips from a booth at the local farmer's market. They were Globe onions and they proved to be excellent keepers. After reading up on onions and planting seeds vs. sets, I decided last year that we must start with seeds (the market gardener no longer offers the Globe slips) but didn't realize how early we needed to start them to have onions ready to transplant into the garden. So last year went by without onions started from seed.
This year I was going to be on top of things and get that order in the first of January (instead of waiting till mid-February like last year) but one of my favorite seed sources is already SOLD OUT. And I'm having trouble tracking down another source that I want to order from -- plus, there's the problem of being overwhelmed when I search. SO MANY choices pop up and I start second-guessing myself about which type of storage onion I want after all.
I will get an order placed THIS WEEK for onion seeds. I will, I will. I must.
Onions are a staple here. I think it's a rare day that we don't have onions on the menu -- either added to a dish as it cooks, sliced on a sandwich or diced for topping green beans or something. You know, a day without onions is like a day without sunshine. Or something like that.

This year I want to grow plenty of onions suitable for storage. The potato onions are great for this purpose but this will only be the second year growing them and I want to have lots of good, hard onions on hand through next winter. More than a second-year crop of multiplier onions can provide and still allow for next year's planting. So I need to find some onion seeds, preferably yellow Globe, and fast.
The onions planted from sets taste great but don't keep for more than a couple of months. We let them dry after harvesting then I tie them off individually in the legs from pantyhose (never throw anything away, remember?) and hang from hooks in our storage area. But by January, if not before, I'm finding soft onions.
A few years ago we bought a flat of onion slips from a booth at the local farmer's market. They were Globe onions and they proved to be excellent keepers. After reading up on onions and planting seeds vs. sets, I decided last year that we must start with seeds (the market gardener no longer offers the Globe slips) but didn't realize how early we needed to start them to have onions ready to transplant into the garden. So last year went by without onions started from seed.
This year I was going to be on top of things and get that order in the first of January (instead of waiting till mid-February like last year) but one of my favorite seed sources is already SOLD OUT. And I'm having trouble tracking down another source that I want to order from -- plus, there's the problem of being overwhelmed when I search. SO MANY choices pop up and I start second-guessing myself about which type of storage onion I want after all.
I will get an order placed THIS WEEK for onion seeds. I will, I will. I must.
Monday, January 10, 2011
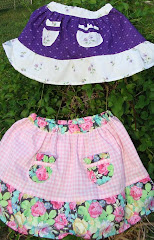
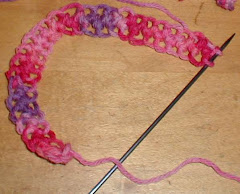
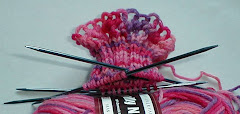
More felted fleece-lined mittens -- for Christmas


Sunday, January 9, 2011
White oak basket

The supplies for the workshop were very basic. He brought 6-feet or so of the lower trunk of a 6"-diameter white oak tree which he'd cut down a few days ago. The trunk had been split into quarters lengthwise and Jenkins spent the first part of the workshop telling us how he chooses the oak and teaching us to split the wood into weavers -- the pieces we'd use to weave over-and-under the ribs of the basket.


Saturday, January 8, 2011
Pizza burgers for the freezer

We all needed lunch and they were so handy...
I thought I'd posted about these OAMC staples several years ago but when I told a friend the recipe was on my blog, she couldn't find it. I couldn't either. So here it is.
Pizza Burgers
 1 pound lean ground beef or venison
1 medium onion, chopped fine
1 quart spaghetti sauce, or substitute pizza sauce
3 ounces pepperoni sausage, finely chopped (optional)
2 cups shredded mozzarella cheese
18 regular hamburger buns
Brown meat with onion in a large skillet. Drain, if necessary. Stir in spaghetti or pizza sauce, chopped pepperoni and cheese. Fill the buns with meat mixture.
 Wrap each bun for the freezer. Originally I used aluminum foil but DH has to use a microwave when he takes these to work so I now wrap the burgers in wax paper. I fold the paper in what's called a drugstore wrap.
To freeze for later: Put the wrapped buns in a plastic bag and freeze. If I'm using store-bought buns, I re-use the plastic bag they come in but any bag that will hold the buns close together so they don't tumble around is good.
If desired, thaw the buns, still wrapped, for no more than 1 hour before re-heating. Bake foil-wrapped buns at 350ºF. for 15-20 min. or microwave wax paper-wrapped buns for 45 seconds to heat through.
Friday, January 7, 2011
Guineas

We learned Newt came from a neighbor's about a mile down the road. They had stopped by a few times over the last couple of years to check out our movable chicken pen and eventually gotten chickens of their own. Plus a few guineas including one hen that's turned out to be a good guinea mama.
This past summer and fall, those same neighbors hired DS to care for their poultry and dogs while they were away from home a few days. The last time, in addition to paying him in cash, they offered him half of the latest guinea hatch. So in early November, DS and DH brought home 6 little guinea keets.
We set up the tallest chain-link dog run we had, put in a small house with a red-bulb heat lamp (these guys were only a week or two old) and the usual accompaniments. I asked DH to put flight netting over the top of the pen, but because it was 6-feet high, he thought it could wait till the keets were older. The first full day they were here, a Cooper's hawk scared the keets causing one to fly up and out of the pen. It roosted about 15 feet off the ground in an arborvitae, too high for DS or me to reach even with our ladder, and DH couldn't spot it late that night when he got home from work. No sign of what had happened to it when we searched the next morning.
So DH put flight netting over the top of the pen. And a piece of chicken wire between the top of the pen and the top of the door where there was a large gap that another keet managed to escape through when the Cooper's hawk returned later that week. That keet was luckier than the first as he managed to hide under the deck with the backyard chickens, finally emerging with them after the hawk took off in search of easier prey.
We used the heat lamp for the first couple of months. The nighttime temperatures were pretty low for November and December here in Virginia. Some nights saw single digit temps which we don't usually experience till later in the winter. After last week's more moderate temperatures, they've weaned themselves from the heat lamp. It's still in place in case we head towards 0º again but their body heat in the small house, insulated by straw bales along three of the outside walls, seems to be plenty for now.
Fed on turkey starter, the guinea keets grew fast. With the excitement of getting them settled, safely, in their new home, plus the usual holiday activities and the bitterly cold daytime weather (and snow!), we didn't even get a picture of them till New Year's Eve. Which is a real shame because when they're little, the shape of their heads combined with the feather coloring makes me think of little snakeheads slithering to-and-fro. (Guineas always stay close and seem to move as one.) Of course, that's another reason they didn't have their photograph taken sooner -- every time I did go outside with the camera, they promptly hid in the far corner of their house. They aren't as sociable as chickens.

For Christmas, I received a book about guineas by Jeannette Ferguson titled "Gardening with Guineas: A Step-By-Step Guide to Raising Guinea Fowl
Thursday, January 6, 2011
Felted fleece-lined mittens for Christmas

With just three pattern pieces plus cuffs, it only took a turn on the sewing machine for the outer mitten (cut from two wool sweaters previously felted in the wringer washer) with a repeat for the fleece lining cut from yardage, then sewing the cuffs to the lining and turning the wool mittens right-side out and the fleece-lining wrong-side out so they fit together correctly -- they were almost finished. A quick search through my buttons produced a couple suitable for attaching to the rolled cuffs so the mittens and their lining stay connected and I was done.

Wednesday, January 5, 2011
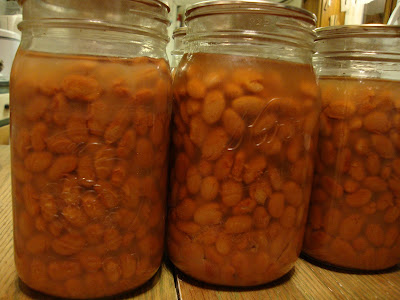
Ham and beans
Just because I haven't posted doesn't mean we haven't been busy. Why, last week I canned 13 pints and 1 half-pint of ham plus 14 quarts of pinto beans with broth from the bone and trimmings.
 I bought the ham in a pre-Christmas sale with the intention of canning it. I discovered we liked canned ham as well as when the extra is frozen and I don't have to worry about freezer burn or freezer space when it's canned. Baked ham is great when it's just prepared and we like ham sandwiches, of course, but ham is something I use in small amounts for cooking. When layered in scalloped potatoes and macaroni and cheese or included in a frittata, a cup or so of ham goes a long way. Half-pint jars would have been plenty big for most uses but that's not a size I had available. So I used pints and probably will be forced to make ham salad with the extra each time I open a jar. (Forced?! Hah! A little ham salad on crackers is a perfect quick lunch. And I guess I'll share if I have to.)
As for the beans, I had planned to make ham broth with the bone and trimmings from the ham and then can it. But when I thought about it, the ham broth would be used to cook dried beans. So I thought why not go the next step?
After carving the hot ham, I put the ham bone, skin and usual trimmings in a big stockpot and covered it with water. I also threw in one of the bags of vegetable parings (carrot peels, onion skins, and celery trimmings) which I had collected in the freezer. Let that simmer for several hours and then strained it. Cooled the ham broth in order to remove the layer of fat that always rises to the top and brought it back to a boil. Filled quart jars with 1-1/8 cups dried pinto beans which I'd sorted and rinsed to clean. Then filled the jars to the 1" mark with the boiling ham broth. (Added a small amount of plain boiling water to two jars as I ran out of ham broth before all the jars were filled.) Processed the jars in the pressure canner for 90 minutes and now I have 14 quarts of ready-to-eat pintos on the shelf.
Subscribe to:
Posts (Atom)