Showing posts with label crafts. Show all posts

Thursday, February 23, 2012

How to make spring come early

It's easy if you know how.  Just knit a warm and cozy hat that you really want to wear.

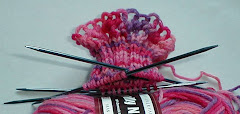
In January I found a Cat Bordhi hat pattern with a Moebius brim and splendid wooly tendrils I couldn't forget.  And I needed a warm winter hat. So I started knitting my Arctic Anemone hat with some really, really soft, bulky superwash merino yarn beautifully dyed by Black Sheep Dyeworks

I finished the hat in time for a field trip DS and I were scheduled to make to Lexington on Feb. 14.  The weather report was pessimistic, promising sleet and ice, maybe snow.  But with my hat finished, I was ready to face it.   The morning did start out overcast but by mid-day we were walking around the grounds at VMI with our coats off and the sun shining brightly, warming us and making my hat superfluous.
 

This past weekend it snowed.  8 inches on Sunday!  I wore my hat all day.  By today all the snow had completely melted and the outdoor thermometer was registering 63ºF. at 5:30pm when I drove DS to his viola lesson.  I wore my hat anyway.  Drove with the window half-open so I wouldn't overheat...

Oh, well.  There's always next winter.  I'll be ready.

Monday, February 6, 2012

More dehydrated carrots

Two years ago I posted about buying 10 pounds of marked-down organic carrots and how I diced, blanched and dried them.  I even dried the peelings (but did not blanch) and used them when making stock or ground them to powder and used for seasoning blends.  I've continued to dry any extra carrots I have on hand.  They are very handy to toss into soup or rehydrate for a casserole.

Before Christmas I did a program for my Garden Club on garnishing.  Like most of our programs, it was a hands-on workshop so everyone brought their favorite sharp paring knife and went to town making carrot flowers, apple swans and more.  Garnishing is a lot of fun and especially nice to try when the garden is in full swing as you can just grab what you need and not worry about how many tomatoes you may ruin on the way to producing a perfect tomato tulip.  In the winter, the cost can add up.

To help contain the cost of the program, I planned to work with some vegetables we had from the winter garden.  Turnips and onions, both green and bulbing, make great garnishes and readily take up food coloring if you want to go that route.  Apples are another thing we keep in cold storage so I knew I'd have them available.  But I ended up buying a 25-pound bag of what's often labeled "organic juicing carrots" -- really big but still sweet and flavorful carrots.  They were perfect for cutting into garnishes and we've been eating the rest.

But they were beginning to sprout feathery greens and since I didn't want to lose the last 10 pounds or so, I determined to dry them.  This time I opted to scrub them rather than peeling and then shredded them in the food processor.  I spread them out on the papery lining because I didn't want the shreds slipping through the plastic mesh as they shrunk during drying.  I'll use them mainly for baking -- carrot cake or carrot-orange muffins are the first things that come to mind but I can also see using them in cornish pasties, meatloaf or spaghetti sauce and I'm wondering how they'd work in cha gio.

Wednesday, January 11, 2012

A yard is enough

Sometimes I buy a yard of a fabric I just can't pass by.  It's only a yard and I can find a way to use it up, right?  Well, yes, most of the time. (And that's what I tell DH...)  But sometimes I just can't find the right project to commit it to.  In the case of the yard of cotton I used for my latest quilting project, the design was too big to cut up neatly and I couldn't bring myself to cut it up in small pieces to utilize it for just the bright colors -- I wanted a project that would take advantage of the design and the colors.  I really liked that yard.

Then when I was searching for just the right design for a baby quilt intended as a gift for a friend's adoption, I came across a book at the library, Joan Ford's Scrap Therapy: Cut the scraps and a project she calls "Once Upon a Scrap".  As soon as I saw the picture, I knew I wanted to make that quilt and I knew exactly which piece of fabric I wanted to use for the three main sections. 

As often happens once I decide on a "dream project" (one that incorporates and builds off favorite fabric, fiber, color, and/or design), the other bits came together without much effort.  I used odd bits of cottons I had on hand to cut out almost all of the 180 2-inch squares required for the two patchwork sections.  It was a lot of fun searching out blues, greens, reds, yellows in my fabric stash.  And I even found a couple of orange prints to use.

Because my mind usually tries to organize things I'm working with into patterns even when I don't want it to, I laid the stacks of colorful squares out on the ironing board and began to play with their layout.  I wanted to keep the patchwork section colorful and free without a discernible color placement order.  To aid that I purposely cut no more than 10 or 12 squares of any fabric so I wouldn't be able to fall back on a coordinated presentation.
I did end up buying a black, horse shoe-patterned fat quarter that jumped out at me on a trip to the local fabric store where I also found the perfect mottled blue cotton used for one of the borders and the soft flannel print used for the backing.  (And what I actually went there to purchase!)  Also, I used a wide green double-fold bias tape for the binding because I think it wears better than the straight-cut quilting cotton which the directions called for and while my best wish for this quilt is that it's worn to tatters by the little one it's intended for, I don't want it to be in tatters due to shoddy fabric or workmanship!
The cotton batting recommended quilting or tying at least every 4" or so and since I used flannel for the backing I planned to hand-quilt.  (I don't machine-quilt when using flannel for backing as I always have trouble with it "ruffling". YMMV)  The simple design encouraged me to just "quilt in the ditch" but the large landscape sections and the long blue border required more coverage. 

DH suggested I do a simple block pattern across those areas but when I attempted that, the white quilting thread didn't look right to me.  Usually I love a simple, primitive quilted design like that but it seemed to distract from the colorful quilt.  The fabric I couldn't bring myself to cut was instead cut up by little white stitches.  Well, not that little -- I average 6-8 stitches to the inch when quilting.  My grandmother, who hand-quilted all her work, considered anything less than 10-12 stitches to the inch to be a hazard as, in her words, "you could get your toenail caught in stitches that big!"

So this quilt features hand-quilting and tying.  I used embroidery floss, blue for the border and green for the design print, to tie the layers together that were deemed not suited to quilting.  DH asked me why I didn't consider hand-quilting with colored thread but I couldn't bring myself to use anything except my usual white cotton quilting thread for the hand-quilting.  Traditions are hard to break, you know?

Tuesday, January 3, 2012

Last year it was felted hearts,

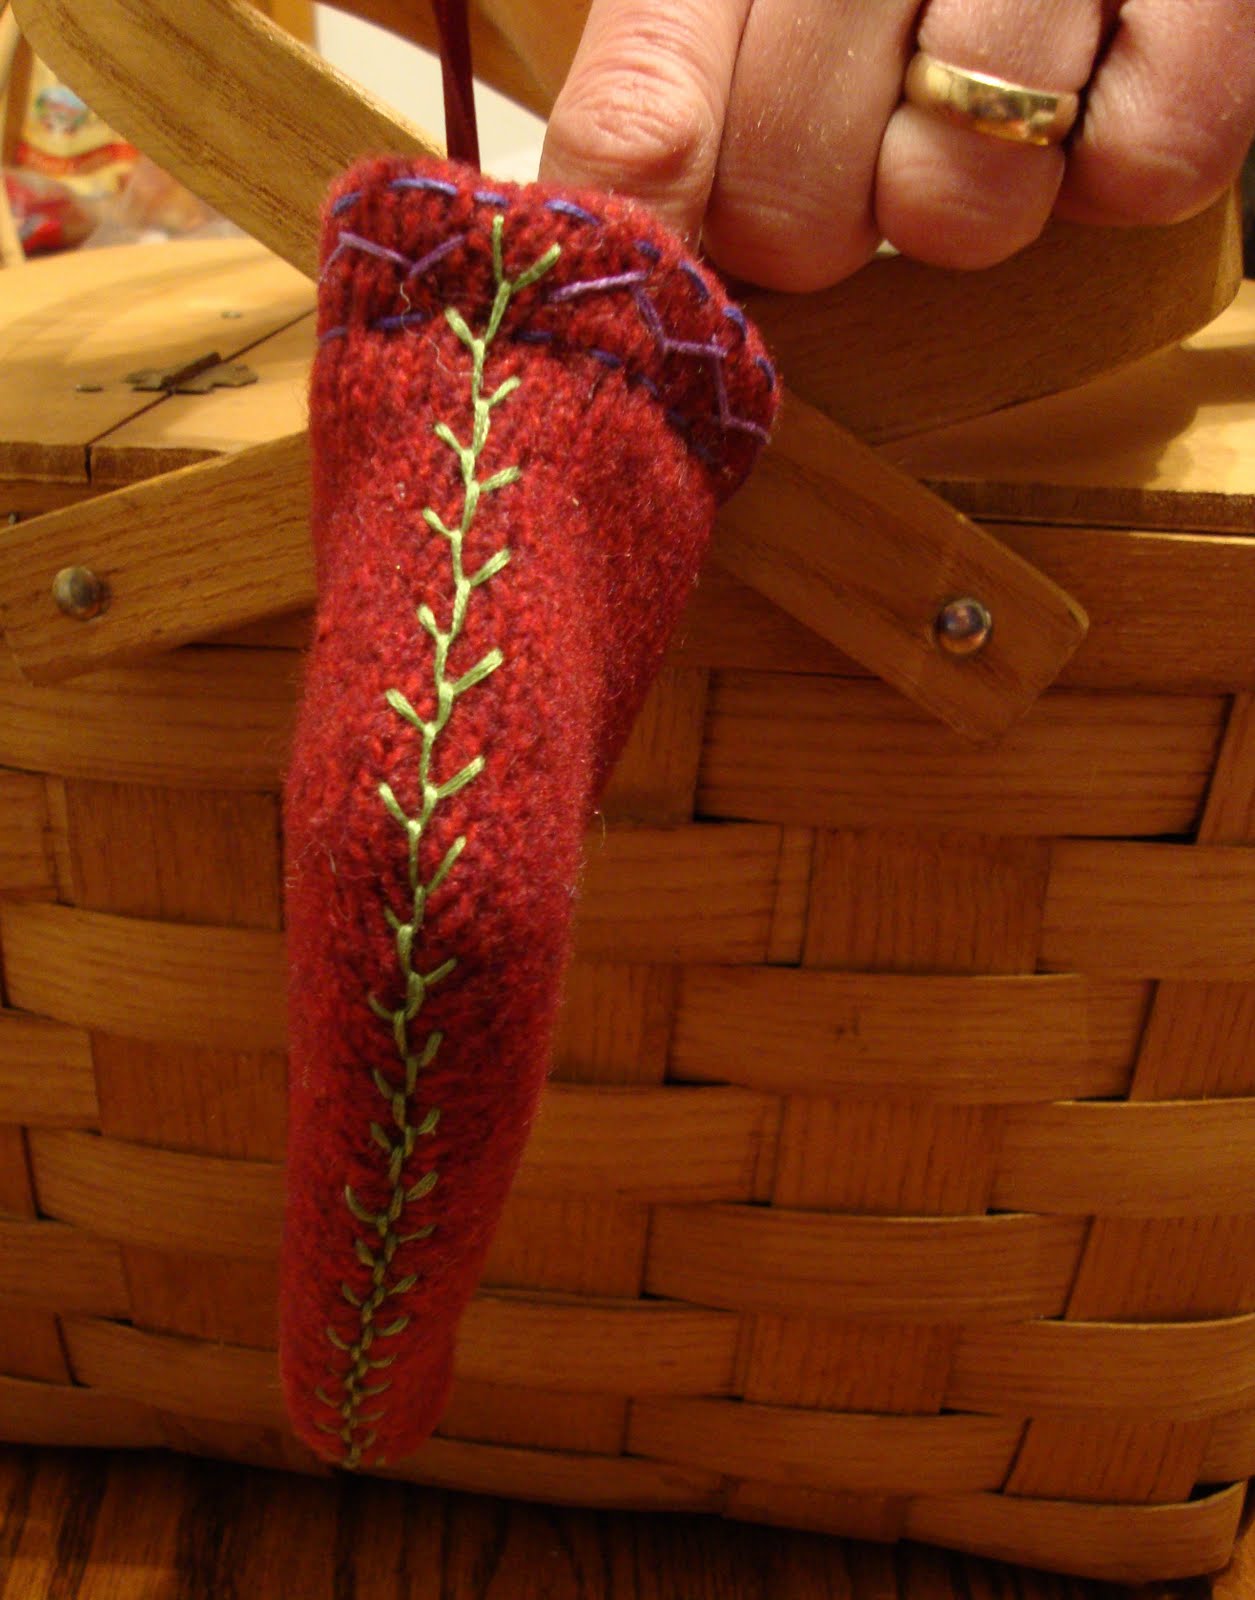
This year it's stockings -- elvish-styled stockings.

I don't know if it was DS's insistence that I read all four of Paolini's Inheritance Cycle books in late November or just one of those things, but when I sat down to make an ornament for my guild's annual exchange an elf bootie is what I kept coming back to no matter how many other ideas I tossed around. That's pretty much the same thing that happened last year when I made Grinch-styled hearts, from the same felted wool sweater...


Used a stocking template I found in a book, Sweater Renewal by Sharon Franco Rothschild, but have since run across Rothschild's original template in a November 2009 post on the Etsy blog. You can find her version and a link to a pdf including the template at this link.

Even though I think I was channeling elves this year instead of Grinch hearts, I couldn't seem to let go of the color combos that still remind me a bit of Dr. Seuss and the Grinch...


So far I've made three, one for the guild ornament exchange, one for the local homeschool support group exchange and one for my aunt.  Each is a little different as I played with the embroidery stitches but they all share the same overall shape and the feather-stitching (plus beads down the front) following the seam lines.  I used a combination of regular DMC embroidery floss and pearl cottons.

And perhaps it's more than just Paolini's books influencing the elfish choice this year. It also could be I was influenced by these little guys who live in my corner china press. They were my mom's when I was little and she gave them to me a few years ago -- I still like them.

They were always so cheerful-looking when I'd spot them under one of her flower arrangements or just hanging out on a shelf somewhere. I couldn't pass them up when she offered.

Saturday, December 3, 2011

It's started.

There are a lot of things I should be doing.  But earlier this week I spent some time crafting -- working on a Christmas tree-themed gift for a swap on Chickens in the Road.

Once again my camera's failing me on color translation but, trust me, I think I'm channeling Dr. Seuss this year.  The green in the green-and-red print fabric reminds me of the Osage-orange globes my mom gave me this fall. (Osage orange trees are rare around here so naturally I want one...)

I went searching for handmade gift ideas and quickly found the appliqued tea towel pattern.  From there it was easy to decide on the knitted dishcloth I found through Ravelry and then, when I had a few scraps of the printed fabrics leftover, I found the patchwork ornaments through a fun November challenge titled "No Ugly Ornaments".  I think I'm going to try #19, the origami dress ornaments next.

Today it's back to regular chores and I need to put up some more taco soup as DH and DS finished the last jar in November and are demanding a refill.  But 'tis the season and all that, so I'll be back with another project to show off share shortly.

Thursday, March 17, 2011

Baby quilt with embroidery -- finished!

And before the baby's arrived, too.  That's a new record.

I took the quilt block I embroidered last month and turned it into the center block for a 52"-square baby blanket.  Backed with flannel and lined with a piece of white sheeting, it reminds me of two my grandmother made.   They had tractors and farm animals and nursery rhyme scenes embroidered in the squares.  And they wore out from my brother, my sister and I dragging them around wherever we went.

My embroidery wasn't as ambitious.  The fun duckling with balloons in the center block was a full design, the other four embroidered blocks were done to supplement and tie the overall design together.  So I chose four simple shapes from Doodle Stitching: Fresh & Fun Embroidery for Beginners -- I found a dragonfly, butterfly and duckling that echoed the printed duck fabric's designs and then added a balloon for the fourth block, lifted from the larger duckling design in the center block.

When I drew out the quilt top on graph paper, I realized I didn't want to simply surround the center block with straight nine-patch blocks.  That seemed sort of blah to me and, somehow, seemed to take away from my center block, too. So I used four nine-patch blocks with the plain, yet embroidered center squares and added those other four with the three long blocks of color in each.  I know where that idea came from.  Just prior to drawing out the overall design, I was reading a thread on Chickens in the Road and saw a photo of a just-completed baby quilt that I couldn't get out of my mind.

This blanket is meant for regular use.  To cover a sleeping baby, to spread on a floor to provide a toddler's play space or just to be dragged around by a growing child.  It should go through the washer and dryer without a problem.  And I hope it wears out just like the ones my grandmother made.  I think that's what happens to all well-loved baby blankets and so it's what I wish for this one.

Wednesday, March 16, 2011

99 sweaters to wash in the wringer, 99 sweaters to wash

Put some in, swish'em around, 93 sweaters to wash... *

From 9 a.m. till 3:30 p.m. last Saturday, I washed knitted wool sweaters plus woven wool skirts, jackets, scarves and slacks.  And one wool Army blanket.  (Smelled like wet dog, washed it just before lunch when we changed out the water.)

Some of the woolens had been washed previously at the laundromat.  I'm always leery of bringing in stray moths when I get woolens from the thrift store so I either store them in the shed or my car's trunk till I can get them washed in hot water and rinsed with a bit of lavender vinegar.  And I've learned my lesson about washing thrift store woolens in my front-load washer.  It doesn't felt as well, of course, as this old Maytag wringer washer but the main risk is my next several loads of laundry are likely to smell like wet mothballs.  So the ones I'd washed late last year at the laundromat were cleared for moths, but hadn't felted as well as I like so they needed a round in the wringer to achieve their fulled potential.

Since my mom's stroke four years ago DH and I've made a monthly commitment to deep-clean her vinyl kitchen and laundry room floors and apply a coat of the shiny "floor finish" she likes.  Between moving all the furniture, sweeping with a broom, scrubbing the floor (on hands-and-knees scrubbing, not the long-handled mop kind), waiting for it to dry, then applying the shiny stuff and waiting for it to dry before putting everything back in place, that's easily a two- to three-hour job.  This month DH agreed to tackle the floor on his own while I washed woolens with the wringer washer in the shop.  He did it because he's a good man but also because he wants a pair of felted mittens to wear, as he said, "the one day every winter when we go out shopping for Christmas."  Yes, he had an ulterior motive and it means I have another project added to my list but, hey, I have till December to worry about THAT.

His willingness to help may have been influenced as well by the last trip we made to Activity Day in my car.  DH and I were in the front, DS was in the back and the trunk was so full of woolens waiting to be washed that DH had to put his two crates of Squad Leader game pieces and hex maps on the backseat next to DS.  When we swung by the farm co-op on the way home to pick up a bag of mineral salt for the sheep and a couple of bags of chicken feed, there wasn't a place to put them except for under the passengers' feet.  And since I invariably drive my car, as DH does his truck, that meant he was one of the inconvenienced passengers.  So when I arranged the day for cleaning with Mom, I asked to use the wringer washer, too.  That's when the Army blanket was added to the queue.

A few years ago the wringer washer lived in our garage.  I used it for much of our regular laundry during the warmer months and whenever I had wools to wash it was right there ready to go.  But we have no basement and very little storage space other than the attached garage which also serves as the root cellar in the cooler months.  So when our 25-y.o. top-loading washer gave up a few years ago I moved the wringer washer (it was my grandmother's originally) back to my mom's shop and we bought a very efficient front-load washer.  (One of these days I hope to have space again for the wringer washer and its tubs.)

Mom's shop only has cold running water these days so DH carried hot water over from her house in 5-gallon buckets.  It took two trips or about 3-1/2 buckets to fill the wash tub.  Meanwhile, I filled the rinse tubs with cold water.  I added two tablespoons of Orvus Paste in the wash tub and 1/4 cup lavender vinegar in each rinse tub.  I don't use regular laundry detergent because I avoid washing wool with the so-called brigheners or bleaches that are often added to detergents. Orvus Paste is what I use for washing fleeces and it works just as well on the finished goods.


Once we had the tubs filled, I added the first load of sweaters and commenced to washing.  So sweaters in wash tub, wait 15 minutes.  Run the wash load through wringer and into first rinse tub.  Put next load of sweaters in to wash.  Use stick (wonder what happened to the long-handled wooden spoon we used for this purpose when I was a kid?) to poke clothes below level of water and just all around play with the laundry.  You know, same way you do with an outdoor fire...

Then after about 10 minutes, start the batch in the rinse tub through the wringer again.  This time they go into the second, or last, rinse tub.  Then move back to the washer and wring those clothes, which have been washing for just about 15 minutes, into the first rinse tub.  Third load goes in the washer and the countdown starts again.

This time there's even less waiting as I factor in how long it will take to run both rinse tubs-worth of clothes through the wringer and still get back to the load in the washer at the right time.  It's not a problem if I run the wash longer than 15 minutes, but I've found that's a pretty optimum time for felting most wools and I want to do this as efficiently and quickly as possible without unnecessary delays.

In between washing, poking the rinsing (can't forget that important step!) and wringing, I sort the items by color.  It's not perfect but I like to start out with the natural or lighter colors first and move through to the reds and then blacks at the last.  Many red wools bleed dye so I aim to do them just before the darkest items or before we plan to change out the cooling wash water for hot.  And in between washes I top up the washer with hot water from a fresh bucket DH brought over mid-way through the morning.  It's surprising to me but the washer does a good job of holding the water's heat, especially when I remember to keep the lid closed except when necessary to pull out/put in clothes.

At lunchtime, DH drained the washer and I did the same with the rinse tubs.  The tubs are made with a fixture on the bottom where a hose can be attached but we just used the buckets and emptied them outside around flowers or shrubs.  It's been so dry here this winter they can use all they can get.

Mom often fixes Saturday lunch for a friend who helps her with landscaping and house maintenance so she increased her covers to include us as well.  (The menu was country-style steak, mashed potatoes, green beans, sauerkraut, fried apples, cornbread and chocolate cake -- well worth stopping work for!)  After lunch, DS helped his grandmother clean up, DH carried fresh hot water for the washer and I refilled the rinse tubs.   I was ready to get the job finished.  And DH still had to clean the floors -- he didn't want to interrupt lunch preparations in the morning but once the dishwasher was running he got to work, too.

Final count was 69 sweaters, 2 scarves, 10 jackets, 9 skirts and 2 pairs of pants.  And can't forget the one Army blanket.  So it wasn't QUITE 99 sweaters but 93 woolen items is close enough for me.

*DH has this habit of ad-libbing lyrics and he couldn't keep it to himself while we were unloading baskets and bags of sweaters for washing. And you know how it is when you get a song stuck in your head.  Especially a silly one.

Thursday, February 17, 2011

Change of plans - cooperative quilting

Ever have a day where it's like you didn't get the memo?

The quilt block we made at Saturday's fiber guild workshop is an applique block made with Do Sew® and called Really, Really Broken Dishes by Kim Montagnese.   Because of the way you make the block, cut it into quarters and then trade quarters with other quilters before re-assembling, the blocks are integrated, sharing fabrics and pattern though each is made by a different quilter. So the blocks we made Saturday will become the quilt for our expectant member.
Makes more sense to me than combining disparate blocks into a quilt so the embroidered block I made last week is now the center block for a small quilt (about 3x4-feet) which I'm putting together as a baby gift.  With luck I'll even get it done before the baby arrives!

Saturday's Really, Really Broken Dishes block was very easy to make -- circles without fear of piecing curves (I love that part especially!) and is a great way to mix up colors in a modern-looking quilt pattern.  You start with a square of fabric that will serve as the block background.  Sew a piece of Do Sew to the right-side of the piece that will be the largest circle on the background.  Then cut away the Do Sew, being careful not to cut the other circles you're drawn on it.

I've never worked with Do Sew before but can't wait to use it for other sewing.  When you spritz Do Sew with water and then press with a hot iron, the Do Sew draws up just a bit, letting you easily fold the edge under as you press.  No burning your fingertips or resorting to a pin to try to fold over the edge as you press.

The largest circle is sewn to the background (we used sewing machines set for a blind hemstitch but you could also do that part by hand), then the block is flipped over and you carefully cut away the background fabric from within the stitched circle.  This keeps the block from becoming too thick with the multiple layers and also gives you a circle of fabric just a little bigger than you need for the next circle.  So you trade that circle with another block maker and then you each have a new fabric to sew Do Sew to, using a slightly smaller circle pattern drawn out on the Do Sew.  And spritz, press and sew to center of the larger circle on your block.
Follow the same process for one more smaller circle (trading fabric again) and press the completed square.  Then take a deep breath, pull out your rotary cutter or scissors and cut the square into four even quarters.  Trade three of the quarters with other block makers and seam them back together into a square.  Take a look at what you've made and say "Wow! That's pretty neat!"  Because it is.

Here are photos of my block in the making and the photo above is of all the blocks laid out for the final assembly. (My block, after trading off 3 quarters and re-assembling, is in the lower left. Can you spot my other quarters now assembled into other blocks?)


The same designer, Montagnese, also has a block called Really, Really Mended Hearts that I want to try next.  It's a similar block but the appliques are hearts not circles.  Then, instead of dividing in quarters with a vertical and horizontal cut through the square, you make three or maybe four vertical cuts (perhaps even cutting wedge-shapes rather than, say, perfect thirds) and re-assemble.  Trading sections encouraged, when working in a group setting, though you can get the same effect (but probably without the comaraderie) by cutting, sewing and mixing blocks you make all by yourself.

Saturday, February 12, 2011

Embroidered quilt block

A fellow fiber guild member is expecting a baby this spring.  One of the members suggested we each make a quilt block and she would set them together into a quilt as a baby gift.  The choice of design was left wide open but she plans to use blue fabric to separate the squares in the quilt as the baby is a boy.

Recalling small quilts my grandmother made for my brother and sister when they were small, I immediately knew I wanted to incorporate embroidery into my block.  She had embroidered nursery rhyme characters and farm animals on white blocks then spaced them alternately with solid-colored blocks -- blue for my brother's and yellow for my sister's.  The quilts were like Linus' blanket and went with them everywhere.  Then what was left of the quilts went with me everywhere.  There are only one or two blocks remaining of those quilts.  They were well-loved.

I really like the baby duck fabric, and used a little of it last year for a baby bib, so I pulled it out for this project, too.  Plus, I remembered an old duckling iron-on I came across in a '60s-era Workbasket not too long ago and tried to draw it out on my easel pad.  Hmm.  The little duck was not well-proportioned to say the least.  Fortunately I found the iron-on when I scrounged through the stack I'd culled and didn't have to rely on my rendering.

When I tried to find a white fabric for the embroidered block, they were either too harsh and bright or tended towards a cream instead of white.  Then I found a 100% white cotton pillowcase in my stash that had been washed so it was soft but without wear.  The fabric's slightly heavier than the duckling fabric but that is a good thing as it means it's not as see-through.  Even so, I still pressed the seams away from the embroidered square.

The center square is 6" on all sides.  The duckling fabric is cut for 3" squares.  And the blue fabric, which also came from a pillowcase, is cut as 3x6-inches rectangles.  The finished size should be 12-1/2" square but I allowed for 1/2" seams on my pieces (trimming away the excess as I seamed the blocks) and left the full 1/2" on the outside edges.  I figure that way the block would offer a little ease when fitting all the blocks together -- one can always trim away fabric but when an 1/8" or  so is needed, it can't be added back.
I can't wait to see the other quilt blocks.  The meeting and baby shower are later today.  Nothing like waiting till the last minute...

Monday, January 10, 2011

More felted fleece-lined mittens -- for Christmas

Christmas was two weeks ago, I know.  But DH insisted I make felted fleece-lined mittens for his sister and brother-in-law after seeing the first pair.  Now, where they live averages less than 20 nights a year with temps at or below freezing and no snow other than a rare dusting every few years so I'm not sure they'll get much use out of felted mittens but, hey, I heard on the news last week that they were experiencing a freeze with the nighttime temperature hitting 28º -- mittens may be just the thing they need!  And I had a lot of fun making these.  Plus, finally found a use for a pair of those leather buttons I can't resist stashing away.

Sunday, January 9, 2011

White oak basket

Saturday my fiber guild held a workshop on making white oak baskets with artisan Clyde Jenkins.  He supplies Colonial Williamsburg with colonial-style baskets but makes other types, too -- all from white oak he cuts and splits himself.  In the summer he can often be found teaching workshops at Big Meadows in Shenandoah National Park.

The supplies for the workshop were very basic.  He brought 6-feet or so of the lower trunk of a 6"-diameter white oak tree which he'd cut down a few days ago.  The trunk had been split into quarters lengthwise and Jenkins spent the first part of the workshop telling us how he chooses the oak and teaching us to split the wood into weavers -- the pieces we'd use to weave over-and-under the ribs of the basket.

I was looking forward to this workshop because I've always wanted to weave a basket but I can't believe how much I enjoyed the whole process!  We started at 9 and I finished lacing the last strip around the rim by 3 (we had a delicious working lunch of vegetable soup and crusty bread thoughtfully provided by a couple of members) yet returned home wishing I had another piece of white oak to work on.  I especially liked the combination of the smell of the fresh wood and the feel of the wood as I'd find the ring line and pull it apart into thinner and thinner weavers.   When it came time to go home, I couldn't stand to put my water bottle and tools back in my canvas bag -- I had a new basket that was just waiting to be filled...

Thursday, January 6, 2011

Felted fleece-lined mittens for Christmas

I've had the hand-drawn pattern for these mittens for awhile but finally got around to making a pair late last month -- Christmas morning, in fact.  Actually, I cut out the pieces on Christmas Eve so I wasn't as late as I could have been in making this present.  But I was tired and put off the sewing part till after DS (and DH and I) checked out our stockings early Christmas morning.  Then I had to rush because we were due at my mom's for our usual family gathering complete with a late-morning Christmas breakfast and opening lots of packages piled high under the tree.

With just three pattern pieces plus cuffs, it only took a turn on the sewing machine for the outer mitten (cut from two wool sweaters previously felted in the wringer washer) with a repeat for the fleece lining cut from yardage, then sewing the cuffs to the lining and turning the wool mittens right-side out and the fleece-lining wrong-side out so they fit together correctly -- they were almost finished.  A quick search through my buttons produced a couple suitable for attaching to the rolled cuffs so the mittens and their lining stay connected and I was done. 
Now I know what I'll be making for a few presents next Christmas...  Here's a link to the pattern I started with in case you're tempted to make your own.  If you think you'd like them, don't put off as long as I did before trying a pair -- they really are very easy and even fun to make.  I'm making a pair for myself right now.

Saturday, December 11, 2010

More ornaments


I'm still playing with felted hearts and this is the one I made yesterday for today's guild meeting and its annual ornament exchange.   Process was the same as the one I worked on earlier this week but I went with an additional appliqued heart in a darker green.  I think it brings out the other green a little more and it fulfills the quote -- "(his) small heart grew 3 sizes that day."

These paper and fabric ornaments came to me through the Chickens in the Road ornament exchange from Kelly F.  Who wouldn't love to open a package and find handmade Christmas ornaments?