Wednesday, January 11, 2012

A yard is enough

Sometimes I buy a yard of a fabric I just can't pass by.  It's only a yard and I can find a way to use it up, right?  Well, yes, most of the time. (And that's what I tell DH...)  But sometimes I just can't find the right project to commit it to.  In the case of the yard of cotton I used for my latest quilting project, the design was too big to cut up neatly and I couldn't bring myself to cut it up in small pieces to utilize it for just the bright colors -- I wanted a project that would take advantage of the design and the colors.  I really liked that yard.

Then when I was searching for just the right design for a baby quilt intended as a gift for a friend's adoption, I came across a book at the library, Joan Ford's Scrap Therapy: Cut the scraps and a project she calls "Once Upon a Scrap".  As soon as I saw the picture, I knew I wanted to make that quilt and I knew exactly which piece of fabric I wanted to use for the three main sections. 

As often happens once I decide on a "dream project" (one that incorporates and builds off favorite fabric, fiber, color, and/or design), the other bits came together without much effort.  I used odd bits of cottons I had on hand to cut out almost all of the 180 2-inch squares required for the two patchwork sections.  It was a lot of fun searching out blues, greens, reds, yellows in my fabric stash.  And I even found a couple of orange prints to use.

Because my mind usually tries to organize things I'm working with into patterns even when I don't want it to, I laid the stacks of colorful squares out on the ironing board and began to play with their layout.  I wanted to keep the patchwork section colorful and free without a discernible color placement order.  To aid that I purposely cut no more than 10 or 12 squares of any fabric so I wouldn't be able to fall back on a coordinated presentation.
I did end up buying a black, horse shoe-patterned fat quarter that jumped out at me on a trip to the local fabric store where I also found the perfect mottled blue cotton used for one of the borders and the soft flannel print used for the backing.  (And what I actually went there to purchase!)  Also, I used a wide green double-fold bias tape for the binding because I think it wears better than the straight-cut quilting cotton which the directions called for and while my best wish for this quilt is that it's worn to tatters by the little one it's intended for, I don't want it to be in tatters due to shoddy fabric or workmanship!
The cotton batting recommended quilting or tying at least every 4" or so and since I used flannel for the backing I planned to hand-quilt.  (I don't machine-quilt when using flannel for backing as I always have trouble with it "ruffling". YMMV)  The simple design encouraged me to just "quilt in the ditch" but the large landscape sections and the long blue border required more coverage. 

DH suggested I do a simple block pattern across those areas but when I attempted that, the white quilting thread didn't look right to me.  Usually I love a simple, primitive quilted design like that but it seemed to distract from the colorful quilt.  The fabric I couldn't bring myself to cut was instead cut up by little white stitches.  Well, not that little -- I average 6-8 stitches to the inch when quilting.  My grandmother, who hand-quilted all her work, considered anything less than 10-12 stitches to the inch to be a hazard as, in her words, "you could get your toenail caught in stitches that big!"

So this quilt features hand-quilting and tying.  I used embroidery floss, blue for the border and green for the design print, to tie the layers together that were deemed not suited to quilting.  DH asked me why I didn't consider hand-quilting with colored thread but I couldn't bring myself to use anything except my usual white cotton quilting thread for the hand-quilting.  Traditions are hard to break, you know?

Monday, January 9, 2012

One lost turkey yields quite a few current and future meals

Trying to clear out the chest freezer before we defrost it later this month and found a turkey. Yes, a 22-lb turkey, in fact. I don't know where it's been hiding but I spotted it under bags of frozen nectarines and strawberries intended for smoothies.

What's worse than admitting I lost a turkey in a large chest freezer? Admitting I haven't bought a frozen turkey in at least 2 years, maybe longer.

The turkey didn't show any signs of freezer burn but our manual-defrost chest freezer will hold well-wrapped meats and most produce in good condition for a long time. Drawbacks? It needs to be defrosted every 12- to 18-months and, if you're short like me, plan on standing on your head to retrieve anything that falls to the very bottom.

Because the outside temperature stayed in the 30s during the day (lower at night), I let the turkey thaw outside for several days. Instead of taking up (a LOT of!) space in the refrigerator, it sat (still sealed in plastic) on the deck in a large enamelware dishpan covered by a laundry tub. When it had thawed enough to allow the giblets and turkey neck to be retrieved from the cavities, DH plunged the turkey into a 5-gal (food-grade) bucket of brine (recipe here), enough to cover the turkey completely and set the covered bucket outside in the cold. Overnight temp was well below freezing but the high concentration of salt and sugar in the brine keeps it from freezing. I swear by brining -- it does wonders for a turkey, especially an aged one.

After brining overnight, I drained the turkey and soaked it in buttermilk for several hours. I did this because I've found with this step the skin will turn the most gorgeous perfectly-roasted brown color, even in a roaster oven, and, perhaps more importantly, the buttermilk soak lessens the saltiness of the pan drippings. Before I started taking this extra step, I didn't like using the pan drippings to make gravy or add to stock.

Rather than use a rack, I put carrots, onion wedges and celery stalks on the bottom of the pan under the turkey. They add good flavor. When the drippings are cooled in the refrigerator, it's easy to lift off the solidified fat that rises to the top. The gelled liquid goes back in the roaster along with the bones, skin and other bits and pieces plus water to make rich turkey stock.

This time, I cut up the roast turkey immediately, while still hot, and readied about half of it for canning immediately. I heated (home-canned) seasoned chicken broth in a pot and added the turkey to it as I carved. Then transferred the hot chunks of turkey to pint jars (ended up with 8) and added the hot broth to cover. Processed for 75 minutes while we had dinner: turkey with mashed potatoes and gravy, butternut squash and peas. The rest of the meat went in the refrigerator destined for several days worth of hot turkey sandwiches with mashed potatoes and gravy, cold turkey sandwiches, turkey hash and, one of DS's favorites, turkey vegetable soup.

As soon as it was stripped, the turkey carcass went into the roaster oven which still contained the warm drippings and roasted vegetables. I added the roasted skin, the still-raw turkey neck and the gizzard from the giblet pack along with some fresh thyme, rosemary and sage leaves and about 3 gallons of water. The turkey stock simmered on a low setting (200ºF.?) for several hours while the canner was going and I cleaned up the kitchen. By then it was nighttime and I was ready to call it quits for the day. So DH helped me strain out the bones, skin and vegetables and set the covered roaster oven outside under the laundry tub till morning.

It was definitely cold enough overnight to chill the turkey stock thoroughly and I lifted off almost 3 cups of white turkey fat the next day. It's great for making pastry or biscuits to top a pot pie. The turkey stock I brought to a simmer, still in the roaster oven, and then jarred and processed in the pressure canner for 25 minutes. I really love the tall AA canner we have as it lets me stack jars so I could do all 11 quarts of turkey stock in one batch -- a definite time-saver.

I used part of the turkey fat to make potpie crackers which we ate with, naturally enough, turkey pot pie made from part of the leftover turkey. DH and DS also like the potpie crackers in their turkey vegetable soup instead of oyster crackers or crushed saltines but I've never been one to put crackers in my soup (served alongside, yes!) so I can't recommend that personally but even plain, as a snack, they're pretty good...

Potpie Crackers
(adapted from Doris Janzen Longacre's More-with-Less Cookbook and attributed to Doris Brubaker, Mt. Joy, PA)

3 cups flour
1/2 teaspoon salt
1/2 cup turkey fat, other shortening or lard, or butter
2 eggs
1/4 cup milk, kefir, yogurt or buttermilk

Combine dry ingredients in a large bowl. Cut in fat. Add eggs and milk, stir lightly and form into a ball. Divide dough into 3 or 4 parts. Roll each out on a lightly floured board, as for thin pie crust.

Either cut and transfer each 1" square or lift dough and lay in cookie sheet before cutting into small squares. Bake at 375ºF. for 10 minutes or until crackers are lightly browned. In my oven, the bottoms brown long before the tops -- check carefully.

Crackers keep well in tightly-covered container so can be made in advance. Except at my house the fact that they will keep is no guarantee that I can keep them. See note above regarding snacking...

Serve with creamed turkey or chicken, soups, anywhere you might think to serve dumplings or saltines.

Creamed turkey or chicken (like a potpie filling)
(adapted from Doris Janzen Longacre's More-with-Less Cookbook)

1/4 cup turkey or chicken fat or butter
1 onion, chopped
1/2 cup celery, chopped (optional)
1/4 cup flour
2 cups turkey stock or chicken broth
1 cup milk
salt and pepper to taste
2-to-3 cups diced, cooked turkey or chicken
1 cup frozen peas or peas and carrots (optional)

Melt fat in heavy saucepan. Add onion, and celery if using, and sauté until translucent. Sprinkle flour over all, stir, and cook until bubbly.

Add liquids. Cook, stirring constantly, until smooth and thickened. Season with salt and pepper to taste. Add frozen peas and turkey. Heat through and serve with potpie crackers.

Instead of peas, try adding a cup or two of any favorite leftover cooked vegetable you have on hand -- chopped broccoli, diced potatoes, or green beans are ones we like to add.

Tuesday, January 3, 2012

Last year it was felted hearts,

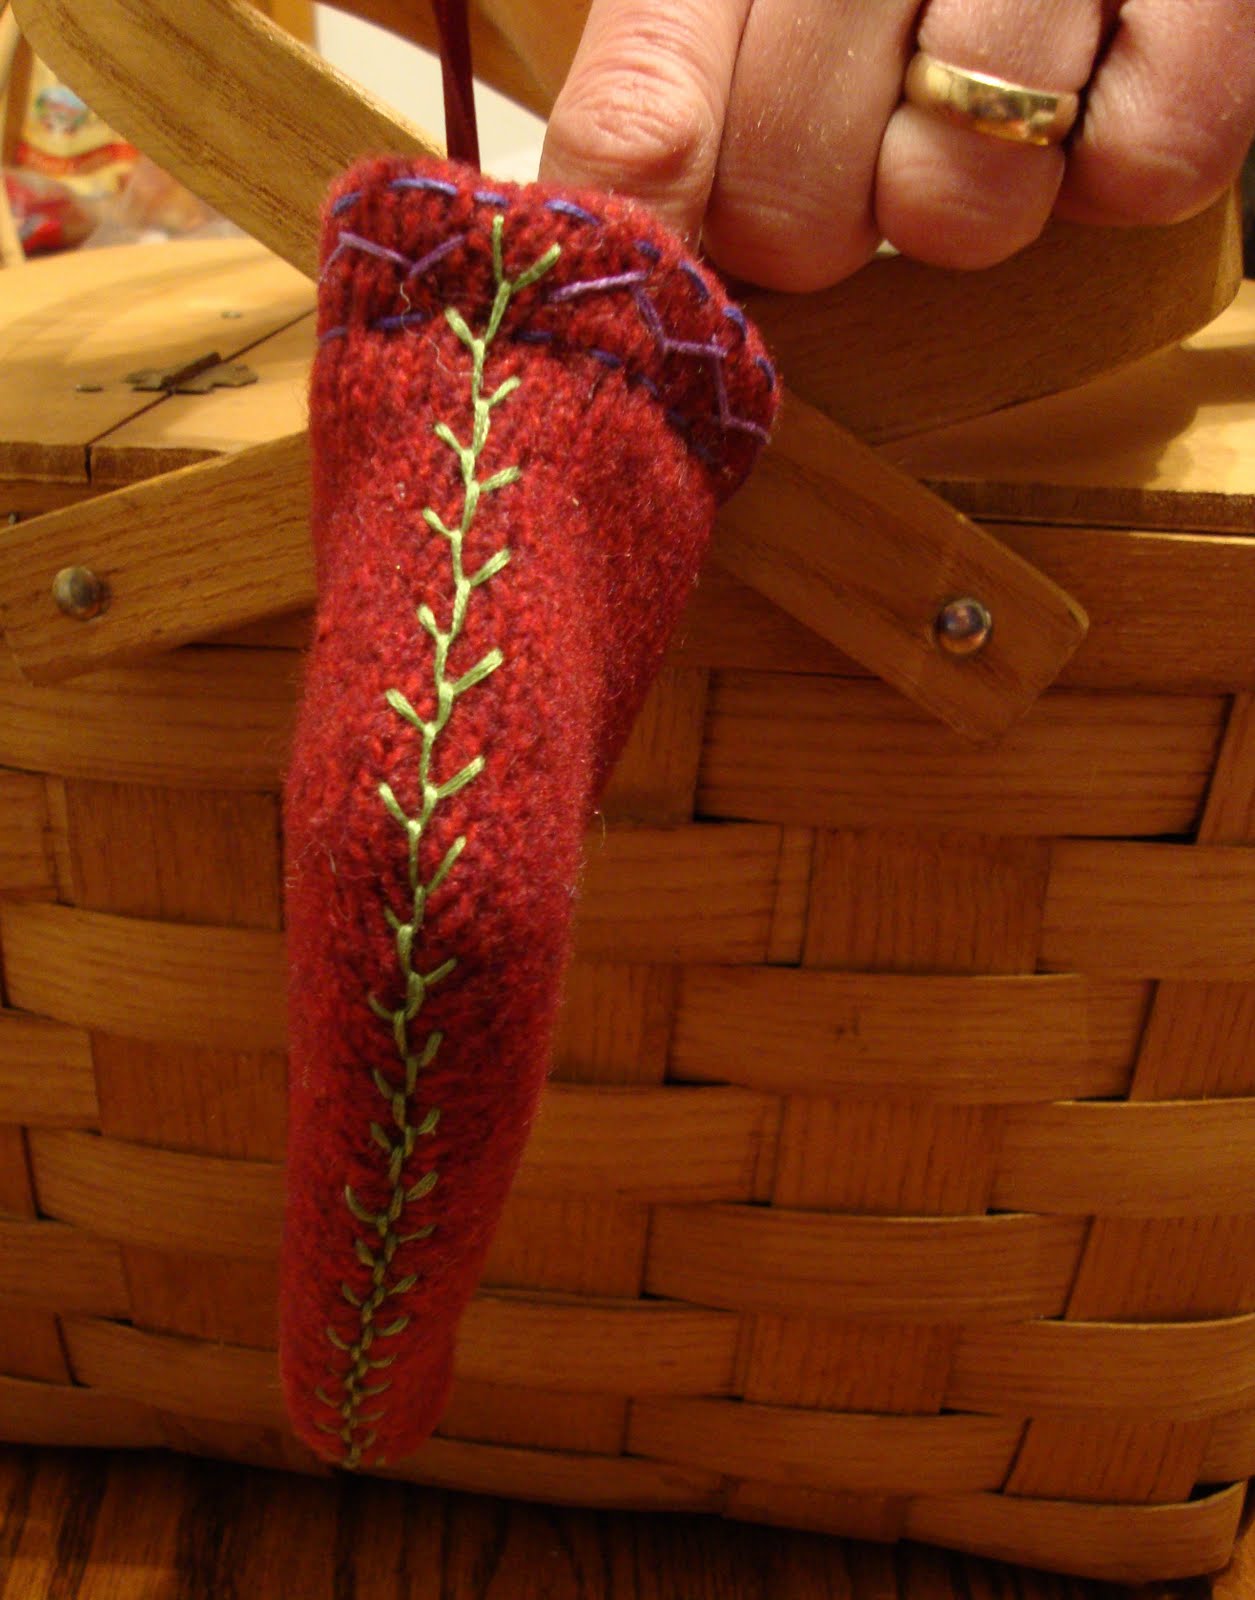
This year it's stockings -- elvish-styled stockings.

I don't know if it was DS's insistence that I read all four of Paolini's Inheritance Cycle books in late November or just one of those things, but when I sat down to make an ornament for my guild's annual exchange an elf bootie is what I kept coming back to no matter how many other ideas I tossed around. That's pretty much the same thing that happened last year when I made Grinch-styled hearts, from the same felted wool sweater...


Used a stocking template I found in a book, Sweater Renewal by Sharon Franco Rothschild, but have since run across Rothschild's original template in a November 2009 post on the Etsy blog. You can find her version and a link to a pdf including the template at this link.

Even though I think I was channeling elves this year instead of Grinch hearts, I couldn't seem to let go of the color combos that still remind me a bit of Dr. Seuss and the Grinch...


So far I've made three, one for the guild ornament exchange, one for the local homeschool support group exchange and one for my aunt.  Each is a little different as I played with the embroidery stitches but they all share the same overall shape and the feather-stitching (plus beads down the front) following the seam lines.  I used a combination of regular DMC embroidery floss and pearl cottons.

And perhaps it's more than just Paolini's books influencing the elfish choice this year. It also could be I was influenced by these little guys who live in my corner china press. They were my mom's when I was little and she gave them to me a few years ago -- I still like them.

They were always so cheerful-looking when I'd spot them under one of her flower arrangements or just hanging out on a shelf somewhere. I couldn't pass them up when she offered.

Monday, January 2, 2012

Chris' dice bag

Two years ago I made a chulo for my nephew.  It was a surprise but, fortunately, he really liked it.  So much so that he requested a knitted bag to hold his dice -- said the other guys mostly used those velvety Crown Royal bottle bags but he wanted something different.

Nothing I like more than making something I know someone wants so I said, no problem!  And started looking around for a pattern for a knitted dice bag.  Ravelry's pattern library yielded just what I was looking for -- Nina Hyland's Deep Sea Flower Dice Bag made up in Noro Silk Garden Sock yarn.

But when I was all but finished, just in time for Christmas Day 2010, you understand, DH took one look and said "that won't hold enough dice!"  So I told Chris I had to frog my first attempt but would get a larger one finished asap.  The only problem was I really wanted to make the Deep Sea Flower one.  None of the other bag patterns I came across appealed to me at all.

So I decided to adapt the pattern by increasing to six petals instead of four.  That should make the bag about 50% bigger in diameter.  Surely that would hold enough dice for 40k... It seemed easy enough, except as often happens to me, I was in a hurry to get to the part I really liked, the flame-stitch-looking petal. 

The first part of the pattern is all about knitting a small square which is used as the bottom of the bag.  Stitches are picked up around the square to create the sides or petals.  But if I wanted to increase the number of petals, I would need to increase the bottom of the bag, too.  A hexagon instead of a square seemed like the way to go.  But I didn't have a pattern, couldn't find one quickly enough so decided to jump ahead to the fun part.  I could always go about adding the bottom last, couldn't I?

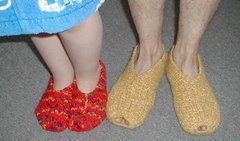
Well, I could and probably should but for some reason, when I was ready to do so, I couldn't get my mind wrapped around reversing the pattern and working my way down to a minimum number of stitches on my needles -- sort of like drawing up a hat at the crown or finishing my favorite knit houseshoes at the toe.  So I was left with this which I carried around in my knitting bag for several months.

Took it out at when fiber-y friends would gather and asked for ideas.  Which I received more than once but, it was like a cruel curse, as soon as I'd get home and try to decipher my notes and remember what seemed so reasonable, and yes, even sounded easy when told to me, wouldn't come together in my head and translate to my needles.  For some reason, I can "think" in crochet but I struggle to convert to a pattern anything knitted.

Finally, it was December again and I still hadn't finished last year's gift.  (This year's gift was to be a set of steampunk-styled dice.)  So I decided to go with another method and knitted a short-row hexagon (using this dishcloth pattern as a guideline), seamed it together and picked up around the edges just as the original pattern instructed but since I had 6-sides to work with I picked up a total of 90 stitches rather than 60.  That went fast and I was soon knitting away on the part I (still) liked best.
It took me about two days to finish the newly-started bag what with all the other holiday stuff going on.  But I'd had 12 months of it hanging over my head.

Am I the only one who does this kind of stuff?  Surely not.

But now I can heave a big sigh of relief that I have that project out of the way and move on to the next project -- when asked what he'd like for Christmas 2012, Chris said hand-knit gloves...

Tuesday, December 6, 2011

Never give up, that's my motto...

I love Charles Dickens' A Christmas Carol.  As a child, I only knew it as the written story.  Then somewhere along the line, probably on late night tv, I saw the 1938 film with Reginald Owen as Ebenezer Scrooge. Of course, I've since seen a lot of newer film versions, too, including a modern adaptation, Scrooged, with Bill Murray.  And, I remember at least two animated versions, one that must be a Walt Disney interpretation starring one of Donald Duck's relatives and another with Mr. Magoo as Scrooge.  I admit it -- if there's an adaptation of Carol, I'm likely at least to give it a chance.  (There's even a free audiobook version available through LibriVox on archive.org.)  But it has to be pretty darn good (and few are) to merit a second viewing because Dickens' words are wonderful all on their own.

For 11 years I've been planning to see A Christmas Carol at Blackfriars Playhouse.  It's Dickens' work adapted for the stage, it's nearby and it's always performed by talented actors -- this year ASC's Almost Blasphemy Tour troupe.  Every year, I remember to check out the performance schedule months in advance and even go so far as to write in a few "good dates" on my calendar.  Then other things come up.  Things that, like this play, are only happening during the Christmas season.  And another year goes by.

But early last week a friend forwarded a note about a full dress rehearsal scheduled for Sunday evening and open to the public.  It wasn't on my calendar.  And we didn't have anything else on the calendar for that night, either.  So we finally made it to Blackfriars to see Carol.  And, boy, am I glad we did.  It was great!!  Now I just need to put it on the calendar for next year because we want to go back and watch it all over again...

Saturday, December 3, 2011

It's started.

There are a lot of things I should be doing.  But earlier this week I spent some time crafting -- working on a Christmas tree-themed gift for a swap on Chickens in the Road.

Once again my camera's failing me on color translation but, trust me, I think I'm channeling Dr. Seuss this year.  The green in the green-and-red print fabric reminds me of the Osage-orange globes my mom gave me this fall. (Osage orange trees are rare around here so naturally I want one...)

I went searching for handmade gift ideas and quickly found the appliqued tea towel pattern.  From there it was easy to decide on the knitted dishcloth I found through Ravelry and then, when I had a few scraps of the printed fabrics leftover, I found the patchwork ornaments through a fun November challenge titled "No Ugly Ornaments".  I think I'm going to try #19, the origami dress ornaments next.

Today it's back to regular chores and I need to put up some more taco soup as DH and DS finished the last jar in November and are demanding a refill.  But 'tis the season and all that, so I'll be back with another project to show off share shortly.

Saturday, November 26, 2011

(Just after) Sunset

5:23 pm, Saturday, November 26, 2011 (50ºF.)

Tuesday, October 11, 2011

Can't forget the lard

This past weekend, a beautiful one by the way, we enjoyed an afternoon with homeschool friends at Polyface Farm. As always the day included a hayride and farm tour followed by a potluck picnic with delicious burgers made from salad bar beef and pigaerator pork. DH came home reinvigorated and ready to implement a few more ideas here at home and I came home with 20 pounds of creamy white pork fat for rendering.

This stuff is gorgeous. Yeah, it's fat and feels greasy but once I put it in the roaster oven, melt it for several hours over low heat and strain it into jars for storage, it's like buttah, I tell you. (Said with a plummy accent...) And, yes, I do this outside -- the roaster oven sets on a small table under the eaves on the back deck. At night I use a couple of bungee cords criss-crossed over the lid to be sure no small nocturnal animal gets into it as it slow cooks. If we had large nocturnal animals, I'd bring it into the garage or shed overnight but other than two coyotes last spring we don't seem to have that issue.

The rendering doesn't make a big mess and the smell isn't bad -- it's just a very rich roasting-meat smell. Makes me hungry, in fact, but also hangs around inside after the rendering's done. So outside is more practical though the wafting scent did raise the expectations of at least one visitor today who was disappointed to learn it was only lard rendering and not the beginning of a pig roast that he could smell.

Once the pork fat's melted, I strain the hot liquid lard through a couple layers of cheesecloth and pour it into canning jars.  Put on lids and rings and the lard's ready to use.  I store it along with our other canned goods as it will keep on the shelf for a good while.  When I open a jar to use, I store the opened jar in the refrigerator.  Cold lard makes the best pie crust...

Here's a link to stovetop directions for rendering lard. The basic idea is the same as how I do it except I use an electric roaster oven (set on 200-225ºF.) and don't add any water. If I was only rendering a pound or two, I'd probably go back to doing it on the stovetop or try out one of my crockpots so I could still set it outside.

Tuesday, September 6, 2011

One potato, two potato, three potato, four...

Bushels of potatoes. Mostly Kennebecs, some Yukon Golds and some Red Pontiacs. All neatly sorted and stacked in (thrifted) bread racks, ready for cool, dark and humid winter storage.
That just leaves the culls.  A few were culled because they were small.  Past experience says that if we store the smallest potatoes, there'll be nothing left when/if they sprout.  (Mid-winter we sort through the stored potatoes, breaking off any sprouts and removing rotten ones.  Helps keep them through till spring -- or till we eat them all, whichever comes first.)

This was a good year for potatoes so we have only a small dishpan of itty bitty potatoes to deal with.  Those won't last two weeks as I'll scrub a potful at a time, boil in their jackets and put them in the refrigerator for use in a baked dish like Doris' Golden Potatoes or make our favorite late morning breakfast -- home fries (cold boiled potatoes, sliced and fried) paired with garden tomatoes, cucumbers and onions in vinegar, plus farm fresh scrambled eggs with just-picked chives.  Yum!

The other culls are potatoes injured while digging or showing damage from wire worms or other pests.  A few more of those but still not a bad year. 

Some will be used over the next few weeks in the usual manner -- mashed, scalloped, roasted or perhaps as oven fries.  But today I'm filling the Excalibur with 10+ pounds of grated potatoes so we'll have dehydrated hash browns ready to prepare when needed.

Peeling, shredding and blanching that many potatoes is a tedious job but it's pouring rain outside and the heat from the stove burner and the dehydrator are welcome. DS's helping by running the Salad Shooter and even set up one of Susan Wise Bauer's Story of the World audiobooks for us to listen to as we work. Wish Alex Bellos' Here's Looking at Euclid was available as an audiobook, too, since we're using that as a math read-aloud this month but Jim Weiss' narration of Bauer's works are surprisingly soothing on this rainy day.

The difference between the white-fleshed Kennebec and Pontiac Red potatoes as compared to the buttery yellow Yukon Gold potatoes makes for some pretty hash browns when laid out on the dehydrator trays but once they're dried the difference will fade to almost nothing. When I'm ready to use, I'll pour boiling water over top, let them rehydrate for 20 minutes or so then prepare according to whatever recipe I'm following. If I'm following a recipe -- these are really good simply tossed on a hot greased griddle and quickly grilled. Maybe with a few onions added...

Doris' Golden Potatoes

2 cups sharp cheddar cheese, shredded
1/4 cup plus 2 tablespoons butter, divided
2 cups sour cream (*see note)
1/2 cup onion, chopped
1 teaspoon salt
1/4 teaspoon pepper
6 large potatoes, cooked -- approx. 6 cups diced

Cut cooked potatoes into a medium dice.

Combine cheese and 1/4 cup butter in medium saucepan; stir over low heat until cheese is melted. Remove from heat and stir in sour cream, onion, salt and pepper. Add potatoes, mixing gently.

Pour into a greased 2-quart casserole; dot with remaining butter. Bake at 350°F. for 30 minutes.

*Note:
I like to sub lightly drained kefir for the sour cream and when I'm short on cheddar, I use almost any hard cheese or blend of cheeses including Monterey jack, colby, or Swiss that's on hand.  And leftover ham, diced and tossed with potatoes, and toasted breadcrumbs sprinkled on top before baking make nice additions.

Wednesday, July 20, 2011

Another broody hen comes through with two cute chicks

Echa hatched two chicks and I think Snowball's envious.  Or maybe she just wants her pen back...

Sunday, July 17, 2011

Bierrocks for now and for the freezer or another idea for an extra head of cabbage...

DH brought in a couple of heads of savoy cabbage from the garden when I'd asked for one.  He does that a lot.  Sometimes it's a push to use up what's ready in the garden.  One extra head doesn't seem like enough to run through the dehydrator and what with all the other garden produce flowing through the kitchen, it can get lost in the chaos.

So I decided to make a batch of bierrocks for the freezer.  Sort of kills two birds with one stone as we always need quick meals when the garden's growing and the outdoors is calling.

I took three pounds of ground beef from the freezer and a couple of red onions from the garden, and started them to cooking in a big skillet.  I never bother thawing the ground beef first.  Just put a teaspoon or so of oil (our beef is really lean) in the pan, add the frozen meat and put a lid on the pan over low heat.  I check it every few minutes and break off the cooked meat, stirring everything together.  Then put the lid on and let it cook a few more minutes.  In a half hour or less, the meat's cooked and broken apart, while I've been able to work on the rest of the dish.

Homemade dough came together pretty fast, though I use the sponge method to get it off to a good start.  And one could always use frozen bread or pizza dough if need be.  The fresh-ground whole wheat dough I used this time is pretty light and the same one I use to make sandwich buns but a good pizza dough would make a great bierrocks' bread, too.
Once the meat and onions were done, I added the whole head of cabbage, shredded, to the pan and let it cook for another 8-10 minutes or so, until the cabbage was tender but still slightly crisp.  Rolling out a piece of dough, a little smaller than a tennis ball, into an oval was the next step.  I mounded a tablespoon or two of shredded cheese on each oval of dough and topped that with 2-3 tablespoons of the meat-cabbage mixture.

I like to fold half the oval over and leave enough of an edge on the bottom section of dough that I can overlap the bottom over the top edge and crimp them together with a fork.  That's the best method I've found to contain the filling so little to none will leak out while baking.  I do have a neat little plastic pocket-looking thing that supposedly lets you prepare the works in one step, then folds over to crimp the edges together.  It works about half the time.  Doing it by hand works all the time plus I don't have to worry about extra filling poking out the open hinge area of the plastic thing when folded.  Overall, that kitchen tool is a good idea but not truly effective.  Still can't bring myself to toss it, though.

So one extra head of savoy cabbage, three pounds of lean ground beef, two red onions and a batch of fresh ground whole wheat bread dough yielded three dozen small-hand-sized bierrocks or 33 for the freezer.  (After all the hard work, we each had to have one for supper...)

Bierrocks for now or for the freezer

3 pounds ground beef
1  head cabbage, chopped or shredded
2 onions, chopped
Salt and pepper, to taste
12 ounces shredded cheese or sliced American cheese
1 batch of  Wholegrain Hamburger Bun dough
   OR 3 pounds frozen bread dough
1 egg, beaten (optional)
                  
Brown ground beef in a large skillet with the onion.  Drain grease, if necessary.  Add cabbage and continue cooking 5-8 minutes or until onion is soft and cabbage is tender but still slightly crisp.  Season with salt and pepper.  Let cool while preparing dough.

After dough has risen the first time, roll out balls of dough into thin ovals about the size of your hand.  Place a couple tablespoons of shredded cheese or half a slice of American cheese on one end of dough oval and top with meat-cabbage filling.  Fold over and seal like a turnover.  I like to use a large meat fork to press the edges together and fold the bottom edge over the top edge, then crimp to make a good seal.

Place on a baking sheet and brush with egg.  Bake at 350 degrees for about 20 minutes or until golden brown.

Serve immediately or cool and freeze.  To reheat frozen, simply bake until hot.  May also be frozen before baking and baked from frozen state.  Will require longer baking time.  Plan on at least 30 minutes.

Yield: about 30

Saturday, July 16, 2011

Hamburger bun heaven

Nothing beats a good hamburger.  But the bun can make a good thing even better.  I've been on a quest for a good wholegrain hamburger bun for a couple of years now and think I've finally found it using a variation on a recipe from a Bosch mixer cookbook, Healthy Recipes from the Heart of Our Homes by Phyllis Stanley and Shirley Heinmets.  The buns even keep well in the freezer -- for the short-term, at least, and the prepared dough, shaped into rolls, then frozen before baking was a success, too.  I haven't had time to test it for more than a few weeks on either method, tho.  We keep wanting to thaw and eat them -- with a hamburger or just on their own.  They're good!

Wholegrain Hamburger Buns

4 cups warm water
2 tablespoons sugar
7 cups fresh ground hard white wheat flour
1/4 cup vinegar
1/4 cup vegetable oil
3 tablespoons wheat gluten
2 tablespoons powdered milk
4 tablespoons Saf yeast
1 tablespoon salt
additional water, 2-3 tablespoons
additional fresh ground hard white wheat flour as needed

Using the dough hook, mix water, sugar, 7 cups flour, vinegar, oil, gluten, powdered milk and yeast together in the Bosch bowl until moistened.  Let rise until it doubles.

Add salt and enough additional flour so the dough pulls away slightly from the sides of the bowl while on setting 1.  Add another 2-3 tablespoons water and knead for 5 minutes.

Cut off dough pieces and shape lightly into rolls.  My baking sheets are not full-size cookie sheets (9x12-inches) and I put 6 rolls on each.  Let dough rise until doubled.
Bake for 20 minutes at 400ºF. until golden brown.  Remove from oven and brush with butter while still hot.

One variation I've tried is using real buttermilk (left from churning butter) in lieu of the 4 cups of water.  That made a great dough for bierrocks...

Thursday, July 14, 2011

Rain + hot weather means garden's growing!

Yes!  For the first time in several years we're catching a few of the thunderstorms that bounce around here.  No hail, thankfully, but some good rains at the right time make a great change in how the garden grows.

Not everything's perfect, of course.  We lost the first planting of green beans to wildlife depredation so had to plant again.  But we're on the third picking of the short double row DH finally got past the birds and rabbits and they're so good!  So far we haven't gotten past the steam-and-eat stage but I have hopes of getting a cannerful one of these days.

Sunday, June 19, 2011

Bistro Salad with homemade creamy Italian dressing

Using up garden produce is sometimes a challenge.  When faced with a bountiful harvest of sugar snap peas again, I find myself wondering how to prepare them.  So far we've had them steamed, stir-fried, included in fried rice, as an ingredient in a green salad, tossed in a light chicken soup just before serving, and raw with dip.  Some of those have appeared on the menu more than once -- not so much that I couldn't squeeze another one by the family but often enough I want to try something different.

So I rummaged in the fridge and found some cold roast chicken plus, thanks to a trip to the newly-opened Friendly City Food Co-op, there were a couple of tomatoes, a bell pepper and a cucumber.  Since it's the Year of the Onion here, the garden could provide an onion, too. But our lettuce has started to turn bitter and bolt (go to seed) so if we were going to have a salad it would have to take a slightly different form from the usual lettuce-tomato-cucumber one.  Green sugar snap peas could be the basis instead of lettuce.  And the dressing would have to be homemade as that's one thing I've cut from my grocery list -- homemade dressing tastes better and I control the ingredients.  This is what I came up with -- and we all loved it.  Can't beat that kind of meal.
Bistro Salad with Creamy Italian Dressing

Makes 4 main dish servings

2 cups cooked cannellini or great northern beans, drained and rinsed
3/4 cup cooked chicken, chopped
1 small bell pepper, seeded and diced
1 small cucumber, diced
1/3 cup diced sweet onion
salt and pepper, to taste
1/4 cup creamy Italian dressing (recipe follows)
12 oz. sugar snap peas, optional
3 small tomatoes, optional

Combine first five ingredients in a large bowl and toss to combine.  Pour dressing over salad and toss to coat.  (I start with a 1/4 cup, add more if needed, then serve extra on the side for those who really like to drown a salad.)  Taste and add salt and pepper if desired.  Serve on a bed of raw sugar snap peas and sliced tomatoes.  Crusty bread makes a good partner.

Creamy Italian Dressing
(adapted from Jim Long's excellent book, The Best Dressed Salad: World Famous Salad Dressings & Their Origins)
Makes about 1-1/4 cups

1/2 cup mayonnaise
1/3 cup rice vinegar
2 teaspoons vegetable oil
1 tablespoons honey
3 tablespoons grated Parmesan cheese
1/4 teaspoon garlic powder
1/2 teaspoon dry marjoram
1 teaspoons dry parsley
1/4 teaspoon dry basil
1/4 teaspoon dry mustard
1 tablespoon fresh chives, chopped
1 tablespoon lemon juice
1 teaspoon liquid lecithin, optional

Combine all ingredients in blender and blend until smooth.  Recipe may be halved or doubled.  Will keep several weeks in refrigerator.

Saturday, June 18, 2011

1 chick, 2 mama hens

This is a conundrum almost worthy of King Solomon.  We have one chick but two hens who are each sure the chick is hers.  The chick doesn't seem unduly worried either way.

It started a few weeks ago when DS reported that Mrs. Badger, our grey Silkie bantam hen, had gone broody.  Then after a few weeks we realized that E.B., a black hen, herself hatched in the backyard last year, wasn't out-and-about as much as usual -- reason?  She was broody, too!  And seated right beside Mrs. Badger in the corner.  They even seemed to be sharing eggs. When one would take her daily break to eat and drink, the other attempted to cover all the eggs. 

We were busy with other things (mainly garden and end-of-year homeschool activities) and instead of separating them and giving each a clutch of fertile eggs from the pastured girls as is our wont, we left them to it.

Well, late last week, DS went out to check for eggs and discovered there was a tiny chick tucked under a hen in the backyard coop.  Problem was, we couldn't tell just which hen was claiming the chick.  He (tail could indicate a cockerel but not sure yet) would pop out from under first one black wing then another.  (Mrs. Badger, though known as a grey Silkie, is more of a charcoal color -- nearly indistinguishable from E.B.'s coloring except in bright light.)

Snowball and her two-month-old chicks were still in the baby pen so first we had to relocate them and re-situate the pen on fresh ground.  Snowball still isn't happy about that -- she sits right outside the gate apparently waiting to be let back in though she did lead her chicks into the big girls' coop from the first night on.  Since we couldn't tell which hen had hatched the chick, we decided to move both hens with the baby.  We figured once they were in the baby pen, the "real" mama hen would take over and the other would want to be freed to roam again with the other backyard girls, guinea fowl and Badger, the grey Silkie bantam roo.

But that's not the way it was.  Both hens would call the chick and he went to either; they all slept in the little house together.  However, after a few days, E.B. seemed to want out -- she was pacing the pen, eyeing the other chickens in the yard as though she was ready to re-join them.  Mrs. Badger and the chick just watched her from a distance.  We thought "Aha!  It's Mrs. Badger's chick and E.B.'s ready to give up and re-join the rest of the flock!"  So DS let E.B. out yesterday afternoon and all seemed fine. Mrs. Badger called the chick to her when I gave them some treats and E.B., though she hung around the yard near the baby pen, ranged with the other girls.

Until evening, that is.  Mama hens and their little chicks often go in for the night long before the rest of the chickens.  Around 6:30 or 7:00 last night, well before the 9:00 bedtime the other chickens adapt this time of year, E.B. began to terrorize the other hens and Snowball's two chicks.  I'd tossed out some leftover cornbread near the baby pen and the big girls were all enjoying their treat except for E.B.  She would pick up a few crumbs, then charge an unsuspecting hen from the rear -- pulling tail feathers and seeming to ram into them before they could run off.  Then she'd go back to pecking for crumbs.  She's always been a bit of a bully so DS and I, watching from the deck, didn't think too much of it except that there was no cause.  She had access to as many crumbs as any other chicken.  I'd scattered them far and wide over that area of yard.

When the cornbread crumbs were mostly gone, E.B. began pacing, then practically loping around the chick pen.  And the chick was trying to keep up with her on the inside.  Mrs. Badger just sat quietly by the door to the little house and watched.  Finally DS and I got the idea -- E.B. wanted in the chick pen.  (We can be pretty dense sometimes.)  So DS opened the gate and shooed her around the pen till she could see it was open.  That's all it took.  E.B. ran into the pen and almost immediately she and the chick were inside the little house settling down for the night.  Mrs. Badger joined them in a few minutes and scooted right up to E.B. with the chick sort of in between them at the rear.
I tried to get a clear picture but only the hens were visible.  DS suggested he take off the house's roof in order to spot the chick but that just stirred everyone up and they all hopped over the side walls fussing up a storm.  Or maybe that was due to me using the flash -- hard to spot a little black fluffball between to big black fluffballs without proper lighting...
So for now, we have a chick who has two mamas.  Perhaps one hen will get tired of the process and give up but no sign of that yet.

Friday, June 17, 2011

Yield: 1 pullet, 1 cockerel

Snowball, the white Silkie bantam hen, hatched three eggs (gathered from the pastured hens) in late April. They were all Turken chicks. One was lost to an unknown cause about a week after hatching. The survivors have grown and are 10 weeks old now.

They're taller than Snowball now thanks to their long legs and probably weigh a little more, too. One is definitely a cockerel and, I'm pretty sure, the other is a pullet.
I love how her black-and-white patterning makes it look like she's wearing a cool cap. Sometimes Turkens just look like Woody Woodpecker to me so I like to see one that appears almost fashionable.

Tuesday, June 7, 2011

It's a jungle out there...


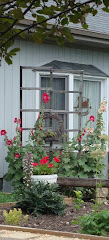
Hollyhocks and spiny bear's breeches gone wild. Where will it end?