Wednesday, March 19, 2008

Chicken that tastes baked prepared in the slow cooker


I'm not a big fan of lots of slow cooker meat and poultry recipes as I often find the meat too stewed for my taste (similar to store-bought canned meat or poultry). I cooked this for almost 5 hours on High as the recipe instructs and the chicken came out like I'd baked it in the oven. The skin wasn't really crisp but the meat was juicy and still firm tho it pulled from the bone with ease.

Spicy Turmeric Chicken
From "Not Your Mother's Slow Cooker Recipes for Entertaining" by Beth Hensperger and Julie Kaufmann

The book attributes this recipe to Laura Quemada as adapted from Madhur Jaffrey's "Indian Cooking." Whatever the original source, it's a keeper. My variation on the recipe was to apply the marinade to chicken leg quarters and layer them in the crock instead of using a whole bird as directed.

We ate this for dinner hot with a rice pilaf and green beans, for lunch the next day at room temperature as part of a chef's salad, and nibbled on pieces out of the fridge in between. Didn't have any left to try it, as the book suggests, wrapped in a tortilla tho that sounds good, too.

Turmeric Marinade:
1 tbs ground cumin
1 tbs paprika
1 tbs ground turmeric
1-1/2 tsp red chile powder or 1 tsp cayenne pepper
1-1/2 tsp fresh ground black pepper
2-1/2 tsp salt
2 to 3 cloves garlic, to your taste, mashed to a paste
6 tbs lemon juice

One 4-pound broiler/fryer chicken or 4-pounds of chicken leg quarters

Rub inside of crock with oil.

Stir marinade ingredients together in small bowl. May use small food processor if desired.


Note: turmeric will stain surfaces yellow so use glass or stainless steel containers or utensils. May stain a light-colored slow cooker crock also. Use a disposable plastic glove to apply marinade to chicken as it will stain skin, too. (I used a plastic food bag to cover my hand while applying marinade.)

Using your hand, apply marinade generously to all sides of chicken. Place chicken in crock and cover. Note that no liquid is used with the chicken. Cook on High for 4 to 5 hours, or on Low for 7 to 9 hours, until meat pulls easily away from the bones. Enjoy!

My notes: When I prepare this again, I'm going to use my homemade garlic powder instead of the garlic cloves and I'm not going to add the lemon juice to the whole mix. I plan to divide it into two bowls and add about half the juice to one bowl. I'll apply that to the chicken and, if it's like this time, I won't need the other portion. So I will put the blend in a labeled spice jar adding the remaining amount of lemon juice when ready to prepare Spicy Turmeric Chicken again. Which won't be long if the reaction to the dish this time is anything to go by.

Tuesday, March 11, 2008

A Savoury Crust for a Tomato-Onion Tart

I think I'm having way too much fun with KitchenParade.com's Pi Day Challenge. Today was a busy day what with running DMom to one doctor and three therapy appointments, the post office and the library. Not to mention having a recalitrant 8yo unexpectedly in tow due to a foul-up between my and DH's schedules. Yet all day, in the back of mind, I was considering the variety of pies I make and the different crusts I automatically make for each. In the case of the recipe below, I think it's easy to see why they go together. The touch of mustard and cheese in the pastry are a good fit with the tomato and onion filling.

We're grinding our own flour these days so I often make this with a full cup of whole wheat flour instead of half all-purpose and half whole wheat as listed. When doing that I make sure to use soft wheat berries suitable for pastry. Gives a nice nutty taste and makes a surprisingly filling main course. Of course, smaller, individual pies make a great first course, too.

Tomato-Onion Tart with a Wholewheat Cheese Crust

Tart filling:

3 tablespoons olive oil
2 large onions, thinly sliced
2 eggs, lightly beaten
1 cup ricotta cheese or cottage cheese
3 tablespoons grated Parmesan cheese
2 cloves garlic, minced
1/4 teaspoon fresh ground nutmeg
2 tablespoons finely chopped fresh thyme OR 2 teaspoons dried thyme
3 large firm, ripe, red tomatoes, sliced into 1/4 inch rounds
Salt and freshly ground pepper, to taste

Pastry:

1/2 cup all-purpose flour
1/2 cup wholewheat flour
dash of salt
1/2 teaspoon dry mustard
2 tablespoons grated Parmesan cheese
1/4 cup butter
cold water, as needed

Sift together flours, salt and mustard. Cut in butter and cheese with pastry blender or two table knives until pieces are the size of small peas. Sprinkle 1 tablespoon of cold water at a time over dough and stir in, adding more as needed until dough leaves the side of the bowl clean. (I usually add 4 or so tablespoons but it varies with the amount of moisture in the air and flour, etc.) Place dough in a plastic bag and let rest in refrigerator for half an hour.

To prepare pie shell:

Preheat oven to 400F.

Fit pastry into regular 9" pie pan or to stay true to the recipe name, follow these directions for making a tart shell in a 8" or 9" tart pan with removable bottom:

Place sheet of dough on a lightly floured surface. Roll to a thickness of 1/8". Carefully ease dough into tart pan and gently press it into bottom and up sides of pan. Trim off all but 1" of excess dough.

Fold overhang back into pan and press firmly against sides; this will create a double layer of dough which will reinforce the sides of the shell. Line pastry shell with a double thickness of foil. Bake for 5 minutes. Remove foil and bake for an additional 5 to 7 minutes or until pastry is nearly done. Remove from oven. Reduce oven temperature to 325F.

Filling:

Heat 2 tablespoons of the olive oil in a large skillet, add onions, and cover. Cook onions over medium heat, stirring occasionally, until softened, about 20 minutes. Remove lid and cook until onions are golden and liquid has evaporated. Remove skillet from heat and set aside.

Combine eggs, Ricotta cheese, Parmesan cheese, garlic, nutmeg and 1 tablespoon of the thyme in a medium size bowl. Whisk until well blended.

Spread cheese mixture over dough. Spread onion mixture over cheese. Arrange tomato slices in concentric circles over onion mixture. Season with salt and pepper to taste.

Stir the remaining olive oil and thyme together and brush over tomatoes. Bake in a 325 degree oven for 30 to 35 minutes. Cool slightly before serving.

This is a good way to use up a small amount of ricotta or cottage cheese. I like to make this in the summer when tomatoes are really ripe but it's a good way to use "winter tomatoes," too. Brings out their flavor!

Monday, March 10, 2008

Single-crust Pie Turned Upside Down

In honor of Pi Day (March 14) as celebrated by KitchenParade.com I'm starting off this week with a favorite pie crust and simple apple pie recipe. For more pie recipes check out the challenge at Pi Day -- Recipes for Homemade Pie.

Everyone knows pie crust can be too much of a good thing. It's loaded with fat, even saturated fat, depending on the recipe. Over the years I've noticed a lot of people will leave that bottom crust no matter how tender the dough. It's not always a sogginess issue either, tho that will make the most dedicated pie face leave it behind on the plate.

So I've started following my mother's practice of omitting the bottom crust when making a traditionally 2-crust pie. Say I'm making an apple pie. I combine sliced apples, sugar, a bit of vanilla and cinnamon, maybe a dash of nutmeg and salt, and a pat or two of butter in the pie pan then top with a crust and seal it against the edge of the pie pan. Slash a few vents in the crust and bake as usual.

If I've done a nice job of layering the apple slices and used a variety of apple that holds together prettily when baked, I can remove the pie from the oven, let cool slightly, slice and serve a nicely formed piece of pie. I do this with peaches and pears, too. Berries have more juice and in order to have the slice hold together for serving, I may add a small amount of thickener to the other ingredients. Or I may just let it cool to room temperature instead of trying to serve it too hot and deal with the runniness. That's no different than when I make a regular 2-crust pie.

Some folks call this a cobbler rather than a pie. That's okay. Many cobbler recipes call for a topping other than a traditional pie crust recipe, tho, so I still call this method a pie.

Here's a recipe for a single-crust apple pie. If you can find them, Albemarle Pippins, are great for this pie. Of course, they're great for applesauce, eating out of hand, making cider, and just about any other use you might have for an apple. Rome Beauty or Granny Smith are easier to find and will work, too. If using Granny Smith apples you'll probably want to increase the sugar to the higher amount suggested or even make it an even cup if you really like it sweet.

Single-crust Apple Pie

Makes one 10" pie

Crust:
1 cup all-purpose flour
1/2 tsp. salt
2-4 tbs. cold water
1/3 cup shortening

Sift together flour and salt. Cut in shortening with pastry blender or two table knives until pieces are the size of small peas. Sprinkle 1 tbs. water over part of mixture. Gently toss with fork and push to side of bowl. Sprinkle next tbs. of water over dry part. Mix lightly and push to moistened part at side. Repeat until all is moist. Form into ball.

Flatten ball slightly and roll 1/8" thick on lightly floured surface.

Always use a light touch and handle dough as little as possible.

Apple Filling:

7 cups sliced pared apples
1/2 to 3/4 cup sugar, depending on sweetness of apples
dash of salt
1 tsp. cinnamon
1/2 tsp. powdered vanilla
1/4 tsp. nutmeg, optional
1-1/2 tbs. butter

Preheat oven to 375F.

Combine sugar, salt, cinnamon, vanilla, and nutmeg, if desired. Stir to blend. Layer apples in 10" pie pan and sprinkle with sugar mixture. Dot with butter and place crust over pie. Trim crust and flute edge, tucking it slightly against the inside edge of pie pan to seal. Cut slits in top.

If you like, beat an egg with 1 tbs. water and brush lightly over crust. Sprinkle with sugar. This will give a pretty finish to the crust but is not required.

Bake in preheated oven 45 minutes or until crust is golden brown.

Saturday, March 8, 2008

Hooked sampler mat

Today I pulled out my Ashford Country Spinner to start working up some roving from Abby, our Jacob ewe. When I prepared to run the leader through the orifice*, I found my lost rug hook (see previous post). It was stuck through the hole along with a strip of black wool. No wonder I couldn't find it! The handle is the same color as the wheel and I'd never put it there so never thought to look there. DH thought I might be right when I asked if he put it there. For safekeeping, he said. Uh huh.

So the way my mind wanders, I went from sitting down at the wheel to working on the border of my hooked sampler. It was just as well since we've had strong winds of 25-30mph all afternoon and into the night. Holly dog likes to be close to her humans when bad weather hits. She usually squeezes under my chair when she hears the least rumble of thunder and with gusts up to 60mph, the windows are whistling and rattling to beat the band. This way I could pull the rug frame right up next to her basket so we were both comfortable. She doesn't like a spinning wheel near her when it's in motion.

Holly dog is looking especially clean today as she wallowed in the mud this morning and had to have a bath before lunch. Fortunately it wasn't windy then and the outdoor temperature was almost 60F. so DH gave her a bath in the washtub on the back deck. Holly is not known for appreciating bathtime and we've learned the hard way not to attempt to bathe her in the bathtub. It's either the back deck or the garage for Holly's ablutions.

I set out to make myself a sampler to show how different weave patterns will look when hooked. Since I like functional samplers, this one is destined to be a mat on the top of a little 4-drawer dresser I use as a side table in the living room. It's proving very helpful as several of the fabrics have turned out different from the way I imagined they would look when hooked. Good to know when I start planning my next hooked projects.

The hooking frame by The Purple Crow was a Christmas gift from my mother-in-law a couple of years ago. I also received another base that lets me support the frame above my lap if I'm sitting in a chair where use of the floor frame is impractical. The head frame has stainless steel grippers on all four sides that make repositioning easy but hold tight while hooking.

I especially like the way I can maneuver the frame around chair legs and even the footstool while not having to worry about frame legs to the side getting in the way. I have a needlework scroll frame (think small quilting frame) that I like but it's only useful if I want to sit in a straight kitchen table-style chair. Even the narrow wingback chair I favor in the living room won't allow me to pull that frame close-in while I work.

Hoping to finish this mat before next weekend so I can start another hooking project -- perhaps a top for my large footstool or chair pads for the kitchen chairs. I keep vacillating between traditional rug hooking and locker hooking. There are four main chairs and several extras we only pull out as needed. Maybe I could make a different type of pad for each?

Well, that's the least of my worries right now. I just need to concentrate on finishing this sampler.

*Are both the openings termed the orifice? I've always called the one to the front where the fiber enters (perpendicular to the floor) by that term but when I went to describe it here I was caught up short. The hook was in the opening behind that first entry point. The second orifice?

Saturday, February 23, 2008

How to use up a bunch of fresh eggs without really trying

Even tho we don't really notice the lengthening days, the hens sure do! The backyard girls are all finished molting and back online and the pullets, who have yet to go thru a molt, are picking up production, too.

We don't use artificial lighting so this winter we've been averaging around 50% on egg production -- out of 20 layers, we would collect between 9 and 11 eggs each day. (Production did drop during two spells of bad weather but only for a day or so each time.) This week tho we've collected 2 dozen over our previous average. We sell extra eggs but it's too cold to set a cooler out with an on-your-honor money jar and we're hardly home long enough to put the 'eggs for sale' sign up at the end of the road so I've been pulling out all the recipes we like which use 6 or more eggs.

That means we have a few jars of lemon curd in the refrigerator and a plain old-fashioned pound cake sitting on the counter to spread it on. I made a pan of Chile Cheese Squares with some of the inexpensive cheese I've been able to pick up at a nearby grocery outlet Sharp Shopper. (Boy, I like that store!) Those squares are good warm or at room temperature and they freeze great, too.

And for lunch (our main meal), we like an herb and cheese soufflé or a frittata with a loaf of homemade bread and either a side salad or some steamed fresh spinach from those cold frames DH has going now. There was a time I hesitated to tackle a soufflé but I discovered it's more the idea of the thing than the actual process that scared me and once I made one I lost my fear.

My Baked Southern Grits recipe only uses 4 eggs but I consider that a lot for a side dish and when I have extra zucchini and eggs both on hand, I make Zucchini Cheese Squares. Since I freeze shredded zucchini, I don't have to wait till summer to make it.

Angel Food Cake is another favorite sweet tho we're beginning to prefer a Daffodil Sponge Cake as it lets me use up the whites AND the yolks, plus makes a pretty, tasty cake to boot. It's part angel food and part yellow sponge cake so it's a marbled yellow-and-white. I'm planning to make several for different events this spring as it looks sensational on a plate with a few fresh blossoms for decoration. And it's low fat with not that much sugar compared to other cakes the same size.

Daffodil Cake (Marbled angel food and yellow sponge cake)

1 cup Sifted cake* flour
1/2 cup Sugar, divided
4 Egg yolks
1/2 tsp Lemon extract
10 Egg whites, at room temperature
1 tsp Cream of tartar
1/2 tsp Salt
3/4 cup Sugar
1/2 tsp Vanilla extract

Sift flour and 1/2 cup sugar together 3 times; set aside.

Beat egg yolks at high speed with an electric mixer 4 minutes or until thick and lemon-colored. Add lemon extract; beat at medium speed an additional 5 minutes or until thick. Set aside.

Beat egg whites until foamy. Add cream of tartar and salt; beat until soft peaks form. Add 3/4 cup sugar, 2 tablespoons at a time; continue beating until stiff peaks form.

Sprinkle one-fourth of flour mixture over egg whites; gently fold it in. Repeat procedure with remaining flour, adding one-fourth of the mixture at a time. Divide egg white mixture in half.

Fold vanilla into half of egg white mixture. Gently fold beaten egg yolks into remaining egg white mixture.

Pour half of yellow mixture into an ungreased l0-inch tube pan; then gently add half of white mixture. Repeat procedure with remaining mixtures. Gently swirl batters with a knife to create marble effect.

Bake at 350°F for 45 to 50 minutes or until cake springs back when lightly touched. Invert pan carefully. Let cake cool in pan 40 minutes. Loosen cake from sides of pan using a narrow metal spatula; remove from pan.

Variation: For a plain sponge cake, do not divide egg white mixture in half. Substitute vanilla extract for lemon extract.

*Note: I regularly use unbleached all-purpose flour and cornstarch as a substitute for the cake flour called for in this recipe. I place 2 tbs cornstarch in the bottom of the measuring cup. Then I spoon in all-purpose flour to fill the cup.

Source: The Southern Living Cookbook (1987)

Friday, February 22, 2008

Zucchini Cheese Squares

3 cups grated zucchini
1/2 cup chopped onion
1 clove garlic, minced
1 cup Bisquick or other biscuit mix
1/4 cup oil
1/2 tsp celery salt or other seasoned salt
1/2 cup parmesan cheese
4 eggs, beaten

Mix all ingredients together. Pour into well-greased glass baking dish. Bake at 350F for 40 minutes.

6 servings.

Leftovers freeze well for lunches, etc. Serve topped with salsa. Can add a 1/2 cup chopped ham or cooked sausage to make it more of a main dish. If using frozen shredded zucchini, squeeze the thawed squash to remove most of the water or the batter will be too wet. Can also substitute yellow squash for zucchini.

Baked Southern Grits

1 tsp. salt
4 cups water
1 cup quick grits
6 tbs butter
1 cup milk
4 eggs, slightly beaten
1/2 cup shredded cheese (cheddar, American, etc.)

Add salt to water, bring to boil in medium saucepan. Stir in grits slowly, keeping water at a brisk boil.

Remove from heat, stir in butter and milk. Cool to lukewarm. Beat in eggs and pour into 2 quart greased casserole.

Bake at 350 F. for 1 hour or so. Sprinkle cheese on top, cook ten minutes more until golden brown.

Variation: Cheese Grits - stir in additional 1 1/2 cups shredded cheese before baking. Top with other 1/2 cup cheese towards end of baking time as directed above.

I've used mild/medium/sharp/extra sharp cheddars, American, Monterey jack, jalapeno cheese(excellent!), or blends of these and other cheeses that I had on hand. They all tasted great!

Individual portions freeze well. I can't say how the whole casserole would fair as I've never tried freezing it.

Thursday, February 21, 2008

Anything Goes Frittata

6 eggs, beaten (may use 8-10 eggs for more servings or planned leftovers)
1 tbs butter
1 tbs olive oil
2 cups diced potatoes
1/2 cup diced onion
2 cloves garlic, minced (optional)
up to 1-1/2 cups cooked vegetables, diced or chopped (this is where the leftovers come in)
1/2 cup or more shredded cheese, your choice
1/2 tsp kosher salt
1/4 tsp black pepper

Melt butter and add oil in a large heavy ovenproof skillet. I use a cast iron skillet. Toss in potatoes and onion and stir occasionally as they cook over medium heat. Stir in garlic. Prepare other vegetables, if using -- they should be in bite-sized pieces. Add when the potatoes are almost done and stir to heat. Add salt and pepper to beaten eggs in separate bowl.

Sprinkle cheese over top and pour eggs over everything, still cooking over medium heat. Stir through once to blend then let cook as is. Cook over medium heat till eggs begin to look set along edges, at least a couple of minutes. Then place skillet in oven and let bake at preheated 350F. for 15-20 minutes. The more eggs used the longer it will take. You may sprinkle with additional cheese anytime during the baking process if desired.

The frittata can be eaten warm or at room temperature. It's good for lunch the next day, too, and will freeze well. It's a very forgiving recipe -- use the vegetables you like and toss the others. Use what you have on hand fresh or use up cooked leftovers. Add that last bit of cooked ham or crumble those two strips of bacon or even a few bits of chopped steamed spiced shrimp or crab.

Lemon Curd

This is the recipe I use most often as it uses quite a few eggs (a good thing around here!) and makes enough to share.

2½ cups superfine sugar*
½ cup lemon zest (freshly zested)
1 cup lemon juice (note that bottled juice may contain sulfites)
¾ cup unsalted butter, chilled, cut into approximately ¾" pieces
7 large egg yolks
4 large whole eggs

* If superfine sugar is not available, run granulated sugar through a grinder or food processor for 1 minute, let settle, and use in place of superfine sugar.

Combine the sugar and lemon zest in a small bowl, stir to mix, and set aside about 30 minutes.

Heat water in the bottom pan of a double boiler or medium-sized metal bowl, until it boils gently. The water should not boil vigorously nor touch the bottom of the top double-boiler pan or bowl in which the curd is to be cooked.

In the top section of the double boiler, beat the egg yolks and whole eggs thoroughly but lightly with the whisk. Slowly whisk in the sugar and zest, blending until well mixed so that the mixture is not lumpy. Blend in the lemon juice and then add
the butter pieces to the mixture.

Place the pan over the boiling water in the bottom pan. Stir gently but continuously with a silicone spatula to prevent the mixture from sticking to the bottom of the pan. Continue cooking until the mixture thickens and will coat a metal spoon (about 8 minutes) or till the mixture reaches a temperature of 170°F.

Remove the double boiler pan from the heat. Continue to stir gently until the curd thickens (about 5 minutes). Strain curd through a mesh strainer if desired to remove zest. (I usually leave it in. This step will also remove any cooked egg bits that show up.)

Allow the curd to cool to room temperature. To prevent a ‘surface skin’
from forming while it cools, place a clean piece of plastic food wrap down onto the surface of the curd or cover the bowl. (I store mine in glass jars with a glass lid and wire bail.)

Refrigerate up to 4 weeks or fill freezer container(s), leaving ½-inch headspace, and freeze up to 1 year. To thaw, place freezer container in refrigerator for 24 hours.

Taunton Press, publishers of one of my favorite magazines -- Threads, gives a recipe it calls foolproof that sounds pretty good, too. I have to admit, the first time I made lemon curd, I had to strain it tho now I don't have that problem. Same recipe so I think it was my technique that needed work but if you have any fears about ending up with bits of cooked egg in your curd, try this recipe from "Fine Cooking."

Plain Old-Fashioned Pound Cake

1 cup unsalted butter, softened
2 cups sugar
6-8 large eggs
2 cups all-purpose flour
1 tsp. vanilla extract or lemon extract

In a large electric mixer bowl, cream butter. Add sugar and blend till no longer grainy. Add eggs, one at a time, blending at medium speed after each addition. Add flour and beat for 3-5 minutes. Add extract(s) during the last bit of blending.

Pour into a 10" greased and floured tube pan or Bundt pan and bake in preheated 350F. oven for 60-75 minutes. Test with a toothpick inserted in the middle after 1 hour. Remove from oven when done and cool in pan for 5 to 15 minutes. Turn out onto cake plate. Let cool completely before covering.

Note: This recipe is just fine with 6 eggs but if you have a lot on hand you can use up to 8 eggs without altering the other ingredient amounts. Pastured eggs will give a beautiful bright yellow color to the cake.


This cake freezes well: sliced, whole or in sections.

Sunday, February 17, 2008

Herb and Cheese Soufflé

2 cups milk
4 tablespoons unsalted butter
4 tablespoons all-purpose flour
8 whole eggs, separated
2 cups Swiss cheese or other preferred cheese
2 tablespoons fresh parsley, chopped
2 tablespoons fresh thyme, chopped
2 tablespoons fresh oregano, chopped
3/4 teaspoon salt
fresh ground white pepper
dash nutmeg
2 tablespoons Madeira, optional

Make a parchment paper or aluminum foil collar that extends 2" above the outside rim of the soufflé dish. Do not grease soufflé dish or collar.

In a saucepan, melt butter over medium heat and stir in flour. Cook 2 minutes, stirring vigorously with a wooden spoon. Add milk and cook, while stirring over low heat until smooth and thick, about 2-3 minutes. Remove from heat and let cool 5 minutes.

Beat yolks lightly in a medium mixing bowl and stir in a little sauce to temper the eggs, then add the remaining sauce. Stir in cheese, herbs, salt, pepper, nutmeg, and Madeira.

Beat whites to soft peaks and fold a quarter of them into the sauce. Fold sauce gently into remaining whites.

Pour into prepared soufflĂ© dish and bake in 350°F oven 35 minutes until lightly browned. Carefully remove collar and serve immediately.

Tuesday, February 12, 2008

Chile Cheese Squares

12 eggs, lightly beaten
1/2 cup all-purpose flour
1 teaspoon baking powder
1/4 teaspoon adobo seasoning
1 1/2 cups cottage cheese
12 ounces cheese, grated
1/2 cup green chiles, diced

Combine eggs, flour, baking powder and salt, mixing thoroughly. Stir in cottage cheese, grated cheese and chiles. Pour batter into well greased 9x12-inch baking dish. Bake at 400 degrees for 15 minutes, reduce oven temperature to 350 degrees and bake for 40 minutes. Let stand for 10 minutes. Cut into 2" squares and serve either warm or at room temperature. To freeze, cut and cool then package for freezer.

Makes 12 main course servings or cut in smaller pieces for an appetizer topped with a spoon of thick salsa.

Note: Use any preferred cheese or combination of cheese -- jalapeno cheese is good as is cheddar, monterey jack or colby. Swiss works well but parmesan might be too salty/strong, probably be better to combine it with another cheese.

Tuesday, February 5, 2008

Drink Mix Dyeing

Strawberry-flavored Kool-Aid® was DS's beverage of choice to take to our annual Superbowl party and when I looked in the cabinet to see if that flavor was on-hand, I realized I had way too many packets just sitting there. I also had part of a Romney fleece that I really needed to do something with so I did a little dyeing exercise.

My dyeing notebook is full of samples from previous drink mix dyeing trials so I had a pretty good idea what colors I could hope for. But that bright yellow at the top of the photo was a real surprise!

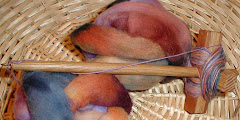
Running counter-clockwise from the surprise yellow, grape-flavored Kool-Aid® brand unsweetened drink mix yielded the purple. It usually comes out fairly dark so this batch was consistent with previous samples. I used 4 packets of drink mix dissolved in 1 quart of simmering well water (limestone issues) and included 1/4 cup white vinegar in the blend. I dyed about an ounce of washed fleece, pre-soaked in water and mostly separated into locks. My scale is "not approved for commerce" but still fairly accurate. I put the glass jars in a large slow cooker that had about 1" of simmering water in it. The temperature setting was on low and I set the filled jars on a small rack that fits in the bottom of the slow cooker. Placed the lid on the slow cooker and let it "cook" until the dye was exhausted (water was clear in the jars).

Next up is the small amount of lighter purple (almost grey in the picture) which is a bit that I stuffed into the container when I was finishing up and realized I had some extra fleece ready-to-dye and nowhere else to put it. It didn't take up nearly the color as the earlier wool.

The dark pink to the front of the photo came from 3 packets of a flavor called "Raspberry Ice." I don't think it's available any longer -- see, I knew I needed to use some of those for dyeing. Who knows what they would taste like after all that time on the shelf?!. Followed the same method as for the purple wool.

The light orange was dyed using orange flavored Kool-Aid® drink mix, of course. It's one of the few that seems to me to yield a "true" color. I followed the same method described above.

I used 3 plain lemonade flavored Wyler's® soft drink mix packets to get that very light yellow in the front of the basket with my wool cards. I only dyed approximately 3/4-ounce instead of the ounce for other colors because I knew the lemonade usually yielded a very light color and I wanted to improve the saturation. Not sure it really made any difference in the final color when I compared it to a batch I dyed previously with the lemonade drink mix. My experience with Kool-Aid® lemonade has been the same.

The light peachy-orange fleece in the same basket was dyed with an orange-pineapple flavor Kool-Aid® drink mix called, I think, "Oh Yeah Orange Pineapple." Same amounts and method as previously described.

The bright yellow wool at the top of the photo was dyed with a Kool-Aid® drink mix called Man'O Mango Berry. It was a surprise because the drink color is more of an orangey red and yet it gave the brightest, best covering drink mix dye job I've had and is yellow. Most drink mixes yield a range of shades but this one covered the wool very well all over. And I don't normally expect the color of the prepared drink to be the same color as the dyed wool but any of the red shades (in terms of the prepared drink color) have yielded some shade of red in my previous experience. So I thought this one would follow that line. Shows me what I know of food coloring! Now if only some of the other colors dyed that strongly!

Shrimp Curry (aka Shrimp a la Gourmet)

This is the best way I know of to use up a small amount of leftover steamed shrimp and yet manage to serve 3-4 hungry shrimp-lovin' people.

It's a very forgiving recipe, too. Out of tomato juice? Substitute tomato sauce thinned with a little water or run canned tomatoes with their juice through the blender. Wanna use up those odds and ends of cheese? Substitute another cheese or a combo of cheeses for the American called for -- just remember, processed cheese will melt smoother than natural cheeses. Need to stretch it to serve 5 or 6? Add another cup or so of cooked rice. I always use at least 2 cups of cooked rice (my preference is for brown) tho the original recipe calls for only 1 cup. And, as for the shrimp, unless I'm using salad shrimp, I chop the shrimp into 2-3 pieces each and often only have a cup instead of the 1-1/2 cups called for. Of course, more shrimp is always acceptable! Even canned shrimp (rinsed) will do in a pinch.

2 tablespoons butter, melted
2 tablespoons flour
1 1/2 cups tomato juice
1/2 teaspoon salt
1/4 teaspoon curry powder
1/8 teaspoon thyme
1/8 teaspoon pepper
pinch cayenne pepper
1 cup processed American cheese, cubed
1 1/2 cups cooked shrimp, peeled
1 cup cooked rice
1 cup bread crumbs, buttered

In a heavy skillet over medium heat, blend flour into butter until smooth. Gradually stir in tomato juice. Add salt, curry powder, thyme, pepper and cayenne. Cook, stirring constantly, over moderate heat until thickened and bubbly hot.

Reduce heat, add cheese, and continue stirring until cheese is melted. Fold in shrimp and rice. Adjust seasonings to taste. Spoon into a greased casserole dish and evenly sprinkle with buttered crumbs.

Bake, uncovered, in a slow oven (325F) for 15 to 20 minutes or until bubbly hot and crumbs lightly browned.

Source: Richmond Receipts: Past and Present by Jan Carlton, attributed to Beth Buckle (Mrs. James)

Fish with Lemony Soy Glaze

1/2 cup soy sauce
1/2 cup sugar
1/2 cup sherry
1 1/2 pounds fish steaks
6 cloves garlic, crushed
6 slices fresh ginger root, quarter-size
2 tablespoons fresh lemon juice
1 tablespoon green onion, minced
2 teaspoons sesame seeds, toasted

In a 2-cup microwave measuring cup, mix the soy sauce, sugar and sherry. Cover and microwave on high for 1 minute, stir to dissolve the sugar. Place fish steaks in a single layer in a dish. Add half the soy sauce mixture, along with half the garlic and half the ginger to the fish and marinate 20 to 30 minutes, spooning the mixture over the fish a few times during the period.

Preheat the broiler or grill. Combine the remaining soy sauce mixture with the remaining garlic and ginger in a small saucepan. Bring to a boil over high heat and allow to reduce to about 1/3 cup (3 to 4 minutes), stirring occasionally. Remove from heat and, with a fork, remove garlic and ginger pieces, pressing to extract sauce. Stir lemon juice, green onions and sesame seeds into reduced mixture (it's now a glaze) and set aside.

Transfer fish from its marinade to the broiler and broil fish pieces about 3 inches from heat until lightly browned and firm (8 to 10 minutes per inch of thickness) turning once. Or, grill the fish, if desired. Serve each portion topped with glaze.

Source: Washington Post 7/20/94

Monday, February 4, 2008

Pan-Grilled Fish Burritos

Pan-Grilled Fish Burritos with Chipotle Cream

1 cup frozen or canned corn, drained
1 cup cooked brown rice (can sub white rice, if desired)
1 can black beans, rinsed
1 cup onion, chopped
1 avocado, chopped (optional)
3 tablespoons lime juice
1/2 cup sour cream
1/2 cup yogurt
3 tablespoons chipotle chiles canned in adobo, pureed
1 pound tilapia fillets (can sub flounder or other white fish fillets, if desired)
1/4 teaspoon chili powder
1/4 teaspoon cumin powder
1/8 teaspoon ground coriander
2 tablespoons olive oil
6-8 large flour tortillas

If using frozen corn, cook until tender, drain and cool. Add rice, beans, onion, avocados and lime juice and stir gently to combine. Set aside.

For chipotle cream, combine sour cream and yogurt, add pureed chipotle peppers.

Combine seasonings with oil and brush fish on both sides with mixture. Grill in grill pan 4-5 minutes until flaky. Warm tortillas till just pliable; add fish and filling; top with generous amount of cream; roll and serve.

If you don't have (or like) chipotle peppers, you can substitute 3 tbs of a favorite salsa or taco sauce.

Modified from "In the Kitchen" a free local monthly foodie paper - March 2007 edition.

No menu plan this week -- we're winging it

My sister is away on business so this is my week to stay with my mother. DSis and I and several other family members have been sharing this job since Mom came home from the hospital after her stroke in early December. I'm finding out this week how much of the work usually falls on my sister -- she does live next door to Mom while I'm about 7 miles down the road, but, boy, am I appreciating DSis more this week!

What does all that have to do with menu planning? Well, I'm trying to juggle 3 meals a day for Mom and myself or whoever might drop in. And she has a lot of visitors over a week's time. Plus, DH and DS are learning to fend for themselves or, more accurately, raiding my supply of OAMC stashed in the freezer. These are the times that strain the grocery budget -- at least at our house.

In the freezer I have about 4 dozen cornish pasties made with ground meat, in this case venison, and shredded white potatoes and chopped onions. I made them last week when I was recovering from the "ick" we all shared during January. Since I had managed to make more dough than filling (why does it always come out uneven?), I sliced a kielbasa and used it with some nectarine mustard to fill the last of the pasties. Those last few are all for DH as DS has decided most sausages are not for him.

Then there's the supply of individual vegetable-beef soup bowls (probably an even dozen now), several multiple-piece packages of individually-frozen oven-baked crispy-battered chicken. (note 3 hyphenated compound words in a row -- a new record) Add 6 egg and cheese burritos, a dozen beef and black bean burritos, and several tv dinner-style frozen dinners with a main dish and 2 veg and I think they'll make out okay. Plus, if they hold to past performance, they'll both manage to eat lunch at Mom's most days and DS will eat dinner there every night as DH will bring him by on his way to work each weekday.

There's a thread running this week on a site I frequent, Fractured Frugal Friends, asking about fish cookery. The person that started the thread mentioned she'd been reading about how 3 fish-based meals each week could improve one's health and she wondered how many times people served fish and some of the preparation methods. That got me to thinking as, in that small survey pool, we seem to eat fish a lot. Well, compared to other posters, I mean. Once a week we have some type of whole fish or fish fillets, either fresh or, more frequently, frozen. Sometimes we have shellfish and there's always canned tuna and salmon. So I've been trying to write down our favorite recipes that use some type of fish and I'm going to try to add at least one new recipe using fish to our menu sometime this month. I worry about getting in a rut with meals but I hardly ever think about expanding the fish side of the menu.

So this week's menu planning will probably become this week's menu after the fact if I even manage that. Here's hoping next week will be better.

Saturday, February 2, 2008

Project Laundry

Project Laundry List is an interesting site with more information about hanging the laundry. It's a non-profit organization dedicated to demonstrating how simple changes in lifestyle can reduce energy demands.

While viewing the site, I came across lists of blogs that discuss clotheslines. Who knew it was such a popular topic? Apparently plenty of other people enjoy the ritual act of hanging laundry and/or the results of line-drying. The blog Living in a Toxic World was where I first found a link to Project Laundry List.

There were quite a few mentions of city ordinances and restrictive covenants that keep folks from blighting the neighborhood with clotheslines or hanging laundry. I'm very glad to live where my linens can fly free and I wish everyone who wanted to could have a clothesline. Hanging my clothes out to dry never felt like a subversive act before.

Hanging clothes on the line -- drudgery or a simple pleasure?

After the delay caused by yesterday's ice storm, I couldn't wait to get the sheets washed and out on the line this morning. I love hanging the laundry! Even when I hate it -- it's too hot, too cold, not in the mood, whatever, once I get the basket out there and start pegging those towels on the line I'm feeling more cheerful. Sick, huh?

We've always had an electric dryer but dryer sheets can't compare with the smell of fresh air-dried laundry. And I like how absorbent and, yes, even how rough, cotton bath towels are after hanging on the line.

And, of course, a clothesline and its regular use offer other benefits such as reduced electricity consumption and the associated cost. Lowering our carbon footprint and all that. But for me it's also about the peaceful feeling I can tap into. The simple act of carrying a basket from the laundry room to the backyard, laughing at the "backyard girls" who come running when they see me come out the door (they're just sure I've brought them a crust of bread or maybe an apple core), and then the peaceful feeling that steals over me as I pick up each piece, shake it out and pin it to the line.

It's a very methodical task for me and the view from the backyard is all about grass, trees, hills and, in the distance, mountains. A few deep breaths while I'm working and cares just roll away. Must be the fresh air.

Saturday, January 26, 2008

What's a gigli wire used for anyway?

DH has learned to use a new tool. It's called a gigli wire and it's a surgical instrument used to cut bone or, in this case, horn.

Two of our Shetland wethers have horns that needed trimming. I knew we needed a gigli wire to do the job but didn't know where to buy one. The local farm store, which stocks all the usual med supplies, said they hadn't carried them in years. I guess horned livestock aren't as popular as they used to be? Who knows.

Ended up ordering one from a surgical supply store down the road in Roanoke. There was a few weeks delay as they had to order from the German manufacturer but finally it came in the mail.

The saw looks like a piece of woven wire and has a ring on each end. You can buy a type of handle to put thru the rings but DH fashioned his own with some duct tape and a couple of large nails. The wire is wrapped around the horn and crossed so you draw back and forth on the wire from each side so it saws thru the horn.

It's very fast -- takes more time to describe the action than to saw the tip off one horn. The vet had told me we could take off up to 1-1/2" of horn from each horn end or, to measure from the skull, leave about 5" of horn on the sheep. The idea is to not cut into the quick, the blood vessel that runs through the middle of the "live" part of the horn. So it's like trimming a dog's nail only the horn is too dark to be able to see the vein as you sometimes can in a dog's nail.

Considering the vet would charge $175 to do the job and the gigli wire cost less than $15 including shipping and took about 20 minutes of DH's time, I'd say DH made a wise decision when he decided to learn another shepherding skill.

Thursday, January 24, 2008

Things aren't always as they appear!

Somehow I stumbled across a series of still life photographs by Carl Warner. They're posted on the BBC site and titled "In Pictures: From edible to incredible."

We're still recovering from our colds so this was a perfect way to spend some time trying to name all the foods that appear. And what imaginative ways some of them are used! That salmon sea is gorgeous!

After examining the 8 photos till we thought we had named everything (and I bet we still missed some!), we moved on to a book on DS's shelves, Look-Alikes by Joan Steiner, that used to be a favorite of his and still is a fav of mine. He may be outgrowing it but we still managed to put our heads together over it long enough to examine the cover photo and several of the inside spreads in detail. And he would have kept going but it was time to start dinner so the book had to come into the kitchen.

The good thing about Steiner's books (she has at least one more in the same vein and a series for younger children, too) is that she includes a list at the back of the book of all the everyday items used to create the pictures. Looking through the book always reminds me of the stories my mother would tell me when I was little. They were all about "the teeny weeny people" who used thimbles for washtubs and coral bell blossoms for cups. She was never at a loss for naming ordinary things and how they could be turned to use by those enterprising little people. We may have to bring the stories back -- I bet she'll tell him a few if we ask.

Tuesday, January 22, 2008

Take a strand of white lights and . . .

A strand of 35 lights and a glass block from a home improvement store make a great way to highlight a dark room corner.

A friend made this for me for Christmas and I love it! After drilling a hole in the back (not the bottom) of the block, insert a 20- or 35-light strand with the plug to the outside. Tie a ribbon around it to look like a pretty package if you want and choose ribbon colors with the room in mind where you intend to place the block.

It takes patience when drilling as you need to go slow in order not to crack the glass. HGTV's message board has a few good tips for drilling glass blocks. Plus there are a lot of alternatives to the ribbon. A web search yielded all sorts of decorated glass blocks filled with light strands and nightlight-size single bulb sockets. Hmm, I could make a different one for every room and occasion . . .

Menu planning for week of January 21

I know, it's already Tuesday but when you're sick you don't want to eat, right? Writing this out is really helping, especially with everyone sick and worn out as a result. At least we don't have to think about what to fix. It's all written out and I make sure we have the ingredients before I write the menu. We keep the pantry and freezer pretty well stocked anyway so except for DH stopping on the way home tonight to get a gallon of milk, we won't have to run out to the grocery this week.

Monday, January 21

Chicken noodle soup
Oyster crackers
Carrot sticks

Tuesday, January 22

Egg and cheese burritos
Homemade salsa
Black beans topped w/chopped sweet onions
Iceberg lettuce wedges w/dressing

Wednesday, January 23

Spaghetti bolognese
Waldorf salad
Garlic toast

Thursday, January 24

Greek-style oven fries
Steamed cabbage wedges, served with vinegar
Braised boneless, skinless chicken thighs
Yogurt with frozen peaches or strawberries

Friday, January 25

Homemade sausage w/gravy
Scrambled eggs
Fried apples
Wholegrain toast
Orange juice

Saturday, January 26

Barbecued venison, chopped
Homemade wholegrain hamburger buns
Coleslaw
Potato chips

Sunday, January 27

Calico fish
Baked potatoes
Apple carrot salad

Apple Carrot Salad

From "Simply in Season : A World Community Cookbook" by Mary Beth Lind and Cathleen Hockman-Wert.

Apple Carrot Salad

1/4 cup fresh lemon or lime juice
2 tbs orange juice
1 tbs honey
2 cups grated apple
2 cups shredded carrots
1 tbs fresh mint, chopped
1/8 tsp salt or to taste
1/4 cup raisins, optional

Mix juices and honey together in a large bowl until honey is dissolved. Grate apples directly into juice mixture to prevent apples from browning. Toss remaining ingredients with apple mixture and serve immediately.

Calico fish

From "Whole Foods for the Whole Family," a La Leche League International cookbook edited by Roberta Bishop Johnson.

Calico Fish

1 pound fish fillets
1 tbs lemon juice
1/4 tsp salt or less, to taste
dash of pepper
2 cups frozen peas
1 medium carrot, grated
1 onion, sliced and separated into rings
1/4 tsp salt
3 tbs butter

Cut large fillets into serving pieces; arrange in ungreased baking dish. Sprinkle with lemon juice and seasonings. Spoon vegetables over top. Sprinkle with salt; dot with butter. Bake, covered, at 350F. for 20 to 30 minutes or until fish flakes easily.

Greek-style oven fries

From "Simply in Season : A World Community Cookbook" by Mary Beth Lind and Cathleen Hockman-Wert

Greek-style oven fries

4 potatoes or sweet potatoes, scrubbed
2 tbs oil
2 tbs lemon juice
1 tsp dried oregano
1/4 tsp black pepper
1/2 tsp kosher salt
2 cloves garlic, finely minced

Cut potatoes into thin sticks or wedges and large bowl. Blend oil and other ingredients together and pour over potatoes, stirring with a spatula to coat the potatoes.

Spread fries in a single layer on a large baking sheet. Bake in preheated 425F. oven until golden brown and fork tender, 30-45 minutes. Stir and flip fries every 5-10 minutes. Serve immediately.

You can vary these by switching around the herb you use. Try a dash of Italian seasoning blend along with a couple of tbs of grated Parmesan cheese or substitute an adobo seasoning salt instead of the salt and oregano for a change of pace.

Monday, January 21, 2008

Neither snow nor sickness keep learning from happening when you're homeschooled

Public school was out for two days last week due to bad weather. DS has had a cough since before New Year's and started running a fever the first of last week necessitating a visit to the pediatrician last Monday. DH came home from work the night before we took DS to the doc and said he was coming down with something, too. By Wednesday, DH was home in bed -- very unusual for him and DS was holding his own. Friday night DS's fever was back and running about 102F. so took him back to the doc on Saturday. Gotta love those doctors' offices that offer weekend hours! Yesterday I started running a fever. Everyone's succumbed.

The good news is, even in the middle of all this snow and sickness, DH and DS have continued reading Bauer's "The Story of the World, Volume II." They love that series. I had to hunt up the next volume and Activity Book from my stash this weekend as they were afraid they'd finish Vol. II and not have the next one close at hand.

DS has particularly enjoyed the latest chapters as they deal with travel by sail one of his favorite topics. Now if only we can make it to the library in the next day or so as he's managed to finish all the books he brought home last time and he has a few suggestions from SOTW to search for.

Whole Wheat Bread revisited


This is a loaf made from the recipe I posted on January 10. Baked in a pullman pan, it didn't completely fill the corners of the pan. This seems to be the norm for wholegrain loaves I've baked -- bread made from regular unbleached bread flour or all-purpose will completely fill the pan and give squared off corners but the whole wheat doesn't. YMMV

This bread is proving to be a great keeper. We've all been sick with fever, cough, cold symptoms, and not eating very much. DH even stayed home from work part of last week, so I knew he was really ill. But that meant we didn't use up the loaf I'd made last Sunday until yesterday -- over 7 days and it was still fresh. Previously, if we had homemade wholegrain bread left past 4-5 days, it would begin to mold. I know honey makes a difference in the keeping ability of bread but what else would have that effect? The only other real difference between this recipe and the one I was using from the Bread Beckers, is the 24-hr "soaking" period. Otherwise they call for the same ingredients or, in the case of water as the liquid in the Beckers' recipe, I substituted thinned yogurt or dry milk and water.

I hastily took this picture before DH and DS started making their lunch and DH's packed dinner for work today. I wanted to try to show the texture. I don't have a vocabulary to explain what I want to say so I thought I'd try a photo.


And, in case you're not familiar with a pullman loaf pan, here's a picture below that shows mine. A pullman pan has a lid that slides on and off. You put the bread in the pan, let rise, when it's almost to the top, slide the lid on and bake. The bread will do the final rise in the oven and will usually fill the pan. Some people remove the lid after the first 15 minutes or so, I usually leave it on.

You can make a homemade pullman pan using a straight-sided loaf pan. Place a greased cookie sheet on top after forming the dough. Be sure to put a heavy weight like a big rock, brick or maybe a big iron skillet on top of the cookie sheet to hold it down when the last rise kicks in inside the oven.

Oh, and FWIW, those are a couple of my handwoven towels under the bread in 2 of the pictures. That's another thing that's on my list -- make more towels. We love using the handwoven ones...

Thursday, January 17, 2008

Owl, the chicken rooster or who knew chickens were afraid of snow?

Owl is a beautiful rooster and he's always been a bit of a bully. Today we found out he's afraid of snow to boot.

The snowstorm started about 8 a.m. so the chickens were already out in their pen. But Owl and several hens went back inside almost immediately and refused to come out even after the snow stopped flying and we shoveled paths around the garden.

I finally coaxed Echa, the Turken at the front of the picture, to at least put her head out the vinyl-hung doorway and taste a cornmeal mush treat but Owl wouldn't come near the door.

One of the other roosters, Cappy, the Dominique in the middle of the photo to the right, was the first to venture out when we started shoveling. He watched me shovel snow while pacing just under the protection of the old truck topper we use as a cover for the feeding station. As soon as there was a clear square of ground, he flew about 12 feet to reach it and then started following me, DH and DS as we shoveled paths, or in DS's case, track beds, 'round the pen. I thought he deserved a special treat for being so brave (and cute, following us around) so I gave him a piece of red tomato, one of his favorite extras.

DS has been reading too many Calvin & Hobbes collections evidenced by his decision to build, in his words, "a screaming snowman" who is about to be devoured by either a snow snake or a snow whale. Or perhaps a snow zeppelin will crash into him as he stands in the middle of the field . . . He's undecided on its exact fate tho he assured me it would be scary and probably very messy. For all that guarantee, I thought this was a pretty cute picture.

DH is recovering from a bad bout of 'flu but still managed to shovel the driveway so I could get back home this afternoon after going over to my DM's before 7 a.m. this morning to help her get going for the day and do several sets of therapy exercises. Someone suggested we read a book about Patricia Neal's stroke experiences to help understand the recovery process and how much difference the time we spend with DM working on all the exercises provided by the physical, occupational and speeh therapists can make in her recovery.

In closing this snowy day's posting, I wanted to include a few more pictures of those silly chickens. To the right is Echa, one of the Turken sisters, being coaxed into the doorway but no farther.

Directly below is another picture of the ones that refused to come out in the snow. On the left is Quirrell, an Easter egg layer and one of DS's absolute favorites, Owl is in the background, Echa is in the lower right front and Broadway, a white Jersey Giant, is on the roost above her. If you've never seen a Jersey Giant up close, note her eyes -- they're different looking from a regular chicken's and she has lead-colored shanks, too, but they're not visible in that picture.


The picture at the bottom is a view under the truck topper with Misha, another of the Turken sisters, the black-and-white Dominique known as Cappy, and several little white hens.

Monday, January 14, 2008

Locker hooking again


This is the rug I made my DSis for Christmas a year ago. The picture makes it look a bit distorted but it really is a rectangle with 90-deg angles!

I used solid red and some dark blue-and-white window-pane fabric and basically started in the middle and worked outward with out a plan. Not the recommended method. After I made the heart (which I did just because I couldn't think of another motif as easy to do as the heart...) I had to fill-in the background and throw in a little more red to round things out. Since I hadn't planned ahead, I didn't have enough red to do a fancier (or even solid) border. But, for a first attempt, I was pleased and DSis insists she likes it, too. I believe her as it is in use and therefore, on display, in her house. (And I've made surprise visits just in case she was only pulling it out of hiding when I'm going to be there. No, really!)

Now I'm ready to do another locker hook project. I'm leaning toward a chair pad for my chair at the kitchen table. Of course, I'd really like to have 4 pads since there are 4 kitchen chairs, but I'm trying not to "promise" myself too much in the way of craft completions these days. I already have the canvas and plenty of fabric to cut into strips with my DM's trusty Rigby cutter. Just have to work out the pattern I want to use.

I'm thinking of a quilt pattern or maybe something from a farmyard scene. That way I could expand the idea to other pads if I get around to them. Maybe a chicken house on one, a barn on another, farmhouse on a third and what on a fourth? I'd go with animals like chickens, sheep, etc. but I think I'll save those for when I'm hooking with yarn instead of locker hooking with fabric strips. Easier to do the smaller details with yarn and a rug hook, I think.

Which brings to mind why I'm contemplating a locker hook project instead of finishing the hooked table pad (rug hook with wool fabric strips) that is all done except for the border. I've misplaced my hook and can't find it! After several weeks of looking in every odd drawer and basket in the grey room and near my chair in the living room, I've reconciled myself to its loss and have ordered a replacement off eBay from a place down the road in Salem. Should be here by the weekend, I hope, and then I've promised myself I'll finish the table pad immediately. But that leaves several days free to get that locker hook chair pad going. And I know where the locker hook is located -- see, I found it while I was searching for the rug hook...

Menu planning for week of January 14

Surprised even myself and followed last week's menu faithfully. So I'm going to try again this week.

Monday, January 14
Since DS is suffering from an upper respiratory complaint (requiring a doctor's visit this morning...) and DH just called from work to say he's coming down with something, too, I think we need some chill-chasin' chicken soup to start off the week. Will let me put Friday's leftover chicken to good use, too.

Chicken and barley soup
Saltines
Red pepper cheese spread
Orange sections

Tuesday, January 15

Spaghetti w/meat sauce
Tossed salad (lettuce, green pepper, sweet onion and carrots)
Hard rolls

Wednesday, January 16

Macaroni salad
Club rolls with ham, provolone, green tomato pickles and shredded lettuce
Sliced apples

Thursday, January 17

Navy beans
Cornbread
Carrots, celery sticks and garden-fresh turnips
Apple cake

Friday, January 18

Grilled T-bone steaks
Spicy potato wedges
Green beans with chopped onion
Ice cream and apple cake

Saturday, January 19

Catfish bites
Pickled beets
Mashed potatoes
Baked apples

Sunday, January 20

Vegetable beef soup
Oyster crackers
Peanut butter (on crackers or wholegrain bread)
Frozen peaches with almond cookies

Saturday, January 12, 2008

Small knitting project - diagonally-knit dishcloth

These diagonally-knit cotton dish cloths have to be the easiest, most portable knitting project ever. The pattern is so simple I don't have to carry any notes with me and I can put it down without fear of forgetting where I'm at when I next pick it up.

All you do is cast on 4 stitches and knit. For the first half of the square, when you're building up to a triangle that would be half of the square you want to end up with, you knit the first two stitches, yarn over and then knit till the end of the row. That's the directions for each row until you're at the halfway point. Then you start decreasing by knitting the first stitch, knitting the next two together, yarn over, and then knit till the end of the row. Repeat till you're down to 4 stitches and cast off. That's it.

Oh, and these make great gifts, too. They fill out a gift basket or make something to tuck into a gift bag when you need a "thinking of you" gift at the last minute. I try to keep a supply on hand in different colors but they're so quick-to-knit you could always run up a few the night before when in a rush. I've done a couple in the afternoon before an evening get-together but I don't recommend it. I'm finding I like to relax when I knit, rather than do it in a rush where I can't enjoy the process. YMMV

Friday, January 11, 2008

Blue Ribbon Corn Relish

I've won a blue ribbon each time I've entered a jar of this corn relish in the county fair but since they judge by appearance instead of taste on the canned goods, I'm not sure that can be considered as a recommendation. Well, take it from me (and DH who said "you did what?!!" when I recently told him I gave away a couple of jars to a visiting friend) this is a good relish. Adds tang and pretty color (plus a bit of heat if you use hot peppers along with the bells) to a dinner plate.

This recipe comes from the 1990 Kerr Kitchen Cookbook: Home Canning and Freezing Guide. If you've never preserved food by canning before, check out the latest Ball Blue Book or an Extension Service site like the National Center for Home Food Preservation so you'll know how to can safely.

10 cups fresh whole kernel corn (yield from 16-20 ears of corn)
1 1/2 cups chopped green bell peppers
1 1/2 cups chopped red bell peppers
1 cup chopped celery
1 cup chopped onions
4 cups white vinegar (labeled 5% acidity)
2 1/4 cups sugar
1 cup water
2 tbs mustard seed
4 tsps non-iodized salt
1 tsp celery seed
1/2 tsp ground turmeric

Drop husked and silked ears of corn into a pan of boiling water. Return to a boil and boil for 5 minutes. Dip ears in cold water to cool quickly. Cut kernels from cob. Do not scrape cobs. Measure 10 cups of cut corn. Reserve any extra corn for another use.

In a large saucepan, combine corn and remaining ingredients. Over medium high heat, bring corn mixture to a boil and boil for 15 minutes, stirring occasionally. Immediately fill hot pint jars with corn mixture, leaving 1/2" headspace. Carefully run a non-metallic utensil down inside of jars to remove trapped air bubbles. Wipe jar tops and threads clean. Place hot lids on jars and screw bands on firmly. Process in Boiling Water Bath for 15 minutes.

Yield: 6 to 7 pints.

Notes:
When I want to make this out-of-season, I've used store-bought canned corn instead of fresh. Taste/texture isn't appreciably altered.

To make this with hot peppers, use 1 cup each green bell peppers, red bell peppers and hot peppers of your choice, chopped. I usually use anaheim, jalapeno, or serrano peppers.

Thursday, January 10, 2008

Whole Wheat Bread from fresh-ground wheat berries

Over two years ago I sat in on Sue Becker's workshop at a homeschool convention and nodded along with most of what she had to say. The net result was we've switched from baking our own bread from store-bought flour to grinding wheat berries to make our own bread. It is an on-going process -- we still buy the occasional loaf of sliced bread and bag of unbleached flour but DS complains if he doesn't have whole grain bread for toast with his breakfast and (with apologies to Ritz) everything tastes better when it sits on a whole grain slice.

I've been using the Becker's recipe for whole grain bread and making it in the Zojirushi which is an absolutely wonderful bread machine. But the last couple of times I've made bread, I've used a modified version of Sue Gregg's recipe from her "Whole Grain Baking" cookbook. I altered it because I like to bake the bread in a long pullman loaf pan and to get the texture like we prefer it, I add milk or yogurt for some or all of the water indicated and sometimes add an egg or two.

1 1/2 cup yogurt
2/3 cup water
2 tbs apple cider vinegar
4 cups fresh-ground whole wheat flour
1 tbs yeast (I use saf-instant yeast)
1/2 tsp baking soda
1/3 cup butter, softened or oil (butter improves the texture but I sometimes use oil)
1/3 cup honey
1 1/2 tsp salt
1 1/2-2 cups additional whole wheat flour

Combine yogurt, water, vinegar and 4 cups flour in bowl. Batter may be stiff. Cover with plastic wrap tight against the dough and let stand 12-24 hours at room temperature.

When ready to continue, put dough in bowl for Kitchenaid mixer. Add remaining ingredients (can add 1 or 2 lightly beaten eggs along with other ingredients at this point) but only adding 1/2 cup additional flour to begin with. Use dough hook to blend ingredients on low speed. Scraping bowl as necessary and adding additional flour as needed. Dough will be stickier than when prepared with white flour. After additional ingredients are incorporated into the dough, knead with mixer for about 10 minutes. (This step may be mixed and kneaded by hand, if desired. Kneading will take about 20 minutes by hand.)

Oil bowl and place dough in bowl, turning to grease top of dough. Cover with damp cloth and let rise until double. This takes 2 hours or more in my cool kitchen.

Punch dough down, turn in bowl and cover again. Let rise a second time till double. Will take about half as long as first rise. In my kitchen this is about an hour.

Punch dough down, knead briefly and let it rest for 15 minutes. Shape for pan(s) and place in oiled pan(s). Allow to rise a 3rd and final time (30 minutes or so at my house) prior to baking in preheated 375F. oven for 30-45 minutes depending on pan size(s) used.

I use a 28" pullman pan (I think that's the size -- slightly longer than the store-bought "king" size loaves). If I were to bake it in a regular loaf pan it would make at least 2, possibly 3, loaves.

Don't worry if it takes longer or shorter amounts of time to rise at your house. As long as your yeast is active and it isn't killed off by heat, etc. the dough will rise. If the woodstove's not going and it's a cool day outside, I've had the dough take as long as 3-1/2 hours to rise the first time. The Zoji bread machine has a heater so it's only when making bread by hand that I have to worry about a s-l-o-w rise but it does happen. So be prepared to wait sometimes or help the process along by providing a warm spot for the bowl.

This is our new favorite. I can't wait to try it for melba toast.

Wednesday, January 9, 2008

Felted bag from handspun

After searching three felting books I gave up on finding a pattern for exactly what I wanted. So picked up my size 10 Addi Turbo circulars, some heathery brown handspun from Abby (my wild Jacob ewe), a little silvery grey handspun from Charlotte (a beautiful CorriedaleX), and two partial skeins of store-bought blue and purple variegated wool yarns. The strap is made from thin leather which I recycled from a '70s-era crocheted vest y mom found at a yardsale. This is what I came up with.

Knitted in the round, the bag will stand up on it's own because when I reached the bottom, I placed two-thirds of the stitches on a holding needle and knitted a flap to form the bottom. When I had the width I wanted, I picked up the stitches on the holding needle and joined it all together. Made a rectangle (read flat) bottom for the bag rather than a more typical rounded one -- typical, at least, in the patterns I found. If they had a flat bottom they tended to be pieced with seam sewing required. Not something I wanted to be bothered with. I like to knit, not join seams with a yarn needle or crochet hook.

I made 4 YOs about 2 inches from the starting round and ran a piece of cotton yarn through the resultant holes while machine felting in order to make holes to run the the leather i-cord thru for the strap. The i-cord gave me the most problem because the leather was so thin I tended to break it by pulling it too tight when first knitting the cord. Once I learned to lessen the tension it was smooth sailing. An appropriate analogy as I knitted this primarily while we watched A&E's Horatio Hornblower series, a dvd set DS and DH received for Christmas and something we all enjoyed watching. And it was nice to see the whole series without any skips from scratches or other viewing problems as when we checked out the individual shows from the library.

Tuesday, January 8, 2008

Blender Apple Muffins

This recipe came about when I wanted to try Sue Gregg's Blender Banana Muffins from her book "An Introduction to Whole Grain Baking . . . with Blender Batter Baking & the Two-Stage Process" but didn't have any bananas on hand. What I did have was about 1 cup of leftover stewed apples.

This is a recipe that you must start 12-24 hours prior to baking so plan ahead. It's worth it!

1/2 cup yogurt
1/4 cup water
1/4 cup oil
1/3 cup honey
1 cup stewed apples (apples cooked in minimal amount of water and no sugar added - grated apple should work as a substitute)
1 tsp cinnamon
1/4 tsp nutmeg
1 1/2 cup soft wheat berries (or whole wheat berries labeled "for pastry")
1 1/2 tsp baking powder
1/2 tsp baking soda
1/2 tsp salt
1 or 2 eggs (I used 2 large eggs)

Combine yogurt, water, oil, honey, apples, cinnamon, nutmeg and wheat berries in blender in that order. I use a Vitamix but the book indicates most blenders are up to the job since there's a good proportion of liquid to grain. Blend for 3 to 5 minutes, changing the speed as necessary to maintain that "blender swirl" in the batter while blending. Let covered blender container stand at room temperature for 12 to 24 hours.

Preheat oven to 325F. and grease muffin pans or prepare paper liners.

Add eggs to ingredients in blender and blend on highest speed for 1-3 minutes. Add baking powder, baking soda, and salt and blend briefly. Fold in with spatula if batter's too thick.

Fill muffin cups two-thirds full. Bake 20 minutes. Cool and enjoy!

The original recipe indicates this makes 12-14 muffins but I ended up with 18 regular and 6 mini-muffins. My pans are old, maybe muffin sizes have increased over the years like fast food combo sizes?

Sunday, January 6, 2008

Menu planning attempt for the week of Jan 7

The last month was a bust on menu planning around here what with my mom having a stroke in early December and DH taking a week or more off for the Christmas holidays but we should be able to get on track (sort of) since DMom came home at the end of last week and DH is back on his regular work schedule. So with all good intentions, I'm going to try posting the menu for the main meal of each day so I can stay focused.

Monday, January 7

Chili
Oyster crackers
Stewed apples
Carrots and celery sticks

Tuesday, January 8

Beef and noodles
Salad (romaine, sweet onion, carrots)
Sue Gregg's 2-step whole wheat muffins

Wednesday, January 9

Potato soup
Oyster crackers
Carrot sticks
Sliced apples

Thursday, January 10

Frittata
Whole wheat bread
Waldorf salad

Friday, January 11

Baked chicken
Mashed potatoes
Green beans
Corn relish

Saturday, January 12

Homemade pizza with black olives, mushrooms and ?
Sliced apples

Sunday, January 13

Bacon
Eggs (over easy, over medium and over hard -- everyone likes them a different way...)
Whole wheat toast
Rhubarb preserves
Orange sections

Thursday, January 3, 2008

Felted bag from rummage sale sweater

I made this bag from a 100% wool sweater labeled "hand wash only" that I found at a church rummage sale. I fulled it by running it through our old wringer washer while washing several batches of towels and then jeans. The hot water and the agitation from the machine, along with the cold water in the rinse tubs and the several trips through the wringer, caused about 40% shrinkage in the sweater.

I wanted to use as much of the fox design as possible so that determined the size of the bag, about 11x13-inches. I recycled a sleeve and part of the front border to make the side pieces. (The side with the border a little longer than the other is from the sleeve.) The bag's back rectangle is from the back of the sweater and is solid green with the flowered border along the top edge. I used the rest of the bottom border to make the flap that folds over the top to close the bag. Any raw edges, such as along the top of the bag or on the edges of the flap closure, got a quick blanket stitch edging with Brown Sheep yarn and I made a chunky buttonhole with the cinnamon superwash yarn, too. (Didn't set out to use superwash but that was what I had on hand in a suitable color.)

Haven't decided on a button yet. I have a few chunky leather ones but I'm leaning towards a toggle made out of black walnut or the tip of a deer antler.

Only problem now is I'm hooked on this craft. It's fast and fun and there are so many bag designs or other useful things to make from these old wool sweaters. Heck, I still have a few sweaters from the '70s in the attic. Those stripes and patterns are calling to me -- gotta run!

Sunday, August 26, 2007

Flatlanders at the Birchmere! What could be better?

So we've been staying close to home lately. Hard enough to find a pet-sitter, much less someone willing to care for livestock, kwim? But early this spring DH suggested we see if the Flatlanders were going to be anywhere nearby this year. A quick search and, yes!, they were on the August calendar at the Birchmere in Alexandria, a close 150 miles away. I ordered tickets for the second show, Friday, August 24.

DS announced he would have a sleepover at Grandma's house and they could check on the chickens that evening. The sheep, llama and cats would be okay till we got home late that night and a dog-sitter was the last of our worries. So with everyone taken care of DH and I were able to leave around 10am with time to stop at the Eden Center as I wanted a few things from the vietnamese grocer and hoped to find some origami paper like another homeschooler had shown me she picked up there. Ended up eating a late lunch at one of the restaurants at Eden Center after shopping and heading over the Birchmere around 5:30pm.

They hand out line numbers starting at 5pm but, tho we could park at the front door, we were already 60 down by the time DH picked up the tickets at the will call window. A quick change of clothes and we were ready for the evening. It was kind of strange going in as we appeared to be on the younger end of the audience age bar. Since we're both over 40 now, it's usually the other way around. Talked to several people while we were waiting but didn't know a soul there. It was fun to browse the cd rack at the Birchmere's shop -- had enough variety it almost seemed like old times.

The Flatlanders were great as usual. Been going to see a range of live music for almost 35 years now and these guys routinely make the top 10 every time. It's amazing how consistently they deliver the goods. On top of the great regular part of the show, we had a treat as Bill Kirchen (of Commander Cody, and more, fame) was two tables down from us and sat in towards the end for several songs. Jenny Scheinman , accompanied by Tony Scherr on guitar, opened the show with an acoustic set we really enjoyed. Unfortunately everyone has to go home eventually so we did. No ringing ears as in years past but with lots of good music resonating through us.

Sunday, August 12, 2007

A new source for pocket change?

Here's DH with his hastily thrown together basket of garden produce. He was prepared to enter the individual vegetable categories at the county fair but hadn't really considered the real money-making possibilities of the special classes. At best a blue ribbon for a plate of 5 red-ripe tomatoes would net $3, but throw together a dozen or more different types of home garden crops and he claimed 12 bucks for third place.

And after watching my DMom win a first place in the farm-garden implement arrangement category last year, he decided he could do that, too, and won another 15 bucks for his first place entry (photo below) featuring his favorite old metal gathering dishpan.

Well, I thought he should have some competition so I put together an arrangement featuring an old straw hat and a few of my favorite (hand) tools. It took a respectable second place, thank you very much. And that was with a whole wealth of entries -- I was glad to see them all because the first year the category had set empty with none. Last year was the second year it was listed and DMom couldn't stand that no one had entered the year before so when I added the class to her entry form before submitting it to the fair office (not exactly "fair," I know) she came up with her first place "garden guy." It was sort of a scarecrow kind of arrangement with a barn fork for the face and torso, some plant material for the hair, etc. Maybe now folks will see the potential for fun with this category. And that will mean all kinds of ideas to steal for use here at home!