Thursday, February 23, 2012

How to make spring come early

It's easy if you know how.  Just knit a warm and cozy hat that you really want to wear.

In January I found a Cat Bordhi hat pattern with a Moebius brim and splendid wooly tendrils I couldn't forget.  And I needed a warm winter hat. So I started knitting my Arctic Anemone hat with some really, really soft, bulky superwash merino yarn beautifully dyed by Black Sheep Dyeworks

I finished the hat in time for a field trip DS and I were scheduled to make to Lexington on Feb. 14.  The weather report was pessimistic, promising sleet and ice, maybe snow.  But with my hat finished, I was ready to face it.   The morning did start out overcast but by mid-day we were walking around the grounds at VMI with our coats off and the sun shining brightly, warming us and making my hat superfluous.
 

This past weekend it snowed.  8 inches on Sunday!  I wore my hat all day.  By today all the snow had completely melted and the outdoor thermometer was registering 63ºF. at 5:30pm when I drove DS to his viola lesson.  I wore my hat anyway.  Drove with the window half-open so I wouldn't overheat...

Oh, well.  There's always next winter.  I'll be ready.

Monday, February 6, 2012

More dehydrated carrots

Two years ago I posted about buying 10 pounds of marked-down organic carrots and how I diced, blanched and dried them.  I even dried the peelings (but did not blanch) and used them when making stock or ground them to powder and used for seasoning blends.  I've continued to dry any extra carrots I have on hand.  They are very handy to toss into soup or rehydrate for a casserole.

Before Christmas I did a program for my Garden Club on garnishing.  Like most of our programs, it was a hands-on workshop so everyone brought their favorite sharp paring knife and went to town making carrot flowers, apple swans and more.  Garnishing is a lot of fun and especially nice to try when the garden is in full swing as you can just grab what you need and not worry about how many tomatoes you may ruin on the way to producing a perfect tomato tulip.  In the winter, the cost can add up.

To help contain the cost of the program, I planned to work with some vegetables we had from the winter garden.  Turnips and onions, both green and bulbing, make great garnishes and readily take up food coloring if you want to go that route.  Apples are another thing we keep in cold storage so I knew I'd have them available.  But I ended up buying a 25-pound bag of what's often labeled "organic juicing carrots" -- really big but still sweet and flavorful carrots.  They were perfect for cutting into garnishes and we've been eating the rest.

But they were beginning to sprout feathery greens and since I didn't want to lose the last 10 pounds or so, I determined to dry them.  This time I opted to scrub them rather than peeling and then shredded them in the food processor.  I spread them out on the papery lining because I didn't want the shreds slipping through the plastic mesh as they shrunk during drying.  I'll use them mainly for baking -- carrot cake or carrot-orange muffins are the first things that come to mind but I can also see using them in cornish pasties, meatloaf or spaghetti sauce and I'm wondering how they'd work in cha gio.

Saturday, February 4, 2012

Running late with the seed orders

We save seeds for many of our vegetables each year but we still end up buying about half of what we plant each year -- mostly in the form of seeds. Sometimes it's because we didn't make the effort to save what we'd need or didn't maintain plant spacing so saving "true" seed wasn't an option, but the main reason is because we always have a list of new varieties we want to try.

After years of Jackie Clay extolling the virtues of Hopi Pale Grey squash it finally made the top of our "must-try" list and Baker Creek Heirloom Seeds was the only place I could find it. So I placed an order for the winter squash and a few other seeds on our 2012 garden list.  Their response time to the order was excellent as I placed the order on Tuesday morning and the seeds arrived in Friday's mail.

It's already time to plant onion seeds and a few other things indoors here in zone 6** so I must get the other seed orders out this weekend if we want to stay on track for spring planting.  Most of what we still need will come from Southern Exposure Seed Exchange (just two counties away) but since they don't carry everything we want, I'll also be ordering from Pinetree and Richters and, if I can't resist the free shipping offer, Thompson & Morgan, too.
So who else is looking at seed catalogs and making lists or orders? How about seeding flats?  It really is that time of year...

**Note: Unsure of your planting zone? Check out the new-for-2012 interactive GIS-based USDA Plant Hardiness Zone Map.  It's a cool attempt to show more accurately "zones within a zone" where small pockets may exist within a geographic range.

Thursday, February 2, 2012

Preserving in a great Christmas present

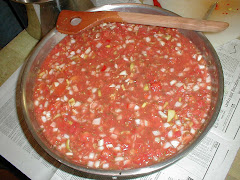
Yesterday I made marmalade in a maslin pan my mom gave me for Christmas.  It wasn't the first time I've used it since December but it was the first time I'd used it for it's intended purpose: preserving.

I'd already made several large batches of pudding and tapioca in it over the last few weeks. That's one of our favorite ways to use up the last half-gallon of milk left before we pick up the new week's share.  And the maslin pan's shape seems to contribute to the process by allowing me to heat the milk even faster than I can in the large heavy-bottomed pan I usually use.

But the citrus needed to be used and marmalade is great on its own and as an ingredient in food prep (on its own to glaze chicken, added to a little salsa for a good sauce for chicken or pork, sandwiched between cookies or gingerbread, heated slightly and drizzled over ice cream).  So this was my first opportunity to use the maslin pan as it was intended.

I used my standard marmalade recipe and started the process the night before when I put the chopped fruit pulp, thin-sliced peel and water in the pan, heated it to boiling and simmered for 5 minutes.  Then I put the lid on the pan and let it sit on the back of the stove till the next day.  So yesterday morning, I brought the fruit mixture back up to a boil and simmered it quickly till the peel was tender.  Then I measured the mixture and added 1 cup sugar for each cup of fruit.  The recipe I use comes from an old Ball Blue Book and is listed below but there are many marmalade variations available.

Once I add the sugar and stir to dissolve, I have to be prepared to devote my whole attention to the process for 30-40 minutes or until the mixture is brought to jelling temperature (8ºF. above the boiling temperature of water for your altitude or around 220ºF.)  I don't rely on the thermometer as much as I do testing the sheeting action and quickly chilling a few drops on a saucer to test for jelling.  Maybe I was just excited to use a cool new pan, but I thought the process went faster (timing was 28 minutes from start to jell) and while I couldn't walk out of the kitchen and I did manage to step away from the stove several times during the process without risking a boil over which has happened to me with other pans.

When it came time to put the marmalade in jars, I opted to use 23-ounce recycled applesauce jars with the plastisol-lined metal lids that feature a pop-up button seal.  This, of course, is NOT the recommended jar/lid type.  (Refer to the National Center for Home Food Preserving for approved canning information.)  Because I had doubled the recipe (again, NOT recommended) I ended up with 5 full jars and one three-quarters full which, upon cooling, went straight into the fridge for immediate use.  DH was already eyeing it this morning...

Orange-Lemon Marmalade
[Adapted from Ball Blue Book, year unknown]

2 cups thinly sliced orange peel
1 quart chopped orange pulp
1 cup thinly sliced lemon (including peel)
6 cups water
Sugar, as needed

Combine orange peel, orange pulp, lemon and water in a large preserving pan. Bring to a boil, simmer 5 minutes. Cover and let stand 12 to 18 hours.

Bring to a rapid boil and cook over high heat till peel is tender, about 30 minutes. Measure mixture and add 1 cup of sugar for each cup of mixture.

Stir well to dissolve sugar. Bring to a boil over high heat, stirring frequently, until mixture reaches jellying point, about 30-40 minutes. Add 1/2 teaspoon butter to reduce foaming, if desired, and skim any foam from surface of mixture as it develops.

Pour hot into prepared jars, leaving 1/4" head space. Process 10 minutes in boiling water bath (see National Center for Home Food Preservation for detailed BWB directions). Yield: about 5 half-pints.

My notes: I added a lime to the mix because I had one and I like lime in marmalade. As long as I keep the ratio of fruit to liquid, then to sugar, the same as listed above, I've found I can use whatever citrus I have on hand, even grapefruit. And, when I have it available, pineapple juice is an excellent sub for some of the water called for. It adds a piquant tropical touch to the marmalade that's very tasty.
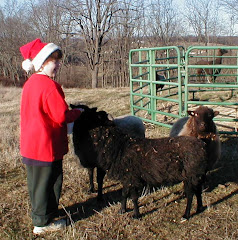