Showing posts with label sewing. Show all posts

Wednesday, January 11, 2012

A yard is enough

Sometimes I buy a yard of a fabric I just can't pass by.  It's only a yard and I can find a way to use it up, right?  Well, yes, most of the time. (And that's what I tell DH...)  But sometimes I just can't find the right project to commit it to.  In the case of the yard of cotton I used for my latest quilting project, the design was too big to cut up neatly and I couldn't bring myself to cut it up in small pieces to utilize it for just the bright colors -- I wanted a project that would take advantage of the design and the colors.  I really liked that yard.

Then when I was searching for just the right design for a baby quilt intended as a gift for a friend's adoption, I came across a book at the library, Joan Ford's Scrap Therapy: Cut the scraps and a project she calls "Once Upon a Scrap".  As soon as I saw the picture, I knew I wanted to make that quilt and I knew exactly which piece of fabric I wanted to use for the three main sections. 

As often happens once I decide on a "dream project" (one that incorporates and builds off favorite fabric, fiber, color, and/or design), the other bits came together without much effort.  I used odd bits of cottons I had on hand to cut out almost all of the 180 2-inch squares required for the two patchwork sections.  It was a lot of fun searching out blues, greens, reds, yellows in my fabric stash.  And I even found a couple of orange prints to use.

Because my mind usually tries to organize things I'm working with into patterns even when I don't want it to, I laid the stacks of colorful squares out on the ironing board and began to play with their layout.  I wanted to keep the patchwork section colorful and free without a discernible color placement order.  To aid that I purposely cut no more than 10 or 12 squares of any fabric so I wouldn't be able to fall back on a coordinated presentation.
I did end up buying a black, horse shoe-patterned fat quarter that jumped out at me on a trip to the local fabric store where I also found the perfect mottled blue cotton used for one of the borders and the soft flannel print used for the backing.  (And what I actually went there to purchase!)  Also, I used a wide green double-fold bias tape for the binding because I think it wears better than the straight-cut quilting cotton which the directions called for and while my best wish for this quilt is that it's worn to tatters by the little one it's intended for, I don't want it to be in tatters due to shoddy fabric or workmanship!
The cotton batting recommended quilting or tying at least every 4" or so and since I used flannel for the backing I planned to hand-quilt.  (I don't machine-quilt when using flannel for backing as I always have trouble with it "ruffling". YMMV)  The simple design encouraged me to just "quilt in the ditch" but the large landscape sections and the long blue border required more coverage. 

DH suggested I do a simple block pattern across those areas but when I attempted that, the white quilting thread didn't look right to me.  Usually I love a simple, primitive quilted design like that but it seemed to distract from the colorful quilt.  The fabric I couldn't bring myself to cut was instead cut up by little white stitches.  Well, not that little -- I average 6-8 stitches to the inch when quilting.  My grandmother, who hand-quilted all her work, considered anything less than 10-12 stitches to the inch to be a hazard as, in her words, "you could get your toenail caught in stitches that big!"

So this quilt features hand-quilting and tying.  I used embroidery floss, blue for the border and green for the design print, to tie the layers together that were deemed not suited to quilting.  DH asked me why I didn't consider hand-quilting with colored thread but I couldn't bring myself to use anything except my usual white cotton quilting thread for the hand-quilting.  Traditions are hard to break, you know?

Tuesday, January 3, 2012

Last year it was felted hearts,

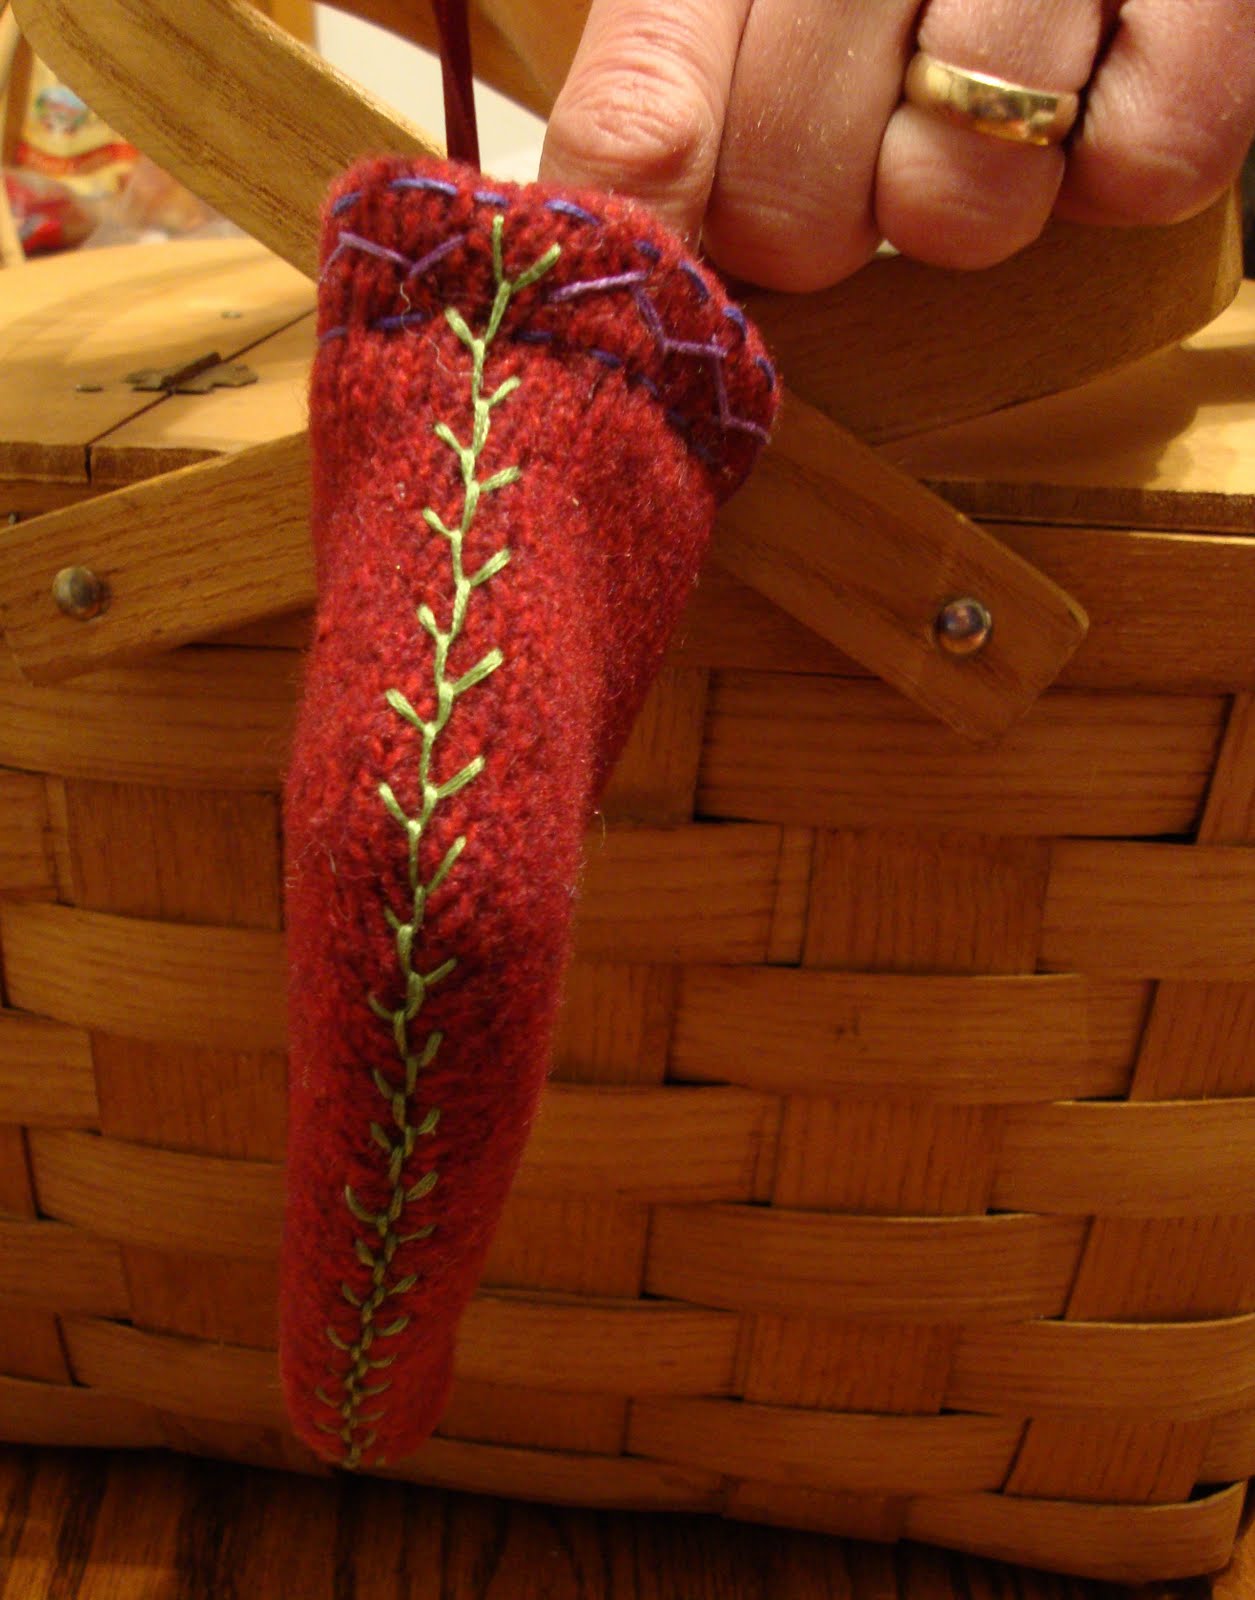
This year it's stockings -- elvish-styled stockings.

I don't know if it was DS's insistence that I read all four of Paolini's Inheritance Cycle books in late November or just one of those things, but when I sat down to make an ornament for my guild's annual exchange an elf bootie is what I kept coming back to no matter how many other ideas I tossed around. That's pretty much the same thing that happened last year when I made Grinch-styled hearts, from the same felted wool sweater...


Used a stocking template I found in a book, Sweater Renewal by Sharon Franco Rothschild, but have since run across Rothschild's original template in a November 2009 post on the Etsy blog. You can find her version and a link to a pdf including the template at this link.

Even though I think I was channeling elves this year instead of Grinch hearts, I couldn't seem to let go of the color combos that still remind me a bit of Dr. Seuss and the Grinch...


So far I've made three, one for the guild ornament exchange, one for the local homeschool support group exchange and one for my aunt.  Each is a little different as I played with the embroidery stitches but they all share the same overall shape and the feather-stitching (plus beads down the front) following the seam lines.  I used a combination of regular DMC embroidery floss and pearl cottons.

And perhaps it's more than just Paolini's books influencing the elfish choice this year. It also could be I was influenced by these little guys who live in my corner china press. They were my mom's when I was little and she gave them to me a few years ago -- I still like them.

They were always so cheerful-looking when I'd spot them under one of her flower arrangements or just hanging out on a shelf somewhere. I couldn't pass them up when she offered.

Saturday, December 3, 2011

It's started.

There are a lot of things I should be doing.  But earlier this week I spent some time crafting -- working on a Christmas tree-themed gift for a swap on Chickens in the Road.

Once again my camera's failing me on color translation but, trust me, I think I'm channeling Dr. Seuss this year.  The green in the green-and-red print fabric reminds me of the Osage-orange globes my mom gave me this fall. (Osage orange trees are rare around here so naturally I want one...)

I went searching for handmade gift ideas and quickly found the appliqued tea towel pattern.  From there it was easy to decide on the knitted dishcloth I found through Ravelry and then, when I had a few scraps of the printed fabrics leftover, I found the patchwork ornaments through a fun November challenge titled "No Ugly Ornaments".  I think I'm going to try #19, the origami dress ornaments next.

Today it's back to regular chores and I need to put up some more taco soup as DH and DS finished the last jar in November and are demanding a refill.  But 'tis the season and all that, so I'll be back with another project to show off share shortly.

Thursday, March 17, 2011

Baby quilt with embroidery -- finished!

And before the baby's arrived, too.  That's a new record.

I took the quilt block I embroidered last month and turned it into the center block for a 52"-square baby blanket.  Backed with flannel and lined with a piece of white sheeting, it reminds me of two my grandmother made.   They had tractors and farm animals and nursery rhyme scenes embroidered in the squares.  And they wore out from my brother, my sister and I dragging them around wherever we went.

My embroidery wasn't as ambitious.  The fun duckling with balloons in the center block was a full design, the other four embroidered blocks were done to supplement and tie the overall design together.  So I chose four simple shapes from Doodle Stitching: Fresh & Fun Embroidery for Beginners -- I found a dragonfly, butterfly and duckling that echoed the printed duck fabric's designs and then added a balloon for the fourth block, lifted from the larger duckling design in the center block.

When I drew out the quilt top on graph paper, I realized I didn't want to simply surround the center block with straight nine-patch blocks.  That seemed sort of blah to me and, somehow, seemed to take away from my center block, too. So I used four nine-patch blocks with the plain, yet embroidered center squares and added those other four with the three long blocks of color in each.  I know where that idea came from.  Just prior to drawing out the overall design, I was reading a thread on Chickens in the Road and saw a photo of a just-completed baby quilt that I couldn't get out of my mind.

This blanket is meant for regular use.  To cover a sleeping baby, to spread on a floor to provide a toddler's play space or just to be dragged around by a growing child.  It should go through the washer and dryer without a problem.  And I hope it wears out just like the ones my grandmother made.  I think that's what happens to all well-loved baby blankets and so it's what I wish for this one.

Thursday, February 17, 2011

Change of plans - cooperative quilting

Ever have a day where it's like you didn't get the memo?

The quilt block we made at Saturday's fiber guild workshop is an applique block made with Do Sew® and called Really, Really Broken Dishes by Kim Montagnese.   Because of the way you make the block, cut it into quarters and then trade quarters with other quilters before re-assembling, the blocks are integrated, sharing fabrics and pattern though each is made by a different quilter. So the blocks we made Saturday will become the quilt for our expectant member.
Makes more sense to me than combining disparate blocks into a quilt so the embroidered block I made last week is now the center block for a small quilt (about 3x4-feet) which I'm putting together as a baby gift.  With luck I'll even get it done before the baby arrives!

Saturday's Really, Really Broken Dishes block was very easy to make -- circles without fear of piecing curves (I love that part especially!) and is a great way to mix up colors in a modern-looking quilt pattern.  You start with a square of fabric that will serve as the block background.  Sew a piece of Do Sew to the right-side of the piece that will be the largest circle on the background.  Then cut away the Do Sew, being careful not to cut the other circles you're drawn on it.

I've never worked with Do Sew before but can't wait to use it for other sewing.  When you spritz Do Sew with water and then press with a hot iron, the Do Sew draws up just a bit, letting you easily fold the edge under as you press.  No burning your fingertips or resorting to a pin to try to fold over the edge as you press.

The largest circle is sewn to the background (we used sewing machines set for a blind hemstitch but you could also do that part by hand), then the block is flipped over and you carefully cut away the background fabric from within the stitched circle.  This keeps the block from becoming too thick with the multiple layers and also gives you a circle of fabric just a little bigger than you need for the next circle.  So you trade that circle with another block maker and then you each have a new fabric to sew Do Sew to, using a slightly smaller circle pattern drawn out on the Do Sew.  And spritz, press and sew to center of the larger circle on your block.

Follow the same process for one more smaller circle (trading fabric again) and press the completed square.  Then take a deep breath, pull out your rotary cutter or scissors and cut the square into four even quarters.  Trade three of the quarters with other block makers and seam them back together into a square.  Take a look at what you've made and say "Wow! That's pretty neat!"  Because it is.

Here are photos of my block in the making and the photo above is of all the blocks laid out for the final assembly. (My block, after trading off 3 quarters and re-assembling, is in the lower left. Can you spot my other quarters now assembled into other blocks?)


The same designer, Montagnese, also has a block called Really, Really Mended Hearts that I want to try next.  It's a similar block but the appliques are hearts not circles.  Then, instead of dividing in quarters with a vertical and horizontal cut through the square, you make three or maybe four vertical cuts (perhaps even cutting wedge-shapes rather than, say, perfect thirds) and re-assemble.  Trading sections encouraged, when working in a group setting, though you can get the same effect (but probably without the comaraderie) by cutting, sewing and mixing blocks you make all by yourself.

Monday, January 10, 2011

More felted fleece-lined mittens -- for Christmas

Christmas was two weeks ago, I know.  But DH insisted I make felted fleece-lined mittens for his sister and brother-in-law after seeing the first pair.  Now, where they live averages less than 20 nights a year with temps at or below freezing and no snow other than a rare dusting every few years so I'm not sure they'll get much use out of felted mittens but, hey, I heard on the news last week that they were experiencing a freeze with the nighttime temperature hitting 28ยบ -- mittens may be just the thing they need!  And I had a lot of fun making these.  Plus, finally found a use for a pair of those leather buttons I can't resist stashing away.

Thursday, January 6, 2011

Felted fleece-lined mittens for Christmas

I've had the hand-drawn pattern for these mittens for awhile but finally got around to making a pair late last month -- Christmas morning, in fact.  Actually, I cut out the pieces on Christmas Eve so I wasn't as late as I could have been in making this present.  But I was tired and put off the sewing part till after DS (and DH and I) checked out our stockings early Christmas morning.  Then I had to rush because we were due at my mom's for our usual family gathering complete with a late-morning Christmas breakfast and opening lots of packages piled high under the tree.

With just three pattern pieces plus cuffs, it only took a turn on the sewing machine for the outer mitten (cut from two wool sweaters previously felted in the wringer washer) with a repeat for the fleece lining cut from yardage, then sewing the cuffs to the lining and turning the wool mittens right-side out and the fleece-lining wrong-side out so they fit together correctly -- they were almost finished.  A quick search through my buttons produced a couple suitable for attaching to the rolled cuffs so the mittens and their lining stay connected and I was done. 
Now I know what I'll be making for a few presents next Christmas...  Here's a link to the pattern I started with in case you're tempted to make your own.  If you think you'd like them, don't put off as long as I did before trying a pair -- they really are very easy and even fun to make.  I'm making a pair for myself right now.

Saturday, December 11, 2010

More ornaments


I'm still playing with felted hearts and this is the one I made yesterday for today's guild meeting and its annual ornament exchange.   Process was the same as the one I worked on earlier this week but I went with an additional appliqued heart in a darker green.  I think it brings out the other green a little more and it fulfills the quote -- "(his) small heart grew 3 sizes that day."

These paper and fabric ornaments came to me through the Chickens in the Road ornament exchange from Kelly F.  Who wouldn't love to open a package and find handmade Christmas ornaments?

Thursday, December 9, 2010

(his) small heart grew three sizes that day

 
When I wanted to make felted Christmas ornaments this year, hearts were what I thought of.  And as soon as I started folding paper to cut out a heart pattern, I remembered the line from one of my favorite Christmas videos -- "Well, in Whoville they say that the Grinch's small heart grew three sizes that day."  From there it was easy to see what I was going to make.


For the fabrics, I chose a heathery red wool sweater and a poison green wool blazer I'd fulled in the wringer washer.  I wanted to layer another heart in order to fulfill the quote's prophecy but couldn't come up with a third color from my stash that worked and refused to change the first two.  (Sometimes my muse is very stubborn.)  So the photo above shows my first attempt.  Unfortunately no matter how I changed the lighting I couldn't capture the true nature of the green.


Compared to choosing the fabrics, the process of making the ornament was easy.  I pressed a medium-weight iron-on interfacing to the wrong-side of the two wools before cutting out two large red and one small green heart shapes.  Then, because the white stabilizer showed along the edges, I tore off a thin piece along the borders of each before attaching them.  The blanket stitching affixing the green heart to one of the red hearts as well as the other embroidery and beading were finished before I blanket-stitched the two red hearts together.  For a hanger, I whip-stitched a loop of ribbon between the two layers of red wool.  Eh, voilร , the first heart was done.  More to follow.

Monday, October 11, 2010

Theuraputic quilting

This is a fidget quilt.  It's small (this one is 20x16-inches), intended to be held on the lap of an Alzheimer patient.  With a variety of fabric textures, beading, buttons and trims it can help provide a sort of calm for nervous plucking and stroking fingers.  I'd never heard of the idea till it was presented for this year's annual charity project at my fiber guild.  Our meetings are held in space kindly provided by a Charlottesville retirement community which happens to have an Alzheimer unit.  So our fidget quilts didn't have far to travel when we turned in the completed quilts at this month's meeting.

Everyone participating in the charity project came up with a unique block.  One member opted for a completely knitted quilt, using a variety of brightly-colored yarns and knitting patterns to produce a color-block of multi-textured surfaces.  Another member sewed her quilt but included gorgeous fringe trims that made me want to run my fingers through them even when viewed from across the room.  Zippers, pockets, woven and braided trims, beads and ribbons rippled across the completed quilts.  Corduroy, velvet, flannel, felted wools, and damask appeared on some of the blocks.  Other than size, the ability to stand up to commercial laundering was the only other constant for the quilts.

I recycled three fabrics from my stash for the basic block.  One, a white linen with bright blue polka dots, was from a set of kitchen curtains that came in a box at an estate auction.  Another, a blue flower print fabric was a woven cotton remnant from the same auction but out of a different box.  It looked like it had been cut from the bottom of a housedress or apron.  The backing for the quilt was a solid white woven wool-linen blend with a small raised fleur-de-lis design.  I used it wrong-side out as the texture was most prominent on that side.  (It came from the now defunct Stillwater Worsted Mills outlet in Craigsville --I miss that place!)

Laying out the fabric on my cutting board helped me decide on a color arrangement I found pleasing.  I used the suggested size, 20x20-inches, as a guideline keeping in mind I intended to use 3-inch polyester satin blanket binding as the edge finish for the block.   I don't know why I was so drawn to the combination of these fabrics but I'd decided to use them as soon as I heard of the planned project. Call it kismet -- certainly wasn't because I had no other fabrics to choose from...

Next up came the choice of trims.  I found that much harder.  Several things I wanted to use, particularly some lace trims, didn't seem able to hold up to long-term fingering.  I've made a few fabric books for toddlers over the years and sometimes the trims and textures I most want to include are the least likely to withstand small fingers tugging and stroking them.  I figured the same problems would occur with the fidget quilt.

 So I went with easily secured items like buttons and appliques with only three narrow polyester ribbons holding a bead each dangling from the surface.  When it came to the last section, I knew I wanted to use a piece cut from a striped wool sweater I'd felted.  I chose to cut a mitten shaped to my hand and only wish I could have attached a full mitten capable of having a hand slipped inside as DH suggested. But I'd already sewn it to the fabric when he offered the suggestion.  Since the project was due the next day, I didn't feel up to a rush job of removing and then figuring out the mechanics of the switch and re-applying.

I always have some sort of handwork project close by because otherwise I fidget when watching a video, waiting for appointments or to pick up DS at his activities.  In this case, the fidget quilt while in my hands served to quiet someone before it ever made it to it's intended recipient.  I hope whoever uses it enjoys it as much as I did.

Wednesday, March 31, 2010

Little girls' skirts


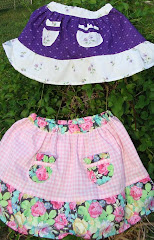
My mother's been clearing out some of her fabric stash over the last few months and while much of the cotton fabric is going into patchwork quilts she and my cousin are busily cutting and sewing, I used a few pieces to make adorable fun skirts for my niece's two young daughters. The pattern, called The Market Skirt, was as simple as could be and came from an online tutorial I found on the Dana-made-it.com site.

The red skirt was made to the specs included in the tutorial but the blue skirt, below, was for the oldest girl and required re-sizing. It wasn't difficult and the pattern is very forgiving anyway. I haven't seen pictures of the girls in their skirts yet but am told they couldn't stop twirling around and were unwilling to take them off so it sounds like I need to go back to Mom's stash and pull out some pink and purple fabrics to make the girls skirts in their favorite colors.

Saturday, January 30, 2010

Another snow day! Finally, a chance to sew...

12°F. at noon and 4 inches of snow on the ground and still falling steadily. A beautiful old Singer 301A in place on top of my sewing machine cabinet. I am happy, happy, happy! DH, not so much.

We were expecting the snow but the forecast keeps being revised for more snow and colder temps. Supposed to be a high of 20°F. today but I don't think it's going to make it. Total accumulation predicted to be 7-12 inches. Hmm, maybe that one will be on target.

For me, I'm a very happy camper here in my work room which also happens to be the room with the woodstove. Sometimes I whine because of the heat but not today! The old Pfaff 230 I've used for years is down for repair. The machine was originally my grandmother's. She ordered it from Germany soon after WWII and after a wait of a year or so it arrived and has been going strong almost continuously since then. It should be back up and running shortly but in the meantime I want to sew!

So my mom, as always, saved the day by offering me one of her machines. This one, a Singer 301A, came with it's grasscloth-covered case and boxes of attachments -- more than I can readily identify. Mom's not much help on id as this is one of her "rescue machines" she picked up at auction.The woman hates to think of a sturdy (near-) working sewing machine being trashed which, very sad to say, is what often happens if the auctioneer can't get a bid. And not many people seem to want the old machines unless it's a Featherweight and easily recognizable as a "collectible." So for $5 or sometimes up to $15 if it has a cabinet, she buys them and puts them in her basement sewing room. When my cousin, Hope, comes to visit, they pull a couple machines out and set up a piecing party down there. (Hope makes beautiful quilts in the time it takes many people to make a set of placemats.) Mom works on her 1980s-era Pfaff, Hope and anyone else who wants to work on a quilt choose from the extras.

So when she offered me the Singer, I knew it was in good working condition and since it's an early portable I could bring it home without asking DH to help load/unload. And now I'm able to sew again! After being without a machine other than my serger (after *gasp* 7 years I have to admit I'm still only using it for straight seaming and have yet to change thread -- thank goodness for those large cones!) I'm even happy to be hemming DS's jeans and mending towels. But today I AM going to do a little more, more fun, that is. I started by making a baby bib pattern (couldn't readily find one to hand or online and didn't want to spend time searching!) and putting together a little bib to tuck in a swap package I have ready to mail. It's a book swap so the bib is something extra I wanted to include because I just found out the recipient is expecting a baby boy. Had thought I'd knit something but now that I have a working sewing machine again, everything MUST be sewn, kwim?

Drafting the bib wasn't too hard. I used a sheet of 1-inch square graph paper (from an easel pad) and drew out the pattern after estimating the size and attempting to shape it by viewing a few pics of DS wearing a bib of his I'd always liked. (Meaning one big enough to catch almost everything, even covering the shoulders.) I did one side, then folded the paper in half and cut both sides at once. I'm no good at symmetry.Using an old pair of jeans, I cut the front of the bib. To take advantage of the best part of the denim (these were discarded jeans, remember -- I'm just happy there was a "best part") I laid the pattern over the triple seam, placing it down the front middle. Then I found a piece of cotton print that looked suitable. Little yellow chicks with kites and butterfly nets are middle-of-the-road baby stuff -- even tho we THINK the baby will be a boy there's always a chance it won't be.

To hedge my bets further, I cut out a couple chicks from the scrap of fabric cut from the bib's neck area and appliqued them on the front and back of the denim fabric. I was going to put the little guy on the front but decided he fit better on the back, above the hook-and-loop fastener.

And there you have it. In less than an hour start-to-finish an "I want to sew now" project that helped me stave off the non-sewing d.t.'s. The end result is kindly modeled by DS's old teddy, Kissy. Now, excuse me, as I have to get started on another sewing project. Stat.