Tuesday, December 30, 2008

Invalid Cookery

Not many cookbooks these days include chapters on cooking for invalids but if you pull out older ones, especially from the early 20th century, they often have a chapter on preparing soothing draughts such as barley water or nourishing dishes like blancmange or some type of gruel. Sound delicious, huh? Here's a link to an online cookbook circa 1902 with a chapter on the subject.

I'm thinking of this as I'm home from a short hospital stay during which I shared a room with a fellow surgical patient who will be on an all-liquid diet for 21 days, clear liquids* only for the first week. It got me considering her options and my own. My diet isn't restrictive but is still limited by how I'm feeling; I couldn't tolerate a steak and loaded baked potato right now if you paid me.

Some meal planning guidelines for invalids come easy. If the doctor recommends clear liquids or no citrus fruits that's clear cut but if you're in charge of setting the menu without medical directives keep these things in mind. Invalid meals should be healthy, easy to digest, easy to swallow or chew as necessary, served at the right temperature for the food and/or the patient's preference.** Easy on the pocketbook, good for the whole family (meaning fewer separate dishes to prepare) and quick to prepare are things worth considering, too. Remember comfort foods may be as much about presentation as ingredients. Toast cut into triangles or cookie cutter shapes, applesauce sprinkled with cinnamon sugar, orange slices arranged in a sunburst on a small plate -- something mom used to make for them when they were small.

I have at least one cookbook devoted to invalid cookery and it's from modern times: Laurel's Kitchen Caring: whole food recipes for everyday home caregiving by Laurel Robertson of Laurel's Kitchen: a handbook for vegetarian cookery and nutrition
fame. Robertson includes simple recipes like Ginger Tea which she recommends for relief of mild stomachache or headache, or for nausea, colds or fever. It's a standby at out house for mild stomach problems.

Ginger Tea

1 quart water
2" nub of peeled and thinly sliced gingerroot

Drop gingerroot into boiling water and simmer for 10 minutes. Strain and serve plain or with honey. Cool and keep extra in a jar in the fridge for a few days. Serve cold or reheat as needed.

-----

This one's in Robertson's book, too, but my mom's made this blend as a sore throat or light cough relief for years.

Lemon and Honey

Squeeze a lemon and stir in honey in an approximate equal amount, to taste; then add boiling water to make a cup. Sip to soothe throat. Add a shot of whiskey to an adult's cup for a hot toddy.

-----
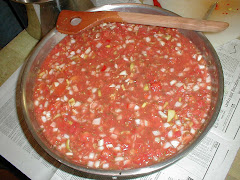
For heartier fare, rice is a good choice. It can be served bland with just salt, pepper and maybe a pat of butter or you can tempt appetites with Robertson's Green Rice Casserole:

1 small bunch green onions or 1 small yellow onion, chopped
1 clove garlic
vegetable oil
2-1/2 cups cooked brown rice
1/3 cup chopped parsley
1/2 cup grated cheese (try swiss, mild cheddar, or Monterey jack)
2 eggs, lightly beaten
2 cups milk
3/4 to 1 teaspoon salt

Preheat oven to 350F.

Saute garlic and onion in oil until soft. Crush garlic with fork. Combine with remaining ingredients. Pour mixture into greased 2-quart casserole. Bake about 45 minutes, until set. Cool slightly if you want to slice it into squares.

Tailor it to diet needs--

Lower fat: Cut cheese in half, use skim milk. Sub 4 egg whites for whole eggs.
Vegan: Omit cheese, milk and eggs. Add plenty of sauteed mushrooms and chopped grilled bell peppers. Lighter dish -- delicious.
Bland, but good: Leave out sauteed onion and garlic, cosider substituting a preferred salt-free seasoning blend such as Mrs. Dash or Spike for salt.

-----
Robertson even includes a recipe for barley water. It's suggested for anyone with weakness, irritated digestive tract or sore throat.

Barley Tea

2 quarts boiling water
1/2 cup barley, whole-grain "naked" or hulled, but NOT pearl
3 cardamom pods (or 1/4 teaspoon ground cardamom)

Boil water in large saucepan. Wash barley in cold water and drain. Put it in boiling water and simmer actively about 30 minutes, until water is a deep pink and cloudy. Either strain it or let stand and then pour off the clear liquid. If desired you can add another quart of water to the barley and boil again, combining the liquid from both batches. You should end up with about 8 cups of barley tea but you can make it stronger or dilute as desired.

With mortar and pestle, finely grind seeds from cardamom pods and add to hot tea. Serve hot with honey or sugar. May store extra in refrigerator to reheat over the next couple of days as needed.

For more kitchen tips check out Tammy's Kitchen Tip Tuesday posts.

-----
*The test is, if you put it in a glass, you can see your hand through the glass. Water, weak black tea, weak herbal teas like chamomile or raspberry leaf, mild clear broth, and diluted apple juice can be appropriate.

**I can still remember ending up in the hospital overnight after a bicycle wreck as a young teen. No food since the previous morning and I thought I was starving. My mouth was filled stitches so I needed something soft or, even better, liquid and not too hot temperature-wise. Instead I was served a steaming (truly!) bowl of oatmeal, thin toast and canned orange juice. I couldn't eat any of it. The toast was dry and had to be chewed thoroughly, the juice was too acidic and by the time the oatmeal had cooled enough to try, the tray had been removed. I spent the next week eating all my food thru a straw. That was one of the few times I would have appreciated something like Carnation Instant Breakfast drink...

Sunday, December 28, 2008

Out of sight, out of mind?

I feel like Dr. Zeus' Whos down in Whoville. So many things have kept my "shouts" from being heard lately. I was optimistic in mid-October that I could get on with our usual winter activities but we didn't get a hard freeze till the very end of October so I kept canning beans (over 150 quarts put up), tomatoes in several forms (salsa, whole tomatoes, and juice to name the main ones) and those pears! We went back to the still-loaded tree with a 15-foot ladder in late October and DH picked three more bushels. Some I wrapped in paper and the rest we spread out to ripen then dried or ate in all their oh-so-sweet juicy glory. The last of the paper-wrapped ones kept till the week before Christmas -- still tasted great, were extremely juicy but the skins had begun to toughen. I will definitely wrap some the next time we have such a bumper crop. I managed to write a few posts off and on during Novemeber and early December but they're stored away as document files till I can get photos sorted and really just TIME to put them up.

Christmas came and went in a blur. I made a few gifts this year but not as many as I'd planned so I've started on next year's in an attempt to spread the work over as many months as possible. I cast-on this yarn Christmas night in order to start a simple garter-stitch hat with a rolled brim for one of DS's cousins. To go with the hat, I'm planning to make a pair of felted mittens trimmed with the same yarn using the fulled shetland sweater showing underneath the skein. The cousin is in the fast-growing age range so I'll wait till closer to next Christmas before cutting out the mittens. The yarn came from GardenPartyFibers.com several years ago but I've lost the label to tell me the name of the colorway. It's very soft, probably merino, and the colors blended together well in the sample I knitted.

One thing I did make this year was knitted cotton dishcloths. I made variations of the two styles shown in the photos below. They're very fast to knit and I can remember the patterns without having to refer to a printout. Along with some handmilled soap or, when short on time or inclination, liquid soap from someplace like Bath & Bodyworks, they made a thoughtful gift that was quick to put together.

Tho I've used the pattern often over the past five years or so I noticed that the pattern for the blue-and-white dishcloth was printed on the yarn's label and it's also listed in Mason-Dixon Knitting as a ballband dishcloth and can be found on-line under other names such as textured slipstitch dishcloth. The other dishcloths are diagonally-knit and the pattern is so simple. It can be found all over the place including in one of my posts from earlier this year.

For the my fiber guild's gift exchange I made a paper star (sometimes called a Polish Star) just like the ones my mother taught me to make as a kid. In exchange I received two inkle-woven chenille ornaments with tassels. They're too lovely to pack away till next Christmas so I'm going to hang them in my workroom. Wish I had a picture but no time tonight. One of those things that have kept me from posting regularly requires surgery scheduled for tomorrow so I'm off to pack for an expected short hospital stay and have a last drink of water before the no food-no drinks rule kicks in at midnight. On the positive side, I'm looking forward to downtime during recovery as I may be able to catch up on some knitting and posting.

Tuesday, October 14, 2008

Back to rug hooking

The garden isn't finished for the year yet. Far from it, really. DH has lettuce, spinach, swiss chard, radishes, turnips, green cabbage, and more beets coming along nicely. He picked a dishpan of green beans this morning and the tomatoes are still producing so we'll be putting up salsa tomorrow and again at the weekend, I expect. But things have slowed down enough that I can start thinking about other projects again.

So after going to a not-to-be-missed semi-annual church rummage sale last weekend, I have several pieces of 100% wool clothing ready to be ripped apart at the seams. To be honest, I hate this part and not just because it can be tedious work. The clothes are often in good condition and it seems a shame to tear them up but then I remember that this is an excellent way to recycle styles that no one wanted. The church runs a community clothes closet and the money from the rummage sale supports that effort. More importantly for my conscience, however, is the fact that the clothes were passed over by the folks who make use of the clothes closet. Makes me feel less guilty for cutting them into strips. The weekend's haul was especially nice as I found woolens in colors besides the more typical grey, black, and tan. I can always overdye if I need a special color but I love having ready-to-use strips, too. It's like having a box of beautiful yarns -- so much fun to look at and the design ideas really start to flow when I look at them all.

One project I'm ready to tackle this fall will be a panel for the top of a footstool. It's about 18x24-inches and could use an overhaul. I recovered it over 15 years ago but Holly-dog has since managed to chew all four corners. And just the other day, DS went to move it and said something poked him along one side. Yep, that would be the heavy-duty staples I used to secure the seam... Time to reupholster. I haven't decided on a design yet but I really want to include a bit of the lovely lavender I found at the rummage sale. For some reason I keep coming back to a tropical fish drawing DS made for the county fair several years ago. May have to adapt it for this project.

Sage House Studio's Rug Hooking Tips and Techniques page gives a quick overview of preparing wool for hooking as well as tips on dyeing. The site is also loaded with cute patterns and pictures of finished rugs, door and window toppers, and pillows.

Tuesday, September 23, 2008

Pear Honey

At today's monthly Garden Club meeting, I mentioned the pears we'd picked at the start of September and one of the members asked if I ever make Pear Honey as it was her sister's favorite type of preserves. Yes, we love it, too!

I use the recipe from Helen Witty's "Fancy Pantry" (sadly OOP but one of my favorite cookbooks) and make it every year I pick pears. The syrupy preserve is what Witty describes as "spoon sweets." We like it spread on toast or a hot biscuit and it tastes wonderful warmed and poured over waffles. Pancakes would work, too, but there's something about the thick sweetness that cries out for a crisp waffle. YMMV And a few spoonfuls over ice cream, vanilla pudding or a slice of pound cake make a company-worthy dessert out of something plain.

It doesn't take a lot of effort once you've pared, quartered and cored the pears so give it a try if you have a few pounds of fragrant, ripe but not soft, pears on hand. Sometimes I vary Witty's recipe by adding a can of crushed pineapple along with the pears. It gives the honey an additional tang but does dot it with "pineapple lumps" instead of it being smooth in appearance.

Pear Honey

4 pounds pears
water, as needed
3 tablespoons fresh lemon juice
zest of 1 lemon, grated
6 cups sugar

Peel and quarter pears, removing core. Dip them into a bowl of cold water to hold till all are ready.

Combine 6 cups water with the lemon juice in a large pan. Shred or grate pear sections; add the shreds to the lemon water. May use food processor to shred pears, if desired.

Combine the grated lemon zest with about a quart of water in another saucepan and bring to a boil. Simmer 5 minutes, drain zest and add to pear mixture.

Bring pears to a boil over medium-high heat. Gradually stir in sugar; return the mixture to a boil. Adjust the heat and simmer the mixture, uncovered, stirring it from time to time, until the shreds of fruit are clear and the syrup has thickened, about 1 hour.

Watch carefully towards the end of cooking and stir often to prevent burning. (I use a flame tamer on my gas stove.) The pear honey is thick enough when a small spoonful placed on a chilled saucer thickens to the consistency of a soft preserve, not a stiff jam, when it is refrigerated for a few minutes. To prevent overcooking, set the pan off the heat while testing.

Ladle hot pear honey into pint or half-pint jars, leaving 1/4-inch headspace. Seal and process in boiling water bath canner for 15 minutes (either size jar).

If you've never canned before check out the latest Ball Blue Book of Preserving or the USDA-funded website, National Center for Home Food Preserving, for detailed directions.

For cooking tips, check out Kitchen Tip Tuesdays at Tammy's Recipes.

Sunday, September 21, 2008

More produce to process

The pears we picked at the beginning of September are ripening. I spread them out in a single layer on some sheets of cardboard in an outbuilding at my mom's and everytime I go to her house I check their status. Have been bringing a few pounds home each trip and the dehydrator's been running every day as I dry cored, quartered but unpeeled pears. I really like doing pears this way as the worst part for me is dealing with the peeling on a pear. The dried pears make a sweet snack in winter right out of the jar. We pack a lunch for the homeschool co-op we participate in and dried pears, nectarines or peaches are perfect to throw in the lunch bag for the three of us.

For helping a friend stack hay for an hour or two on Friday DH received a bushel of freestone peaches. Those I'm dipping in boiling water to skin, halving and pitting them and stacking zip bags in the freezer. They make great additions to yogurt fruit smoothies -- one of our favorite quick breakfast fixes. If I have too many for the freezer, I think I'll make peach preserves. Last winter we ran out of the jars I put up a couple of years ago. Will make a nice change from the rhubarb-strawberry preserves put up this spring.

DH and I picked three bushels of apples on Friday afternoon and turned about half a bushel into fresh applesauce that evening. We gave a bucketful of apples to my mom for fried apples and the rest will keep for a while so I'll work on making more applesauce over the next couple of weeks. The apples came from a friend who has eight overgrown trees in her side yard. I was glad to get them as our old apple tree came down in a windstorm this spring and tho we planted several new ones this spring they won't start producing for a few years. We took a big bowl of applesauce to an annual homeschool picnic Saturday and I overheard one of the mother's telling her little boy that was "real applesauce." I'm not sure what that means they normally eat...

DH picked the last of our corn this morning and we had most of it for lunch today. Matter of fact, except for the fresh applesauce, that's ALL we had for lunch. Yum! Hate to see the last of it. What was left, I cut from the cob and will have tomorrow. Maybe reheated with a little butter and some lemon pepper or DS is requesting corn fritters. I have errands lined up all morning tomorrow so it depends on how fast I can get back home as to how it will show up on the menu.

Bugs found our second planting of green beans but aren't doing too much damage. Not enough beans to can but I snapped the bowlful and cooked them with a few new potatoes. DS can eat green beans every day and I love them like this with chopped sweet onion sprinkled over top. DH doesn't care for the potatoes when cooked with green beans but I go light on them so he can spoon up just beans if he wants.

There weren't enough tomatoes to bother canning either so I dipped them in boiling water after I finished with the peaches and pulled off the skin, cored and chopped them. Along with a few garlic cloves, a chopped onion and carrot, they made a fresh-cooked tomato sauce for a pan of baked ziti. DH lobbied for fresh salsa but was happy with the ziti. Our cilantro loves the cooler days and, if past years are a measure, we'll have fresh cilantro till January so I promised he won't miss out on more fresh salsa.

Tuesday, September 16, 2008

Searching for leftovers ideas?

It's an endless quest, I think.

As soon as I figure out what to do with rhubarb, how to use up a lot of zucchini, or a bunch of eggs, the cucumbers or peppers or something else explodes in the garden. And on top of the produce, which in most cases could always be "put up" in some way for later use, there are all those true leftovers like the last few ounces of a baked ham, three stalks of steamed broccoli left from lunch, a half cup of plain yogurt, a half dozen small new potatoes boiled in their jackets and more. All just sitting in the fridge or on the counter. Sometimes when we're really swamped, the garden produce piles up on the kitchen floor in enamel dishpans and big plastic buckets.

There is hope, tho. Many cookbooks, especially older ones, have a section on using leftovers. Cookbooks that don't have a specific section on the subject can still offer help in the form of their index. Just look up the ingredient you're trying to use up and, if you're lucky, there will be recipes indexed under that heading.

This list of my cookbooks tagged as "use-it-up" on LibraryThing don't all mention leftovers in their titles, but they're books I've found helpful for that purpose. If I could only have a couple I'd probably choose Lois Carlson Willand's "The Use-It-Up Cookbook: A guide for minimizing food waste" and Jane M. Dieckmann's "Use It All: The leftovers cookbook." Both give actual recipes for many dishes but they also suggest general ways to use up leftovers such as using the juice drained from canned fruit to make gelatin or as the liquid in a fruit smoothie. Yes, some of the suggestions are plain common sense, not necessarily a new idea never before revealed to mankind, but then sometimes that's what I need. Menu planning can be boring and I can get stuck in a rut no matter how much I may enjoy the creativity of cooking overall.

There are also websites that let you enter one or more ingredients which you have on hand and will suggest recipes that use those items. (Start with one of these: bigoven.com, cookingbynumbers.com or recipematcher.com ) I don't think they were all set up with leftovers in mind but they can be useful for that purpose, too.

Also, when I come across recipes that call for pre-cooked ingredients or some other ingredient that I'm likely to have on hand as a leftover, I try to bookmark or save to a file where I can search for it by a keyword when the need arises to use up leftovers. (Sometimes that's daily!) And, since I like list-making, I have a few pages in a household journal labeled "recipes that call for ______" with foods like cooked poultry, eggs, day old bread, etc. filling in the blank. As I look thru my cookbooks (yeah, I like to read them even when not searching for a recipe) I note the cookbook title, recipe name and page number under the appropriate use-it-up heading.

I even set up a category in the recipe database I use, MasterCook, called "use-it-up." MasterCook lets me search by ingredient so it's not absolutely necessary to use the tag in order to find a recipe that calls for yogurt, say, but since the ingredients' names can vary (whole milk yogurt, fatfree yogurt, etc.) I like to be able to scan the category, too. Every little bit helps when I'm stumped for ideas. I know we save grocery money when we don't waste food and that's the whole point of the exercise. Well, that and I believe we should be good stewards of the earth's resources. I feel a twinge of guilt if I let something good go to waste just because I was too lazy to be bothered to figure out how to use it.

So, what leftovers do you always seem to need help using up? Maybe someone has a great idea and is just waiting for you to ask the question. For my part, I'm always looking for good ideas for bread -- we can only eat so many bread puddings, stratas, croutons, dressings and melba toasts. They're all good but I admit the chickens often get bread scraps around here.

And just to let you know what prompted this leftover essay, I found two partial pints of sweet cherries in the fridge when I cleaned it out this week. The fruit went into the following recipe, one of my favorite use-it-up recipes taken from WWII-era The Good Housekeeping Cook Book, and the juice was added to a pitcher of lemonade to make cherry-lemonade. Both went over well with the family.

Fruit Cottage Pudding
6 servings

2 to 3 cups sweetened fruit, canned, frozen or stewed*
1 cup flour
1 1/4 teaspoons baking powder
1/8 teaspoon salt
1/8 cup vegetable oil or softened butter
1/2 cup sugar
1 egg
6 tablespoons milk
1/2 teaspoon vanilla extract

Preheat oven to 350F.

In the bottom of a greased or oiled 1 1/2-quart baking dish, place sweetened fruit.

Combine flour, baking powder, sugar and salt in a medium-size mixing bowl. Add oil, egg, milk and vanilla. Stir till smooth. May use mixer but a wooden spoon or spatula will do the job easily.

Bake 60 minutes or until the cake batter tests done. Serve warm or at room temperature.

*Note: Try rhubarb sauce, applesauce, berries, pineapple chunks, cherries, cooked prunes, plums, etc. Combine fruits such as cooked rhubarb and frozen strawberries or raspberries, stewed prunes with apricots, pineapple with cherries, whatever you have on hand. If using fresh fruit, cook on top of the stove or in the microwave with a little water to soften first. Sweeten with sugar or honey as desired.

Check out Kitchen Tip Tuesdays at Tammy's Recipes for more good ideas.

Monday, September 15, 2008

Pickled pepperoncini peppers or hot banana peppers

Pickled peppers are a pantry staple here. DH always plants several types of peppers and every year I put up quarts of hot banana peppers (aka Hungarian Wax?), and sometimes jalapeno or serrano peppers. Years ago I used to put up the sweet banana peppers, too, but DH has gone completely to the hot side in recent years and doesn't plant them anymore.

This year after several years of me asking "why not plant pepperoncini, too?" he finally decided to take the plunge. (Which is a real good thing as I've not found pepperoncini to be readily available at our local farmer's market in previous years.) We've had a good crop so far and I'm on the third canning session for pepperoncini. The crockpot will get a workout this winter as we all like Italian beef sandwiches on hearty homemade wholegrain rolls. And, tho I've tried preparing the roast with hot banana peppers, I prefer the milder (to my taste anyway) pepperoncini peppers. (BTW, why is it every time I go to type that word I misspell it as pepperocini? Anyone else with that problem?)

I use the same recipe for pickling any of the hot peppers. It's very basic and easy to do. It's okay to combine different pepper varieties in the same jar, too. For heat distribution while processing, it might be best to stick with similar sizes of peppers, tho. These can also be sliced into rings before jarring but I find the texture is better if they're left whole then sliced before serving, if desired. If you've never canned before check out the latest Ball Blue Book of Preserving or the USDA-funded website, National Center for Home Food Preserving, for detailed directions.

Pickled Peppers

4 quarts peppers
1-1/2 cups salt (non-iodized or pickling salt recommended)
1 gallon plus 2 cups water, divided
2 cloves garlic
2 tablespoons prepared horseradish, optional
10 cups vinegar (5% acidity)
1/4 cup sugar

Wash peppers. Leave up to an inch of stem on each pepper. Cut two small slits in each pepper. (Wear plastic gloves to prevent burning hands.)

Dissolve salt in gallon of water. Put peppers in a large non-reactive container that will hold the peppers and the gallon of water. Pour salt water over peppers and put a dinner plate on top to hold peppers below level of water. May need to weight plate with a glass jar filled with water and capped. Let stand at room temperature for 12 to 18 hours.

Drain and rinse peppers, then drain thoroughly. Combine 2 cups water and remaining ingredients in large saucepan; simmer for 15 minutes. Remove garlic.

Pack peppers into hot sterilized canning jars, leaving 1/2-inch head space. Pour boiling hot pickling liquid over peppers, leaving 1/4-inch head space. Adjust lids.

Process half pints and pints for 10 minutes, quarts for 15 minutes in boiling water water.Oh, and the Pepperoncini Beef is a simple crockpot recipe. Put a beef chuck roast in the slow cooker. Pour liquid and pepperoncini from pint canning jar over roast and cook on Low for 6 to 8 hours. That's it. If peppers were canned in a quart-size jar, just put half the peppers and half the liquid over beef or use a larger roast and the whole quart. Original recipe based on a 2-1/2 to 3-pound roast. Venison works great, too. If you want to get fancy add garlic, onions or an Italian dressing seasoning packet along with the peppers and their pickling juice.

Tuesday, September 2, 2008

Yamazetti, Yummazetti, Ya-Ma-Zetta or Y________ ?

Anyway you spell it, the dish always seems to come back empty after serving.

I'd never heard of the casserole till about 30 years ago when it showed up on a friend's family supper table. Then I began to spot it at potlucks, church dinners and the like. Finally I found a couple of recipes in a local Amish cookbook, "Dutch Cookbook - Stuarts Draft 1979." So I thought of it as some sort of Pennsylvania Dutch word meaning "darn good hot dish."

When I mentioned it in a recent post, I started hearing from others who either made the dish regularly, were looking for a recipe or had heard of it but wanted to know more such as where it came from originally. The truth is, I'm not sure anyone knows that; kind of like the correct spelling of the name. Or even, what is the correct name?

A 1993 Reiman Pubs cookbook, "Country Ground Beef," gives a recipe that's very similar to others I've come across but it's titled "Marzetti." Other cookbooks refer to a dish called "Johnnie Marzetti" and Wikipedia even has an entry for a similar (the same?) dish giving the origin as an Ohio restaurant.

So what's the recipe? Well, that depends on who you ask. Constants appear to be ground beef, cheese, tomatoes and noodles. Other ingredients come and go depending on your recipe source.

It's a very forgiving recipe. If you have Swiss cheese but not the more commonly listed Cheddar, that's fine. A can of diced tomatoes instead of condensed tomato soup or sauce? That's okay, too. Want to sneak in a few vegetables? Layer in some chopped zucchini or a can of green beans, drained, or a cup or so of corn if you want to make it stretch to another serving, perhaps. If you have some leftover veg from yesterday's dinner consider layering them between the noodles and sauce. Be adventurous but not crazy. I wouldn't recommend sweet and sour cabbage, say, but leftover plain or buttered steamed cabbage or peas and mushrooms wouldn't be amiss.

Below is the recipe I start with. It's the one I was given over 30 years ago when I first came across the dish. Remember there are lots of variations. On occasion I've subbed a couple cups of chopped cold roast beef for the ground beef. Just cook the onion and celery in a bit of butter, oil or broth then mix with the cold beef. According to Wikipedia, the Panama Canal Zone's version of this dish always includes celery and olives. So the sky's the limit.

Yamazetti

8 ounces dry noodles, cooked
1 to 1-1/2 pounds ground beef
1 onion, chopped
1 stalk celery, diced
1 (10-3/4 ounces)can condensed cream of _____ soup*
1 (10-3/4 ounces) can condensed tomato soup
1 cup sour cream or plain yogurt
2 cups grated cheese

Brown ground beef in skillet, adding onion and celery as beef cooks. Spoon cooked noodles into 9x12-inches baking dish. Combine soups and sour cream or yogurt.

When beef is done, drain if necessary. Spoon beef over noodles. (Add 1 or 2 cups of any desired vegetable as discussed in post above.) Spread soup mixture over top. Sprinkle with cheese.

Bake at 350F. for 45 minutes to 1 hour or until bubbly and cheese melted.

Casserole reheats well for packed lunches and also freezes well. Make one to serve and one to freeze for another day.

*Note: Almost any condensed cream soup will work. The lady who gave me the recipe always used cream of chicken but I use whatever's on hand so cream of mushroom and cream of celery are often subbed. Recently I came across cream of squash blossom soup and it works great, too. If you like the cream soup, it will probably sub with no problem in this recipe.

For cooking tips, check out Kitchen Tip Tuesdays at Tammy's Recipes.

Sunday, August 31, 2008

Harvest continues

As summer winds down, we've been putting up fruit and vegetables almost every day. Enough tomatoes and hot peppers to make 18 quarts of salsa on Thursday, more grapes on Friday, this weekend found us chopping a couple heads each of green and red cabbage for the dehydrator and also canning a few jars of pepperocini peppers. I can't remember exactly when we did what earlier in the week but we have some applesauce in the freezer and a pound of jerky in jars on the counter to show for it.

The photo shows some of what came in this week. Plus DH dug a couple rows of potatoes yesterday that he laid out to cure before we store them in a cool cellar. All the garden and kitchen work means meals were cobbled together from the fresh produce and make-ahead dishes from the fridge or freezer. Yesterday's supper was no exception.

It was a filling vegetarian feast that included Marinated Tomato and Green Pepper Salad, one of our favorite make-ahead salads, yellow eye beans and lacy corn meal cakes with slices of a Sugar Baby watermelon for dessert. The vegetables and watermelon came from the garden, the cornmeal I ground fresh from local dried corn, the egg in the griddle cakes came from the backyard girls and I thinned whole-milk yogurt made from rich local milk for the cakes, too. Tho the recipe doesn't require it, I used fresh ground whole wheat (local) for the indicated flour amount. I think the whole grain adds an extra boost to the flavor of the griddle cakes tho they're also great made with regular all-purpose flour.

The yellow eye beans aren't very common apparently but I came across them several years ago at a little produce market in Pulaski that featured local farm products. We ate most of what I brought home but saved back enough seeds to plant our own the next year. The texture is creamier than a pinto, if that makes sense, and the taste reminds me a little of a navy bean. We all like dried beans so it was nice to find a new-to-us variety to add to the mix.

The cornmeal griddle cakes are a great way to have a hot bread with a meal without heating up the oven and they're fast to fix, too. My mom likes to make the batter thin (add more liquid than recipe indicates) and make the cakes crisp and lacy. If you want, you can spread butter on them but that's gilding the lily as far as I'm concerned but a spoonful of sorghum is a good choice especially if you're eating one at the end of the meal.

Cornmeal Griddle Cakes

2 cups buttermilk or about 1-1/4 cup yogurt thinned with 3/4 cup water
1 egg, beaten
1 teaspoon salt
2 tablespoons vegetable oil
1 teaspoon baking soda
1-1/2 cups cornmeal
1/2 cup all-purpose or whole wheat flour

Combine dry ingredients in a mixing bowl. Make a well in the middle and pour in buttermilk and add eggs. Beat till smooth and then add oil, stirring to combine. Cook on a hot griddle like a pancake or fry in a skillet to which a teaspoon of oil has been added. Yield: 8-10 cakes.

Tuesday, August 26, 2008

Quick and easy grape juice, the old fashioned way

Last Saturday DH and I picked almost 5 (5-gallon) buckets of Concord grapes from my mother's two grapevines. She thinks that's the largest yield since they were planted about 20 years ago. The grapes were beautiful with no sign of Japanese beetles, a serious problem some years.

My sister offered the use of her kitchen for processing -- she lives next door to our mother, and my brother-in-law's mother and stepfather came over to help stem the grapes. It was like a harvest party.

DBIL built a fire in the outdoor fire ring and set a washtub filled with water over the flame. We followed the directions listed below for preparing the jars of grapes, filled them inside then set them in the washtub of boiling water. DBIL and DH (wearing hat in photo) waited for it to return to boil and counted off the minutes till processing was complete. They topped off the water between batches and set the finished jars on a rug placed in a nearby metal wagon. To prevent too sudden temp changes, a light towel was thrown over the cooling jars.

Using the large washtub outside meant the kitchen stove could be used for preparing a homegrown dinner which included corn on the cob, sliced cucumbers and tomatoes, Harvey House slaw, green beans, and muskmelon. The grapes were finished processing just in time to sit down on the porch for dinner. Drinking our grape juice this winter definitely will bring back good memories of the day we put it up.

Quick and Easy Grape Juice

Wash and stem firm ripe grapes. Put 2 cups grapes into a hot quart jar. Add 1/4 to 1/2 cup sugar or up to 1/4 cup honey. (I use the lesser amount of sugar.) Fill jar with boiling water, leaving 1/4-inch head space. Adjust caps. Process 15 minutes in boiling water bath.

Let stand in pantry for several weeks before using. The juice from the grapes is drawn out into the water over time. When ready to drink, pour juice through wire sieve or a coffee filter to remove grapes and any seeds or skins that may be floating loose in the jar. Taste and add 1 to 2 cups of water (sparkling water is a fun choice, too!) to dilute as desired.

If you've never canned using the water bath method, please refer to the latest Ball Blue Book of Preserving or the USDA-funded website, National Center for Home Food Preserving, for detailed directions.

We ended up with enough grapes to make 54 quarts of grape juice concentrate. When reconstituted, it should yield over 80 quarts of juice.

Check out Kitchen Tip Tuesdays at Tammy's Recipes for more good ideas.

Sunday, August 24, 2008

Homegrown meals or One Local Summer challenge weeks 9-12

For the past month or so I've been whinging offline about having to post locally sourced meals for the One Local Summer challenge. Now, this is especially bad because I chose to sign up for this challenge but have not been keeping up with the posts.

The one thing in my favor is we have not deviated from the local foods idea behind the challenge. Even tho drought in our part of Virginia is playing havoc with our garden and those who supply most of the local farmers' markets, we've managed to keep some things growing and producing. Because we're diligently preserving any excess produce we're in good shape to continue eating locally through much of the coming winter.

So the one local meal (out of many eaten this week) that I want to describe was a harvest party of sorts that we enjoyed at my sister's house yesterday. We were over at her neighbor's to pick grapes and since her neighbor happens to be our mother, it quickly turned into a big family gathering, even including DBil's parents. That happens a lot in our family. Two will gather and the next thing you know there are so many family members around we're spilling out the door. Could be good, could be bad, I guess. In our family it's usually good.

Mom's two grapevines were filled with particularly sweet grapes this year thanks to the very dry weather we're experiencing. And, since Japanese beetles didn't besiege the grapes this year, it was a bumper crop. We picked grapes, washed, stemmed grapes, put them in jars and processed several batches of jars in a boiling water bath to make 54 quarts of grape juice concentrate.

The next thing you know, it's getting late and everyone's hungry. Do we call for pizza delivery? Are you kidding? First of all, they live in the country -- I'm not sure that's even an option. And secondly, DSis and DBil's garden was just sitting there waiting to be plundered.

From their home garden we prepared corn on the cob with fresh butter, Italian flat beans cooked with a small piece of home-cured ham, sweet and juicy muskmelon and sliced tomatoes and cucumbers. Alongside she served Harvey House slaw made earlier in the week with some of the cabbage we harvested earlier this summer and stored in their cellar.

DH cooked a few brats over the fire in the outdoor fire ring while every thing else was being prepared in the kitchen. The brats are made by a local seller at our farmers' market. DH can't go there without getting one hot off the grill and sometimes picks up a few for the freezer, too. DSis didn't have any rolls for the brats (this was a spur of the moment dinner party, remember) but we just spread a little Nectarine Mustard on them or, in DS's case, topped them off with homemade fresh salsa.

There's only one more week left on the One Local Summer challenge and the idea of spending time over the next few days searching out some esoteric ingredient perhaps only available in this county or finding a local source for oats, a food we use a lot of both as a dish on its own and as an important ingredient in many favorite recipes, is very appealing. But I know it's not going to happen.

Tomorrow I'll spend several hours processing homegrown tomatoes into beautiful jars of whole tomatoes or salsa or just plain dried tomatoes. Tuesday's probably going to be focused on making more jerky -- DH and DS have found a recipe they both love. The fall crops of beans and more tomatoes need to be weeded and watered. Wednesday I'm going to check on a friend's pear tree and pick if they're ready. Thursday's subject will be either pears or more grapes. Jelly's on the to-do list. And so it goes.

My envy of those posters who weekly get to track down sources for local foods is part of the "grass is greener" thing. I get to harvest most all of what we eat but I do it at the expense of time to be out in the world amongst other consumers. Everyone has a niche, I just get the urge to move outside mine after several months of continuing garden care, harvesting and processing. But I'm not giving up my garden.

Tuesday, August 12, 2008

Zucchini Chips -- a great way to use up a lot of zucchini!

If I had to give one good reason to own a dehydrator, Zucchini Chips would be it! Yes, I use the dehydrator to dry fruits like nectarines and cherries, vegetables such as cabbage and potatoes and treats like fruit leather and jerky but since mid-July we've learned to grab those mid-size zucchini (before the skin gets tough and the seeds develop too much), cut them into 1/4"-thick slices, sprinkle with a little seasoning (latest favorite is Zatarain's Creole Seasoning) and dry for about 12 hours at around 135F. Summer squash will work like this, too, but the seeds in it are often large almost before the squash is of a good size for drying. Since it shrinks you want to use the slightly larger ones, perhaps 9- or 10-inches in circumference, rather than the small ones. They're just as tasty but make tiny slices once dried!

The zucchini chips are crispy and tasty by themselves, work like a chip or cracker when served with dip or salsa and DH says cream cheese spread works, too. DS even tested a tray with cinnamon-sugar sprinkled on top the zucchini. I didn't try any of those but he swore they were excellent and they went immediately. That's why I didn't get to taste any... Usually we just go with the creole seasoning, Old Bay or a homemade seasoning salt. All it takes is a light dusting. The slices shrink as they dry and too heavy a hand with the seasoning can make the seasoning flavor too pronounced.

Of course, there are a lot of good ways to use up zucchini and summer squash. I like to dry lengthwise slices of zucchini for use as "noodles" in lasagna and larger, thick-sliced zucchini slices, when dried, can be rehydrated and fried like fresh squash or green tomato slices (dip in batter or roll in flour or seasoned crumbs). I dry a lot of large, seeded and sometimes peeled, zucchini in slices or shreds for use in soups, spaghetti sauce, quick breads, etc. in the winter. (I used to freeze the shredded zucchini and that's still a great way to preserve it but drying doesn't take up my freezer space -- always valuable real estate around here.) Depending on how I plan to use it I soak it in water for 30-45 minutes before using it in a recipe. If I'm adding it to soup or a tomato sauce, I usually just throw it into the mix as is without soaking. Perhaps adding a little extra liquid to the recipe as I go.

Our favorite way to prepare it is to slice lengthwise, marinate in something flavorful (italian dressing, teriyaki sauce, balsamic vinegar and oil, whatever) and grill. I included another of our favorite oamc uses for zucchini in a previous post, Zucchini Cheese Squares, but I also make a zucchini quick bread similar to banana bread, use shredded zucchini or yellow squash as an ingredient in yeast rolls and salmon cakes and make squash fritters with fresh shredded zucchini in the summer or dehydrated zucchini in the winter. Lots of casseroles have zucchini added as part of the measure of vegetable ingredients. Small cubes of the squash sub for peas in tuna casserole, cubes or shreds get layered into a pan of yamazetti (does anyone know the standard spelling for that old favorite?) or lasagna and show up as an ingredient in any version of Spanish rice we throw together. On occasion I've canned a great mock crushed pineapple by combining shredded zucchini, pineapple juice and a bit of sugar or honey if the juice is unsweetened. With the price of canned pineapple going up I'm thinking of putting some up again this fall.

When they get large and the skin is difficult to pierce with your fingernail, don't despair. The really large zucchinis will even keep for a couple of months if stored without touching. Stack them like firewood along a wall in a protected spot in the garage, shed or, even better, a root cellar. Then when you want to make fried squash or zucchini bread, all you have to do is go get one. The large squash will need to be seeded and peeled for most recipes and they will rot eventually so keep an eye on them and discard any that develop soft spots. If you have chickens or other livestock that like squash this is a good way to keep the last of the crop through to early winter. Years when the squash vines keep producing right up to frost, we've had zucchini to chop up for the chickens right up till Thanksgiving with no problem. Our sheep are divided on the squash issue -- Happy-lamb and Andy, the llama, like zucchini, the rest of the sheep won't touch it.

I don't think we'll have too many to store this fall as we're getting very good about checking the vines daily. Those zucchini chips have changed the way we think of zucchini these days!

For more Kitchen Tips check out Kitchen Tip Tuesdays at Tammy's Recipes.

Tuesday, July 29, 2008

Donut Peaches and Nectarine Mustard

Last week the first white donut peaches of the year arrived at our house. After eating as many out of hand as we could hold, say 4 or 5 apiece, I pulled the skin off a flat of peaches and put them in the freezer for future smoothies. Then we ate a few more. The next flat went into the pot to make a favorite condiment, Nectarine Mustard. I know, these were peaches, but the original recipe called for nectarines and so it will always be known.

DH and I were discussing the difference between peaches and nectarines and, other than the peach fuzz that is lacking on nectarines, we couldn't think of any other. I've read that nectarines are usually smaller than peaches but over the last several years the nectarines we've had are often softball size while the peaches are closer to baseballs. In size, not feel! And then there are these small donut peaches. DH always swears that when the nectarines are at their ripest they are sweeter than any peach but since we rarely have them ripe at the same time to compare I think I'll just say the difference is in the skin.

So some years I make nectarine mustard with nectarines and sometimes I make it with peaches. As long as I use fragrant, juicy-ripe fruit it tastes great with no noticeable difference in flavor. The picture above shows this year's peaches with a little jar of last year's nectarine mustard.

We use this mustard for almost everything -- it's excellent for dipping pretzels, spreading on a sandwich or adding to ham salad with a little mayonnaise. The recipe calls for granulated sugar but I substitute local honey when available. Sometimes I reduce the amount of honey to 1/4 or 1/3 cup since it has more sweetening power than regular sugar but if I leave it at 1/2 cup the mustard makes an excellent honey mustard dressing with only a bit of yogurt added upon opening to give it a creamier pouring consistency.

I found the original recipe on the web about 7 years ago and it was attributed to the El Dorado County (CA) Master Preservers. They have a page of their own now but don't currently include this recipe. The only cookbook I have that lists a recipe for Nectarine Mustard is "The Glass Pantry: Preserving Seasonal Flavors" by Georgeanne Brennan but when I prepared it I thought it hotter and more vinegary than this one.

Nectarine Mustard

1/2 cup dry mustard
1 cup cider vinegar, 5% acidity
1/2 cup onion, finely diced
1/2 cup sugar
1/4 cup flour
1/4 teaspoon turmeric
2 cups ripe nectarines, peeled, pitted and pureed

Combine mustard and enough water to make a smooth paste. Cover and let stand 10 minutes.

Combine remaining ingredients in a large pot. Bring to a boil. Boil 3 minutes. Remove from heat and *whisk 1/4 cup hot mixture into mustard paste till smooth. Repeat from * twice more, then pour all mustard mixture into saucepan with remaining fruit blend. Puree in blender/food processor until smooth.

Ladle into hot jars leaving 1/4 inch headspace. Wipe rims, adjust lids, and rings. Process 15 minutes in a boiling-water bath.

Yield: 3 half-pints

Note: I successfully triple this recipe using a small dutch oven on the stove. The recipe works with peaches instead of nectarines and honey can sub for regular sugar.

Check out Kitchen Tip Tuesdays at Tammysrecipes.com for more kitchen how-to.

Saturday, July 26, 2008

One Local Summer challenge - week 8 (and weeks 6 and 7, too)

I know the premise of the One Local Summer challenge is to eat at least one completely local meal each week, excepting spices and oil perhaps, and report the details for compilation in weekly regional report. But given the last few weeks, I think it almost would be easier to report what we ate that WASN'T local.*

Our garden is supplying the basis for every meal. Green beans, four kinds of potatoes, zucchini and yellow squash, green and red cabbage, cucumbers, cherry tomatoes, beets, onions, chard, sugar snap peas, blackberries, blueberries, garlic and all kinds of herbs (even bay leaves) come in to the kitchen fresh every day. The pantry still has 40+ pounds of local wheat ready for grinding and baking in our twice-weekly bread batches and the freezer's stocked with local meets like beef, venison, chicken and a bit of lamb. We collect over 2 dozen eggs every day and my sister has kept us supplied with local fruit as it comes in season -- this week it's been donut and regular peaches, earlier in the month it was sweet cherries. All we've had to pick up at the store the last few weeks has been local milk, a box of orange pekoe tea, and a bag of granulated sugar to make sweet tea -- I like mine unsweetened (heresy, I know) but I can't convince DH and DS that it's better that way tho we all agree adding fresh-picked mint or lemon balm/verbena is a good idea. As for the milk, I keep telling DH we need a cow or at least a couple of dairy goats but so far no luck.

Today was the first day for regular eating tomatoes. Lunch was a couple of red ripe tomatoes on toasted homemade whole wheat bread spread with homemade mayo. A sprinkle of kosher salt and black pepper made the sandwiches perfect. To go along with them we had Harvey House slaw from our own cabbage and onions, sliced cucumbers and a bowl of just-picked blackberries with a spoonful of top cream from the milk jug. Now that's a local meal.

*Non-local foods or ingredients used in our kitchen over the last few weeks:
-oils (olive, sunflower, peanut, sesame)
-coffee
-tea
-sugar (DH uses it in his coffee every day and it's always in the pitcher of tea otherwise we mainly use local honey, maple syrup and sorghum for cooking)
-unbleached all-purpose flour (baked a couple of cakes for the local fireman's lawn party fund-raising effort)
-rolled oats or old-fashioned oatmeal (tho farmers around here grow oats I haven't been able to find a local source for rolled oats)
-dried beans (pinto, kidney, garbanzo and black beans -- DH has grown kidney beans before but it's been a few years)
-seasonings and canning supplies like salt, black pepper, mustard seed, vanilla beans, distilled white vinegar, and pickling lime

Sunday, July 6, 2008

One Local Summer challenge - week 5

We raise a lot of our own food so keeping to the OLS challenge isn't a hardship most of the time. This is prime gardening season in our region and we're having to put in more hours weeding and, unfortunately, watering these days. (We've watched storms move around us for the last couple of weeks but still haven't gotten more than a few drops of rain.) The kitchen chores fall in importance this time of year -- well, except for preserving what the garden produces, that is. So many of our meals are all about quick preparation and, where possible, providing really good leftovers for other meals. Saturday's lunch fit both criteria besides being just plain good.

I made a frittata with eggs from our own chickens and a few vegetables and herbs from our garden along with a little local chevre. I used my "Anything Goes Frittata" recipe adding leftover boiled new potatoes, a walking onion and the very last of our asparagus -- no more fresh asparagus till next spring. A handful of garden-fresh herbs comprised mainly of parsley and chevril went in to the mix right before I poured it into the iron skillet. The frittata tastes great hot but is also good as part of a cold meal for another day.

A choice of pickled beets (homegrown and pickled last month) or cucumbers in vinegar (from my sister's garden -- our cucumbers are late this year) and a plate of steamed green beans (homegrown) drizzled with olive oil and dashed with kosher salt completed the main meal. DH and DS had glasses of grape juice to go along with their lunch, I opted for water. The juice, which we canned last fall, came from my mom's grape vines.

No dessert as we still had a lot of work to do -- DH went to work setting up a larger rainwater collection tote so if it ever does rain here, we'll be able to hold onto some of it. Hope to have pictures up later this week.

Tuesday, July 1, 2008

Make-ahead Summer Salads

I think it's a big help to have something prepared ahead in the fridge and with our summer garden vegetables it's easy. A jar of cucumbers in vinegar or sweet-and-sour cucumbers and onions help make a sandwich into a meal. DS even likes to put the cucumbers ON his sandwich in lieu of a regular pickle. Fire-and-Ice Salad, the Hot Shoppes' Marinated Tomato and Green Pepper Salad, or Bean Zucchini Salad all can be prepared ahead of time and brought out to serve alongside a quick meal comprised of other garden produce or something from the grill.

Harvey House slaw and pickled beets are two other side dishes we always have on hand in the fridge over the summer. Even better than just being able to make these dishes in advance of a meal is that they will keep in the fridge for a couple of days and, in the case of the cucumbers a minimum of a week and the Harvey House slaw for at least a month tho ours is always long gone before that.

Cucumbers in Vinegar

2 medium cucumbers, peeled and sliced
water to cover
1 teaspoon salt
1/2 cup apple cider vinegar
1/2 cup water

Place cucumbers in medium bowl. Sprinkle with salt and then pour over enough water to cover cucumbers, then lightly stir to disperse salt. Let stand for 30 minutes. Drain and place cucumbers in bowl or jar for refrigerator storage. Pour vinegar and water over cucumbers. If necessary, add additional liquid at the same 1-to-1 ratio to completely cover cucumbers. Store in fridge till ready to serve.

Sweet-and-Sour Cucumbers and Onions

3 medium cucumbers, peeled and cubed, seeded if necessary
1 medium onion, chopped
1/2 cup sugar
1/2 cup vinegar
1/4 teaspoon salt
1/8 teaspoon white pepper

Mix togther. Store in covered container in refrigerator at least 2 hours before serving.

Fire-and-Ice Salad

4 tomatoes, cut into eight wedges each
1 green pepper, thinly sliced
1 small jalapeno, minced
1 onion, thinly sliced
3/4 cup apple cider vinegar
1/4 cup sugar
1-1/2 teaspoon mustard seed
1-1/2 teaspoons celery seed
1-1/2 teaspoons prepared horseradish, optional
1 teaspoon salt
7 drops hot pepper sauce, optional
2 cucumbers, peeled and thinly sliced

Combine tomatoes, peppers, and onion in a large bowl; set aside. Combine the next seven ingredients in a saucepan; bring to a boil and boil for 1 minute. Pour over vegetables. Let stand until mixture returns to room temperature. Stir in cucumbers. Refrigerate at least 2 hours before serving. Drain before serving.

Marinated Tomato and Green Pepper Salad
(from Marriot Hot Shoppes Cookbook: Sixty years of American cookery)

4 medium tomatoes
1 green bell pepper, sliced into 1/4"-thick rings
1/2 cup water
1/4 cup apple cider vinegar
1/4 teaspoon salt
1 tablespoon sugar
1/4 cup salad oil

Cut tomatoes in half lengthwise. Remove core and cut each tomato half into three wedges. Cut green pepper rings in half. Mix tomatoes and green peppers together. Combine remaining ingredients in a small mixing bowl. Beat with a wire whisk until well blended. Pour liquid over vegetables. Cover, refrigerate and allow to marinate for two hours or overnight before serving.

Bean Zucchini Salad

1-1/2 cups small zucchini, thinly sliced
1 green bell pepper, cut in strips
1 cup cooked green beans, canned or fresh
15-ounce can red kidney beans or black beans, drained and rinsed
3 green onions or 1 medium onion, thinly sliced
1/4 cup vinegar
1/4 cup vegetable oil (I use sunflower)
1/2 teaspoon seasoned salt
2 teaspoons sugar
1/4 teaspoon fresh ground pepper

Combine vegetables. Combine other ingredients in small bowl and pour over vegetables. Stir well. Refrigerate in covered bowl for several hours, stirring occasionally. Toss lightly before serving. A small jalapeno pepper, minced, will add a nice touch of heat, too.

Check out Kitchen Tip Tuesdays at Tammysrecipes.com for lots more how-to information.

Sunday, June 29, 2008

Summer supper


Lots of activities this week along with the usual gardening and general chores meant not much time for cooking. But when it's hot we tend to prefer lighter meals anyway. Last night's meal fit that profile with a combination of garden vegetables and a bit of local cheese.

Yesterday morning I prepared Harvey House Slaw (recipe below) using a head of cabbage and several Egyptian onions from our garden. It's best when made at least 4 hours ahead of serving and any leftovers will keep for several weeks in the fridge. I think it gets better the longer the vegetables marinate and have seen similar recipes with names such as '6-weeks Slaw.' The onions lose quite a bit of their edge in the slaw so don't feel like you have to start with a sweet onion.

Earlier in the week I cut the crust from the last of a loaf of wholegrain bread (from local wheat) I'd baked in my pullman pan. Then thinly sliced it and baked the slices in a very low oven till dried and crispy -- making homemade melba toast. I do this regularly with extra bread so I almost always have a tin of crisp melba toast sitting on the shelf. We use it in place of crackers much of the time and since I planned to serve a cheese spread for last night's meal, the melba toast was a perfect accompaniment.

A friend and I had been talking about cheese spreads lately and when I went to town in the middle of the week I couldn't resist picking up a small tub of a locally-produced goat cheese and dried tomato spread. I love this spread and hope one of these days we can make our own version -- DH is slowly coming 'round to the idea of a couple of dairy goats and this cheese on a crisp toast makes a great selling point.

To go with the slaw, cheese, and toasts, DH picked a mess of green beans (third one this week from the garden!) which I lightly steamed and then sprinkled with coarse salt. Sometimes I'll dribble a little olive oil over the beans but since the Harvey House has a vinegar and oil dressing another oil didn't seem necessary.

We're still eating sweet cherries my sister picked and tho we've added cherries to a few yogurt smoothies and canned or frozen most of them, we enjoy them best by the handful. Yes, spitting out cherry pits as we go. That's how we ate them last night sitting on the back deck watching a faraway neighbor's fireworks. Relaxing end to a busy week.

Harvey House Slaw

1 head of cabbage, cored
1 large onion, thinly sliced
1-1/3 cup sugar or 2/3 cup honey
1 cup vinegar (I use apple cider vinegar)
1/2 cup salad oil (I use sunflower oil)
2 teaspoons dry mustard
1 teaspoon celery seed
2 teaspoons salt

Cut cabbage into wedges and then thinly slice. (Alternatively, may use food processor to slice.) Put cabbage in a large bowl and scatter onion slices on top. If using sugar, pour over onion.

Put remaining ingredients (and honey if using rather than sugar) in medium saucepan and bring to a rolling boil. Stir to dissolve honey and pour over cabbage immediately. Cover with lid or plastic wrap to hold in steam. Do not stir cabbage mixture at this time. Refrigerate at least 4 hours before serving. Stir prior to serving.

Sunday, June 22, 2008

Hamburger, fries and a dish of ice cream -- all local!

DH likes a good hamburger but we rarely eat out these days as we like to know where our food comes from and there aren't many (any?) local food restaurants in our area. So this weekend we had our version of a hamburger and fries.

The hamburger starts with local venison we prepared ourselves. I have trouble powering my old handcrank meat grinder for very long so last summer, in preparation for hunting season, I bought a grinder attachment for my KitchenAid mixer. With that and the vacuum sealer, we can have ground venison in the freezer ready for use any time of year. Our hamburgers start with thawing the venison and a package of locally-produced country pork sausage, also stored in the deep freeze. I mix about 1-1/2 pounds of venison with a pound of sausage and shape into patties. No further seasoning needed.

DH put the patties on the gas grill while I prepared the fries. Thursday I boiled new potatoes from our garden in their jackets and the leftovers went into the fridge for just this moment. I pulled the skins off the cold cooked potatoes and sliced them to fry in a combination of oil and local butter, about 1-1/2 tablespoons of each. I use a heavy iron skillet as it's nonstick for all practical purposes and lets me get on with the rest of supper without watching the potatoes too closely.

While the potatoes sizzled, I topped and tailed a bowl of sugar snap peas also from the garden and threw in the first couple of garden zucchini which were ready today. I just steamed the vegetables and sprinkled a bit of kosher salt over top before serving. The buns were wholegrain made from wheat I sourced at a local farm last year. I used my all-purpose bread recipe, just shaped the dough into rolls and baked. The sliced onion came from the garden as did the cucumbers and onions in the jar of bread-and-butter pickles I canned last year and opened to go with the sandwiches. A little of the lettuce is still hanging in there so DS could have a few leaves on his sandwich but no ripe tomatoes yet -- don't think anyone noticed their absence.

Even the mustard and ketchup could count as local as they're from jars I put up last year. The tomato ketchup recipe (below) is called Western Gourmet Ketchup and comes from an old Farm Journal cookbook. It makes a nice table ketchup plus is good in recipes calling for ketchup or a slightly spicy tomato sauce. I've been making it for years from our garden tomatoes. The mustard, Nectarine Mustard, is a real favorite around here and I've learned to make it by the gallon, literally! For Christmas I give my brother-in-law a dozen pint jars and my mom says he still eats it at her house by the spoonful. Very easy and, since the nectarines come from an orchard just over the mountain, also very local.

For dessert we had ice cream made at Perfect Flavor, which uses local ingredients such as eggs from Joel Salatin's Polyface Farms and milk from Holsinger Dairy Farm. I'd been meaning to stop by their shop at the foot of Afton Mountain for several months and finally had an opportunity on Tuesday when the local homeschool group toured the creamery and talked with Lynsie Watkins about her business. The vanilla and chocolate ice cream samples were wonderful! Even though we usually make our own ice cream, I couldn't resist bringing home a container from Perfect Flavor. It was a great way to finish our very local dinner.

Western Gourmet Ketchup
(from Farm Journal's Freezing & Canning Cookbook: Prized Recipes from the Farms of America)

7 quarts tomato puree (18lbs tomatoes -- See Note*)
3 tablespoons salt
2/3 cup sugar
1 tablespoon paprika
1/4 teaspoon cayenne pepper
1 tablespoon dry mustard
1 tablespoon whole black peppercorns
1 tablespoon whole allspice
4 bay leaves
4 chili peppers
1 tablespoon dried basil
2 cups vinegar, 5% acidity (I use apple cider vinegar)

Tie spices loosely in a cloth bag so they can be retrieved after cooking. Add all ingredients, except vinegar, to tomato puree. To prevent lumps, blend dry mustard with a bit of tomato juice before adding to puree. Cook until thick, about 1-1/2 hours. Will not thicken as much as storebought but should reduce by at least one-third.

Add vinegar the last 10 minutes of cooking.

Remove spices.

Pour into hot, sterilized jars; seal and process in water bath canner for 10 minutes. Makes 4 pints.

*Note: Cook 18 pounds of washed and cored tomatoes until soft. Then put through a sieve to yield 7 quarts of tomato puree.

If you've never canned using the water bath method, please refer to the latest Ball Blue Book of Preserving or the USDA-funded website, National Center for Home Food Preserving, for detailed directions.

Tuesday, June 17, 2008

Pickled beets or beet pickle?

No matter what you call them, they're good! Easy to make and, after I saw the price on a pint jar of "pickled beet balls" ($4.09!), I'm looking at my quarts as tho they were gold. Even better, if you grow your own beets, when you thin them you get to eat the tiny beets along with their tops (beet greens).

So far I've put up 34 quarts of pickled beets since last Thursday. That represents half of our beet crop this year. Between the beets and 25 gallons of sweet cherries my sister picked this weekend, we've been busy. One good thing, both beets and cherries will stain your hands so it's kind of nice to get them done all at once. Of course, you can always wear lightweight plastic gloves but I say (almost) black fingernails can be a fashion statement in some circles and a badge of honor in others so don't worry about it.

Prior to this year I never gave much thought to beet pickles other than noting whether we needed to "do beets" but I've had at least 3 people ask me for a recipe in the last couple of days. So I'm including the recipe I use at the end of this post.

And don't worry if you didn't plant beets this year. For one thing, you could always put in a few rows as a late summer, early fall crop or just buy plain canned beets and save a step in the recipe below. If you only make a small batch, you can skip the hot water bath and store them in the fridge. Some people like to include onions in the jars along with the beets or add peeled hard-boiled eggs to the jar after opening. For me I'm just thinking about how good pickled beets are served alongside potato salad or with green beans and potatoes, say.

The only low note is DS, a cucumber pickle aficionado, just doesn't care for them. I did learn that he loves plain cooked beets, tho, as he kept asking for slices when I was filling the jars. So I'm not giving up hope and there's always Harvard beets or roasted beets or red flannel hash for any beets that don't get pickled this year.

Pickled Beets

4 quarts beets, sliced (*see Note below)
3 cups apple cider vinegar
1-1/2 cups sugar
1-1/2 cups water
2 (3-inch) stick cinnamon
Pack beets in sterilized jars. Combine other ingredients in saucepan, and heat to boiling. Boil 5 minutes. Pour hot liquid over beets in jars leaving 1-inch headspace. Tighten lids and process in boiling water bath for 30 minutes.

You can double or treble this recipe as needed. I usually prepare all my beets and get them into jars. Then cover the jars with a towel while I prepare the pickling liquid. I simply mix and cook more liquid as needed to fill prepared jars.

*Note:
Prepare beets for canning by cutting off beet tops, leaving about 1-inch attached. This will stop the beets from bleeding so badly while cooking. Cook washed whole beets in boiling water to cover for 20-25 minutes or until you can rub the peeling off with your hands under cold water. Cool beets quickly by putting them into a dishpan of cold water. Use a knife to cut off tops and rub skin off with your hands. Can use a knife to scrap any stubborn bits off as needed.

If you've never canned using the water bath method, please refer to the latest Ball Blue Book of Preserving or the USDA-funded website, National Center for Home Food Preserving, for detailed directions.

Check out Kitchen Tip Tuesdays at Tammysrecipes.com for lots more how-to information.

Sunday, June 15, 2008

Sunday lunch and minor garden talk

This morning DH couldn't resist checking along the edges of a row of Yukon Gold potatoes. He didn't dig with a shovel, just scrabbled with his hands so as not to disturb the growing plants yet still came up with one softball-sized potato and another dozen ranging from golf ball- to baseball-sized. Those were enough to get us off and running to create an all-from-the-garden lunch.

A medium-sized head of cabbage (about 3-1/2 pounds -- the third one picked this season), a couple of pounds of sugar snap peas which DS picked, and a handful of chives completed the harvest. I cut half the cabbage into wedges and steamed it. A pound of the peas I quickly stir-fried in homemade garlic oil and I simply scrubbed the potatoes, quartered them as necessary, and boiled till fork tender, about 12 minutes. They cook really fast when fresh.

To accompany this garden feast I sliced a bit of cold roast beef (grass-fed and raised about 15 miles from here) but when it came time to sit down no one even looked at the beef. It was all about the potatoes sprinkled with aromatic fresh chives and topped with local country butter. And just a touch of local apple cider vinegar poured over the cabbage. And those crisp tender peas in the pod! Oh, my.

DS discovered that he likes to dip pea pods into the vinegar, too. Not something I wanted to try but interesting.

For dessert we enjoyed a bowl full of sweet cherries that my sister picked yesterday morning. It was such a good meal, DH packed up the remains to take for dinner at work. He included a bit of meat but I think that was only because we'd made real inroads on the vegetables -- there weren't many leftovers, in other words.

Sunday, June 8, 2008

Broccoli from the Garden to the Table

After several days with daytime temps in the 90s and nighttime temps over 70F., the last of the spinach bolted. The lettuce won't be far behind. The cilantro self-seeds so well that I don't expect to lose it completely -- there are always young starts to pick up the slack when the older plants set seed.

The broccoli came and went in about two weeks. DH picked the last of the side shoots today (9 pounds) and plans to prepare that garden bed for sweet corn tomorrow. I have to say the broccoli was outstanding again this year. Very few bugs -- I froze about 15 pounds last week and only had one full-size and two tiny caterpillars out of all that broccoli. This last batch had a few more, about 8 full-size and a couple tiny ones. As always, I soaked it in salt water prior to blanching and freezing.

The last few years I've separated the broccoli into florets with only about an inch of stem and then I chop the stems and freeze them for use in casseroles, cream soup or as an addition to stirfry or fried rice. Even using a vacuum sealer we just didn't care much for the frozen spears -- the tops were overdone and the stems almost limp at times. (We have the same reaction to storebought frozen broccoli spears.) Maybe the difference now is because I don't have to blanch the florets as long when the stems aren't attached. And the stems take less time than normal, too, since they're in smaller pieces. Two minutes in rapidly boiling water and I use an extra large stock pan filled with water so I don't wait for it to come back to a boil.

Most meals around here are prepared fresh from our garden or food preserved from it by freezing, canning or drying. We add fresh eggs from the backyard girls, local (or even homegrown) chicken, beef raised on grass less than 15 miles away, or sometimes venison from this or a neighboring county. Can't get food from much closer than right outside the door or within a 30-minute drive. And it's all handy and available throughout much of the year, especially when considering the ways we preserve it.

Yesterday's lunch was typical. In the morning I partially thawed a piece of venison, sliced it thin and marinated it in an apple cider vinegar, garlic and herb blend until lunchtime. The herbs came from the current garden and included thyme, lovage and oregano plus a couple of garlic cloves and dried Thai bird peppers from last year's garden. Even the vinegar was made here last year with apple cider from a friend's cider mill a few miles away. I don't use it for canning as I haven't bothered to verify its acidity level but it tastes like good cider vinegar should!

When we were ready for lunch, I grabbed a bunch of broccoli from the salt water where it was soaking prior to cooking, and coarsely chopped it. Pulled up a couple of pieces of the walking onion and, after rinsing, cut it into thin rings, including some of the green top. Heated the wooden-handled wok till it was smoking and added a tablespoon or two of peanut oil. Unfortunately that was not local -- haven't had any luck finding a source for local oils yet.

The stirfry process itself went very quickly. First I cooked the onion, adding the broccoli almost immediately. Then removed the vegetables from the pan and tossed in the venison, drained of its marinade. Thinly sliced, the meat cooked quickly and I added the vegetables back in along with a dash of kosher salt and pepper.

To accompany the stirfry I buttered the last of the homemade wholegrain bread (made with wheat harvested locally last year and ground just before baking) and heated it in the toaster oven. For dessert, we had fresh strawberries which DS had just picked from the strawberry bed in the side yard. I had intended to make rhubarb ade to drink but ran out of time and so we all drank water. Since it comes from our well, it can't get much more local.

Tuesday, May 27, 2008

No-Knead Bread: Regular or Fresh Ground

Over the last couple of years we've gone from regular store-bought white bread to grinding our own wheat berries and baking fresh bread several times each week. Having a good recipe for sandwich bread helps. It's even gotten to the point where I keep at least three types of wheat on hand; using hard red winter wheat or hard white wheat for breads and soft white wheat for pastry, biscuits, and cakes. But until last month when I stumbled across Jim Lahey's No-Knead Bread, I still couldn't make a crusty, holey loaf of rustic bread that was equivalent or better than a bakery-made loaf. (Loaf made with unbleached flour pictured in photo to left.)

All that's changed now. And almost better than the bread itself is the fact that it's incredibly easy to make. No kneading. Not a bit. The hardest part is getting the timing down as you need to start the process 15 to 21 hours ahead of when you want to take the loaf out of the oven. But that initial calculation is all the work there is -- you mix up the ingredients, cover and let sit on the counter for 12 to 18 hours, roll the dough out of the bowl and pretty much let it sit for another 2 hours, roll into the pre-heated pan and bake. That's it.

The method works fairly well with fresh ground wheat, too. There are a few differences in the loaves -- the wholegrain bread won't rise as high, the crust won't be as shatteringly crunchy and the texture won't be quite as open. However, two improvements I find when using fresh ground wheat are that the bread stays fresher longer (doesn't dry out as fast) and the taste is improved. That last one is true for all wholegrain bread, I think.

Here's the recipe for my fresh ground wheat version (shown in photo above right). Check out the link above for the story of Lahey's method development or go straight here for his recipe for the loaf made with all-purpose or unbleached flour.

No-Knead Wholegrain Bread

3 cups fresh ground hard wheat flour, more for dusting
1/4 teaspoon Saf-instant yeast
1-1/4 teaspoons salt

Mix flour, yeast and salt together in a big bowl. Add 1-1/2 cups water. Stir until blended. Cover bowl with plastic wrap. Let bowl sit on countertop at room temperature. Surface of dough will be dotted with bubbles when it's ready for the next step -- allow at least 12 hours, preferably 18.

Lightly flour clean countertop or other work surface and place dough on it; sprinkle a little more flour over dough and fold it over on itself once or twice. Lay plastic wrap left from covering bowl over dough and let rest for 15 minutes.
Using just enough flour to keep dough from sticking to counter or fingers, gently and quickly shape dough into a ball. Generously coat a cotton towel (do not use a textured towel like terry) with extra flour. Place dough on towel and dust top of dough with more flour. Cover with another similar cotton towel and let rise about 2 hours.

Preheat oven to 450F. at least 30 minutes before dough is ready. Put a 6- to 8-quart heavy covered pot (cast iron, enamel, Pyrex or ceramic -- I used large Corning Ware dish shown in pictures above) in oven as it heats. When ready to transfer dough to pot, remove pan from oven, slide one hand under towel and flip dough over into pot. It will look messy. Shake pan bake and forth once or twice if dough is unevenly distributed. It will shape up as it bakes. Cover with lid and bake 30 minutes, then remove lid and bake another 15 minutes or until loaf is browned. Turn out onto a rack to cool.

For all kinds of kitchen tips including more recipes, check out Tammy's Recipes.com Kitchen Tip Tuesdays column. There's a discussion about grain mills going on, too, in case you're thinking about grinding your own wheat.