I love crisp mung bean sprouts. Fresh ones, not canned. DS and I made a quick trip north recently, stopping at an oriental market on the way to pick up a few things including a couple pounds of fresh bean sprouts. I know, I can sprout my own. I even have a couple of mesh lids that fit wide-mouth canning jars and make the job of rinsing easier. But sometimes I succumb to the woman inside who shouts "Look at those bean sprouts! They're beautiful -- Buy them." And the good thing is, they're very inexpensive at the market compared to local supermarkets' prices for fresh sprouts.
So what does one do with bean sprouts measured in pounds? Egg foo yung is a favorite and I have good luck freezing any leftovers so that takes care of several cups of bean sprouts. But in the winter when fresh produce at the store is pitiful -- shipped 1,000 miles or more and usually looks like it, too -- bean sprouts salad is a welcome change from DH's cold frame lettuce and winter root vegetables and it easily uses a pound of sprouts.
I found this salad recipe several years ago at SproutPeople and the dressing is out of this world! The salad's good as is or add shredded chicken for a main dish. Try serving it over bean thread noodles if you have them. If you don't have fresh bean sprouts, try subbing Napa cabbage or regular green cabbage. And, once you try the dressing, you may want to use it to make a chicken salad all on its own, without the sprouts. That's okay, too.
Bean Sprout Salad in Outrageous Dressing
Serves 4
1 pound (or more) mung bean sprouts
1 cup chopped cucumber
1/2 cup (or more) grated carrot
1 cup (or more) chopped sweet peppers
2 cups Napa cabbage, chopped
Outrageous Dressing
3 tablespoons tahini or crunchy peanut butter (or combination)
2 tablespoons soy sauce
4 tablespoons vinegar
1 teaspoon to 1 tablespoon hot red pepper oil
1/4 to 1 teaspoon cayenne pepper
1 teaspoon sugar
1 tablespoon toasted sesame oil
2 tablespoons sunflower oil
1 tablespoon minced ginger
1 tablespoon minced garlic
1 tablespoon minced green onions
1 tablespoon white wine
1 teaspoon hot mustard (optional)
1/2 teaspoon salt
1 1/2 cups broth (chicken or vegetable)
Mix sprouts and chopped vegetables in a bowl.
Mix all dressing ingredients together and pour over salad.
Chill salad, if desired, and serve garnished with more chopped scallions and toasted sesame oil.
Optional:
Poach sprouts for 30 seconds to 2 minutes by putting them in rapidly boiling water, remove to strainer and cool quickly with cold water. Drain well.
For more recipes and kitchen ideas check out Kitchen Tip Tuesdays at TammysRecipes.com.
Tuesday, January 27, 2009
Tuesday, January 20, 2009
Date Krispies
 These no-bake treats may not look like much but they taste great! My sister's been preparing them at Christmas for years and lately I've taken to making a batch when the weather's cold and we want something sweet to eat. DS and I made these when the temperature hit 0F. here this past week. Seemed like we needed a treat...
The recipe is fast but there is a short waiting period till the mixture is cool enough to shape into balls. Wetting my hands with cool water before shaping helps me work the mixture before it's completely cool and keeps the dates from sticking to my fingers.
Rolling the balls in confectioner's sugar is our preferred finishing method but even DS, who doesn't care much for coconut, likes the balls rolled in unsweetened coconut. And, if I'm making them as part of a Christmas basket, I often finely chop pecans or walnuts and roll the balls first in the sugar, then in the nuts. Yum!
Date Krispies
1 stick (4 ounces) butter
1 cup sugar
1 egg, lightly beaten
1 cup dates, chopped
3 cups crisp rice cereal such as Kellogg's Rice Krispies
1 teaspoon vanilla extract
Powdered sugar, coconut, chopped nuts - optional
Melt butter in large saucepan over low heat. Stir sugar, dates and egg together in small bowl and pour into melted butter, blending well. Cook over low to medium heat, stirring often, till mixture comes to a full boil. (Boil that cannot be stirred down.) Remove from heat. Add vanilla extract and cereal. Stir to combine.
Let sit till mixture is cool enough to handle with bare hands. Wetting hands with water will help keep mixture from sticking to fingers. Roll into balls about 1-inch in diameter. Roll balls in powdered sugar, shredded coconut or finely chopped nuts as desired. Makes about 40.
For more recipes and kitchen ideas check out Kitchen Tip Tuesdays at TammysRecipes.com.
Monday, January 19, 2009
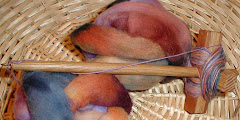
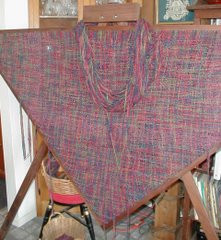
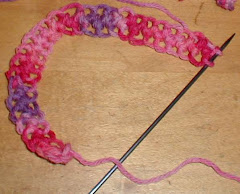
First new knitting project of 2009 finished
 All my forced downtime the first couple weeks of this year at least meant I had time to knit. This hat went so quickly! I decided to make a simple Garter Stitch Cap with this soft mostly-merino Garden Party Fibers (Handspun by Jacquetta) yarn I bought a few years ago. My plans are to use the leftover yarn to trim a pair of felted mittens I'll cut out of an old Shetland sweater I recently felted in the wringer. Maybe knit a short cuff or needle felt a design on the mittens? Haven't decided yet.
The pattern I used for the hat came from Homespun, Handknit, one of my all-time favorite knitting books. The pattern couldn't be simpler: Knit 1 round, purl 1 round on circular or dp needles till time to shape the top. Then alternate a decreasing knit row with a plain purl row for another 7 rows or so. The colorful nubby bulky yarn stars here.
Tuesday, January 6, 2009
Sausage balls: quick breakfast, tasty snack or soup accompaniment, and, um, spur-of-the-moment chicken treat?
A Christmas gift this year included homemade pork sausage. The presenter gave it already frozen in pint-size glass jars and we knew from past years' batches it would be perfectly seasoned with a good balance between lean and fat. In other words, a perfect sausage for making breakfast patties, sausage brunch casseroles or quiches, combining with ground venison for sloppy joes or meatloaf and for making not-too-greasy sausage balls. Yesterday was the day for sausage balls.
Serve them warm from the oven with a flavorful mustard (we like Nectarine Mustard) for dipping and they can be stored in the refrigerator for a few days -- reheating as needed in oven or microwave. Also great for freezing, either before or after baking. I rarely freeze before baking simply because my sausage is often frozen before preparation but either way works great.
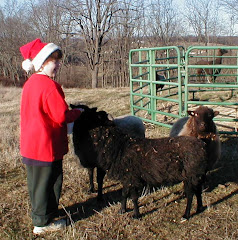
A few sausage balls make a great quick breakfast with a glass of juice or bowl. And always a good choice for a snack -- they often show up at parties because everyone likes them and they're so easy to have on hand in the freezer. They can even serve as a chicken treat as happened today when I was caught outside by our backyard girls without any readily accessible treats. The chickens, particularly Turkey, the large reddish-brown turken gobbling down her snack, are as bad as the dog when it comes to begging for a treat. Heck, Turkey doesn't even beg, she demands. Failure to produce a treat often leads to her jumping up to sit on your arm or shoulder as she squawks her frustration at being denied a treat. So today, in the drizzling icy rain, I didn't want to get into a discussion of poultry nutrition with her so I gave in and shared a bit of sausage ball I was munching on while gathering eggs. Madame President, the silver-laced Wyandotte, was quick to share, too. Dolly and Jabber, the white hen, even managed to get a bite. Seemed to rank right up there as treats go.
Yesterday DS did the mixing by hand but if you don't have a child around who likes to mash things together when cooking, just use an electric mixer on low or a few quick pulses of a food processor to do the messy job. I've also heard of cooks putting the ingredients in a large plastic bag and kneading it thoroughly from the outside of the bag. If you use a cookie scoop to from the sausage balls, you never need get your hands gooey.
Bisquick is a traditional ingredient in the simple sausage ball recipe but we mainly eat fresh ground whole wheat so I tweaked the recipe as usual. Plus, I think the whole wheat flour adds a richer, nutty flavor to the mix. And the butter is optional -- the sausage usually provides plenty of fat without the added shortening. (I didn't use it for this batch and can't tell any difference in texture or taste.) If you do use Bisquick, just substitute 2 cups of the regular or low-fat version for the first four ingredients listed below.
Sausage Balls
2 cups whole wheat pastry flour
2 tablespoons butter, lard or shortening
1 tablespoon baking powder
1 teaspoon salt
1 pound bulk pork sausage
1 small onion, diced (optional)
1/2 pound sharp cheddar cheese, shredded
up to 1/2 cup milk or buttermilk
Preheat oven to 350F.
Cut fat into flour with pastry blender as when making biscuits. Add other ingredients except milk and stir to blend. May use mixer or food processor as described above. Sometimes it's easier to add sausage in small bits and then stir in shredded cheese last. YMMV. Add up to 1/2 cup milk or buttermilk slowly to mixture to help bind ingredients.
Form batter into small balls, no larger than 1-inch in diameter. Place on baking sheet with low sides. If you're not sure of the low fat content of your sausage, line baking sheet with aluminum foil and turn up foil edges to help contain grease that may melt from balls while baking.
Bake at 350F. for 15-20 minutes. This makes about 3-4 dozen sausage balls at 1". Mine are soft when I take them out but upon breaking one open, the sausage has changed color and the dough is similar to the inside of a biscuit. If baked too long, they will become hard and almost rock-like after cooling.
For more good ideas (but maybe not chicken snack recipes) check out Kitchen Tip Tuesdays at Tammy's Recipes.
Serve them warm from the oven with a flavorful mustard (we like Nectarine Mustard) for dipping and they can be stored in the refrigerator for a few days -- reheating as needed in oven or microwave. Also great for freezing, either before or after baking. I rarely freeze before baking simply because my sausage is often frozen before preparation but either way works great.
A few sausage balls make a great quick breakfast with a glass of juice or bowl. And always a good choice for a snack -- they often show up at parties because everyone likes them and they're so easy to have on hand in the freezer. They can even serve as a chicken treat as happened today when I was caught outside by our backyard girls without any readily accessible treats.
 The chickens, particularly Turkey, the large reddish-brown turken gobbling down her snack, are as bad as the dog when it comes to begging for a treat. Heck, Turkey doesn't even beg, she demands. Failure to produce a treat often leads to her jumping up to sit on your arm or shoulder as she squawks her frustration at being denied a treat. So today, in the drizzling icy rain, I didn't want to get into a discussion of poultry nutrition with her so I gave in and shared a bit of sausage ball I was munching on while gathering eggs. Madame President, the silver-laced Wyandotte, was quick to share, too. Dolly and Jabber, the white hen, even managed to get a bite. Seemed to rank right up there as treats go.
 Yesterday DS did the mixing by hand but if you don't have a child around who likes to mash things together when cooking, just use an electric mixer on low or a few quick pulses of a food processor to do the messy job. I've also heard of cooks putting the ingredients in a large plastic bag and kneading it thoroughly from the outside of the bag. If you use a cookie scoop to from the sausage balls, you never need get your hands gooey.
Bisquick is a traditional ingredient in the simple sausage ball recipe but we mainly eat fresh ground whole wheat so I tweaked the recipe as usual. Plus, I think the whole wheat flour adds a richer, nutty flavor to the mix. And the butter is optional -- the sausage usually provides plenty of fat without the added shortening. (I didn't use it for this batch and can't tell any difference in texture or taste.) If you do use Bisquick, just substitute 2 cups of the regular or low-fat version for the first four ingredients listed below.

Sausage Balls
2 cups whole wheat pastry flour
2 tablespoons butter, lard or shortening
1 tablespoon baking powder
1 teaspoon salt
1 pound bulk pork sausage
1 small onion, diced (optional)
1/2 pound sharp cheddar cheese, shredded
up to 1/2 cup milk or buttermilk
Preheat oven to 350F.
Cut fat into flour with pastry blender as when making biscuits. Add other ingredients except milk and stir to blend. May use mixer or food processor as described above. Sometimes it's easier to add sausage in small bits and then stir in shredded cheese last. YMMV. Add up to 1/2 cup milk or buttermilk slowly to mixture to help bind ingredients.
Form batter into small balls, no larger than 1-inch in diameter. Place on baking sheet with low sides. If you're not sure of the low fat content of your sausage, line baking sheet with aluminum foil and turn up foil edges to help contain grease that may melt from balls while baking.
Bake at 350F. for 15-20 minutes. This makes about 3-4 dozen sausage balls at 1". Mine are soft when I take them out but upon breaking one open, the sausage has changed color and the dough is similar to the inside of a biscuit. If baked too long, they will become hard and almost rock-like after cooling.
For more good ideas (but maybe not chicken snack recipes) check out Kitchen Tip Tuesdays at Tammy's Recipes.
Friday, January 2, 2009
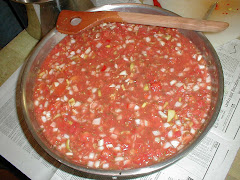
Cleaning out the freezer leads to canning beef stock...

About 10 pounds of beef soup bones became 14 pints of rich beef broth.
One of DH's least favorite jobs couldn't be put off any longer so we tackled the chest and upright freezers last week and discovered several packages of meaty soup bones languishing in the bottom of the chest freezer. We all love vegetable soup but there was too much for a regular batch so I decided to put up most of the stock for later use and added chopped vegetables to the rest to make a pot of soup for immediate consumption.
I've included the basic stock recipe below but it's open to interpretation. For example, throughout the year when I scrape carrots and peel onions, I often throw the unwanted portions (aka carrot peels, onion skins) into a freezer bag for just this kind of cooking. Then when I want to make soup stock, I use those parings as the vegetable basis. If I don't have enough on hand in the freezer, I use unpeeled but scrubbed carrots and the same with onions and celery. No need to trim away the peel as long as it's clean. You almost can't have too many vegetables in the pot -- they all add to the final flavor of the stock after all.
Beef Stock
10 pounds meaty beef bones
3 large, scrubbed carrots, chunked
3 large stalks of celery with leaves, chopped
3 large unpeeled onions, quartered
2 cloves garlic, crushed
1 teaspoon black peppercorns
2 large bay leaves
2 sprigs fresh thyme
Heat oven to 425F. Place all bones in large roasting pan. Bake uncovered for 30 minutes. Add onions, celery, and carrots. Bake, turning tones and vegetables occasionally, an additional 30 minutes or until bones are evenly browned.
Transfer ingredients to a large 2-1/2 gallon stockpot or use large electric roaster oven. If you don't have one pan big enough for the whole amount, split all ingredients evenly between two smaller pots. Add 2 cups water to roasting pan, scraping up browned bits. Pour over bones and vegetables in stockpot. Add at least 1-1/2 gallon additional water or enough water to cover ingredients by 2 inches. Bring just to a boil, skimming foam as needed.
Reduce heat and simmer partially covered for 4 to 6 hours, adding hot water if necessary to keep ingredients submerged. Strain stock through fine sieve of through triple layer of damp cheesecloth-lined colander set over large bowl or pot. Discard solids. (Meat may be pulled from bone and used for another purpose. Taste before using in another recipe as the long cooking pulls much of the flavor from the meat.)
Cool stock overnight in refrigerator. Next day, remove and discard layer of fat. Return stock to pot and bring to a boil. Immediately fill hot quart or pint jars with stock, leaving 1-inch headspace. Wipe jar tops and threads clean. Place hot lids on jars and screw bands on firmly. Using pressure canner, process quarts for 25 minutes and pints for 20 minutes at appropriate pressure for your altitude.
If you've never canned before check out the latest Ball Blue Book of Preserving or the USDA-funded website, National Center for Home Food Preserving, for detailed directions.
Subscribe to:
Posts (Atom)