Sunday, June 29, 2008

Summer supper


Lots of activities this week along with the usual gardening and general chores meant not much time for cooking. But when it's hot we tend to prefer lighter meals anyway. Last night's meal fit that profile with a combination of garden vegetables and a bit of local cheese.

Yesterday morning I prepared Harvey House Slaw (recipe below) using a head of cabbage and several Egyptian onions from our garden. It's best when made at least 4 hours ahead of serving and any leftovers will keep for several weeks in the fridge. I think it gets better the longer the vegetables marinate and have seen similar recipes with names such as '6-weeks Slaw.' The onions lose quite a bit of their edge in the slaw so don't feel like you have to start with a sweet onion.

Earlier in the week I cut the crust from the last of a loaf of wholegrain bread (from local wheat) I'd baked in my pullman pan. Then thinly sliced it and baked the slices in a very low oven till dried and crispy -- making homemade melba toast. I do this regularly with extra bread so I almost always have a tin of crisp melba toast sitting on the shelf. We use it in place of crackers much of the time and since I planned to serve a cheese spread for last night's meal, the melba toast was a perfect accompaniment.

A friend and I had been talking about cheese spreads lately and when I went to town in the middle of the week I couldn't resist picking up a small tub of a locally-produced goat cheese and dried tomato spread. I love this spread and hope one of these days we can make our own version -- DH is slowly coming 'round to the idea of a couple of dairy goats and this cheese on a crisp toast makes a great selling point.

To go with the slaw, cheese, and toasts, DH picked a mess of green beans (third one this week from the garden!) which I lightly steamed and then sprinkled with coarse salt. Sometimes I'll dribble a little olive oil over the beans but since the Harvey House has a vinegar and oil dressing another oil didn't seem necessary.

We're still eating sweet cherries my sister picked and tho we've added cherries to a few yogurt smoothies and canned or frozen most of them, we enjoy them best by the handful. Yes, spitting out cherry pits as we go. That's how we ate them last night sitting on the back deck watching a faraway neighbor's fireworks. Relaxing end to a busy week.

Harvey House Slaw

1 head of cabbage, cored
1 large onion, thinly sliced
1-1/3 cup sugar or 2/3 cup honey
1 cup vinegar (I use apple cider vinegar)
1/2 cup salad oil (I use sunflower oil)
2 teaspoons dry mustard
1 teaspoon celery seed
2 teaspoons salt

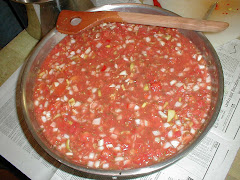
Cut cabbage into wedges and then thinly slice. (Alternatively, may use food processor to slice.) Put cabbage in a large bowl and scatter onion slices on top. If using sugar, pour over onion.

Put remaining ingredients (and honey if using rather than sugar) in medium saucepan and bring to a rolling boil. Stir to dissolve honey and pour over cabbage immediately. Cover with lid or plastic wrap to hold in steam. Do not stir cabbage mixture at this time. Refrigerate at least 4 hours before serving. Stir prior to serving.

Sunday, June 22, 2008

Hamburger, fries and a dish of ice cream -- all local!

DH likes a good hamburger but we rarely eat out these days as we like to know where our food comes from and there aren't many (any?) local food restaurants in our area. So this weekend we had our version of a hamburger and fries.

The hamburger starts with local venison we prepared ourselves. I have trouble powering my old handcrank meat grinder for very long so last summer, in preparation for hunting season, I bought a grinder attachment for my KitchenAid mixer. With that and the vacuum sealer, we can have ground venison in the freezer ready for use any time of year. Our hamburgers start with thawing the venison and a package of locally-produced country pork sausage, also stored in the deep freeze. I mix about 1-1/2 pounds of venison with a pound of sausage and shape into patties. No further seasoning needed.

DH put the patties on the gas grill while I prepared the fries. Thursday I boiled new potatoes from our garden in their jackets and the leftovers went into the fridge for just this moment. I pulled the skins off the cold cooked potatoes and sliced them to fry in a combination of oil and local butter, about 1-1/2 tablespoons of each. I use a heavy iron skillet as it's nonstick for all practical purposes and lets me get on with the rest of supper without watching the potatoes too closely.

While the potatoes sizzled, I topped and tailed a bowl of sugar snap peas also from the garden and threw in the first couple of garden zucchini which were ready today. I just steamed the vegetables and sprinkled a bit of kosher salt over top before serving. The buns were wholegrain made from wheat I sourced at a local farm last year. I used my all-purpose bread recipe, just shaped the dough into rolls and baked. The sliced onion came from the garden as did the cucumbers and onions in the jar of bread-and-butter pickles I canned last year and opened to go with the sandwiches. A little of the lettuce is still hanging in there so DS could have a few leaves on his sandwich but no ripe tomatoes yet -- don't think anyone noticed their absence.

Even the mustard and ketchup could count as local as they're from jars I put up last year. The tomato ketchup recipe (below) is called Western Gourmet Ketchup and comes from an old Farm Journal cookbook. It makes a nice table ketchup plus is good in recipes calling for ketchup or a slightly spicy tomato sauce. I've been making it for years from our garden tomatoes. The mustard, Nectarine Mustard, is a real favorite around here and I've learned to make it by the gallon, literally! For Christmas I give my brother-in-law a dozen pint jars and my mom says he still eats it at her house by the spoonful. Very easy and, since the nectarines come from an orchard just over the mountain, also very local.

For dessert we had ice cream made at Perfect Flavor, which uses local ingredients such as eggs from Joel Salatin's Polyface Farms and milk from Holsinger Dairy Farm. I'd been meaning to stop by their shop at the foot of Afton Mountain for several months and finally had an opportunity on Tuesday when the local homeschool group toured the creamery and talked with Lynsie Watkins about her business. The vanilla and chocolate ice cream samples were wonderful! Even though we usually make our own ice cream, I couldn't resist bringing home a container from Perfect Flavor. It was a great way to finish our very local dinner.

Western Gourmet Ketchup
(from Farm Journal's Freezing & Canning Cookbook: Prized Recipes from the Farms of America)

7 quarts tomato puree (18lbs tomatoes -- See Note*)
3 tablespoons salt
2/3 cup sugar
1 tablespoon paprika
1/4 teaspoon cayenne pepper
1 tablespoon dry mustard
1 tablespoon whole black peppercorns
1 tablespoon whole allspice
4 bay leaves
4 chili peppers
1 tablespoon dried basil
2 cups vinegar, 5% acidity (I use apple cider vinegar)

Tie spices loosely in a cloth bag so they can be retrieved after cooking. Add all ingredients, except vinegar, to tomato puree. To prevent lumps, blend dry mustard with a bit of tomato juice before adding to puree. Cook until thick, about 1-1/2 hours. Will not thicken as much as storebought but should reduce by at least one-third.

Add vinegar the last 10 minutes of cooking.

Remove spices.

Pour into hot, sterilized jars; seal and process in water bath canner for 10 minutes. Makes 4 pints.

*Note: Cook 18 pounds of washed and cored tomatoes until soft. Then put through a sieve to yield 7 quarts of tomato puree.

If you've never canned using the water bath method, please refer to the latest Ball Blue Book of Preserving or the USDA-funded website, National Center for Home Food Preserving, for detailed directions.

Tuesday, June 17, 2008

Pickled beets or beet pickle?

No matter what you call them, they're good! Easy to make and, after I saw the price on a pint jar of "pickled beet balls" ($4.09!), I'm looking at my quarts as tho they were gold. Even better, if you grow your own beets, when you thin them you get to eat the tiny beets along with their tops (beet greens).

So far I've put up 34 quarts of pickled beets since last Thursday. That represents half of our beet crop this year. Between the beets and 25 gallons of sweet cherries my sister picked this weekend, we've been busy. One good thing, both beets and cherries will stain your hands so it's kind of nice to get them done all at once. Of course, you can always wear lightweight plastic gloves but I say (almost) black fingernails can be a fashion statement in some circles and a badge of honor in others so don't worry about it.

Prior to this year I never gave much thought to beet pickles other than noting whether we needed to "do beets" but I've had at least 3 people ask me for a recipe in the last couple of days. So I'm including the recipe I use at the end of this post.

And don't worry if you didn't plant beets this year. For one thing, you could always put in a few rows as a late summer, early fall crop or just buy plain canned beets and save a step in the recipe below. If you only make a small batch, you can skip the hot water bath and store them in the fridge. Some people like to include onions in the jars along with the beets or add peeled hard-boiled eggs to the jar after opening. For me I'm just thinking about how good pickled beets are served alongside potato salad or with green beans and potatoes, say.

The only low note is DS, a cucumber pickle aficionado, just doesn't care for them. I did learn that he loves plain cooked beets, tho, as he kept asking for slices when I was filling the jars. So I'm not giving up hope and there's always Harvard beets or roasted beets or red flannel hash for any beets that don't get pickled this year.

Pickled Beets

4 quarts beets, sliced (*see Note below)
3 cups apple cider vinegar
1-1/2 cups sugar
1-1/2 cups water
2 (3-inch) stick cinnamon
Pack beets in sterilized jars. Combine other ingredients in saucepan, and heat to boiling. Boil 5 minutes. Pour hot liquid over beets in jars leaving 1-inch headspace. Tighten lids and process in boiling water bath for 30 minutes.

You can double or treble this recipe as needed. I usually prepare all my beets and get them into jars. Then cover the jars with a towel while I prepare the pickling liquid. I simply mix and cook more liquid as needed to fill prepared jars.

*Note:
Prepare beets for canning by cutting off beet tops, leaving about 1-inch attached. This will stop the beets from bleeding so badly while cooking. Cook washed whole beets in boiling water to cover for 20-25 minutes or until you can rub the peeling off with your hands under cold water. Cool beets quickly by putting them into a dishpan of cold water. Use a knife to cut off tops and rub skin off with your hands. Can use a knife to scrap any stubborn bits off as needed.

If you've never canned using the water bath method, please refer to the latest Ball Blue Book of Preserving or the USDA-funded website, National Center for Home Food Preserving, for detailed directions.

Check out Kitchen Tip Tuesdays at Tammysrecipes.com for lots more how-to information.

Sunday, June 15, 2008

Sunday lunch and minor garden talk

This morning DH couldn't resist checking along the edges of a row of Yukon Gold potatoes. He didn't dig with a shovel, just scrabbled with his hands so as not to disturb the growing plants yet still came up with one softball-sized potato and another dozen ranging from golf ball- to baseball-sized. Those were enough to get us off and running to create an all-from-the-garden lunch.

A medium-sized head of cabbage (about 3-1/2 pounds -- the third one picked this season), a couple of pounds of sugar snap peas which DS picked, and a handful of chives completed the harvest. I cut half the cabbage into wedges and steamed it. A pound of the peas I quickly stir-fried in homemade garlic oil and I simply scrubbed the potatoes, quartered them as necessary, and boiled till fork tender, about 12 minutes. They cook really fast when fresh.

To accompany this garden feast I sliced a bit of cold roast beef (grass-fed and raised about 15 miles from here) but when it came time to sit down no one even looked at the beef. It was all about the potatoes sprinkled with aromatic fresh chives and topped with local country butter. And just a touch of local apple cider vinegar poured over the cabbage. And those crisp tender peas in the pod! Oh, my.

DS discovered that he likes to dip pea pods into the vinegar, too. Not something I wanted to try but interesting.

For dessert we enjoyed a bowl full of sweet cherries that my sister picked yesterday morning. It was such a good meal, DH packed up the remains to take for dinner at work. He included a bit of meat but I think that was only because we'd made real inroads on the vegetables -- there weren't many leftovers, in other words.

Sunday, June 8, 2008

Broccoli from the Garden to the Table

After several days with daytime temps in the 90s and nighttime temps over 70F., the last of the spinach bolted. The lettuce won't be far behind. The cilantro self-seeds so well that I don't expect to lose it completely -- there are always young starts to pick up the slack when the older plants set seed.

The broccoli came and went in about two weeks. DH picked the last of the side shoots today (9 pounds) and plans to prepare that garden bed for sweet corn tomorrow. I have to say the broccoli was outstanding again this year. Very few bugs -- I froze about 15 pounds last week and only had one full-size and two tiny caterpillars out of all that broccoli. This last batch had a few more, about 8 full-size and a couple tiny ones. As always, I soaked it in salt water prior to blanching and freezing.

The last few years I've separated the broccoli into florets with only about an inch of stem and then I chop the stems and freeze them for use in casseroles, cream soup or as an addition to stirfry or fried rice. Even using a vacuum sealer we just didn't care much for the frozen spears -- the tops were overdone and the stems almost limp at times. (We have the same reaction to storebought frozen broccoli spears.) Maybe the difference now is because I don't have to blanch the florets as long when the stems aren't attached. And the stems take less time than normal, too, since they're in smaller pieces. Two minutes in rapidly boiling water and I use an extra large stock pan filled with water so I don't wait for it to come back to a boil.

Most meals around here are prepared fresh from our garden or food preserved from it by freezing, canning or drying. We add fresh eggs from the backyard girls, local (or even homegrown) chicken, beef raised on grass less than 15 miles away, or sometimes venison from this or a neighboring county. Can't get food from much closer than right outside the door or within a 30-minute drive. And it's all handy and available throughout much of the year, especially when considering the ways we preserve it.

Yesterday's lunch was typical. In the morning I partially thawed a piece of venison, sliced it thin and marinated it in an apple cider vinegar, garlic and herb blend until lunchtime. The herbs came from the current garden and included thyme, lovage and oregano plus a couple of garlic cloves and dried Thai bird peppers from last year's garden. Even the vinegar was made here last year with apple cider from a friend's cider mill a few miles away. I don't use it for canning as I haven't bothered to verify its acidity level but it tastes like good cider vinegar should!

When we were ready for lunch, I grabbed a bunch of broccoli from the salt water where it was soaking prior to cooking, and coarsely chopped it. Pulled up a couple of pieces of the walking onion and, after rinsing, cut it into thin rings, including some of the green top. Heated the wooden-handled wok till it was smoking and added a tablespoon or two of peanut oil. Unfortunately that was not local -- haven't had any luck finding a source for local oils yet.

The stirfry process itself went very quickly. First I cooked the onion, adding the broccoli almost immediately. Then removed the vegetables from the pan and tossed in the venison, drained of its marinade. Thinly sliced, the meat cooked quickly and I added the vegetables back in along with a dash of kosher salt and pepper.

To accompany the stirfry I buttered the last of the homemade wholegrain bread (made with wheat harvested locally last year and ground just before baking) and heated it in the toaster oven. For dessert, we had fresh strawberries which DS had just picked from the strawberry bed in the side yard. I had intended to make rhubarb ade to drink but ran out of time and so we all drank water. Since it comes from our well, it can't get much more local.