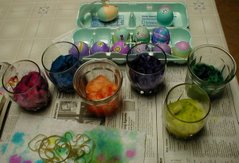
 We can't. First we boiled two dozen brown eggs and DS spread newspaper on the worktable in the kitchen. DH scrounged up wide-mouth jars to hold the dye. This year I bought a dye kit at the dollar store. The dyes come in pellet form and all but the red and purple ones required vinegar be added to the water when mixing.
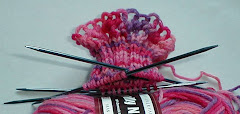
 The egg colors were pretty but a bit muted due to using brown eggs, I think. The yellow egg in the middle front was gorgeous! Not a blemish on it. The others had light spots and smudges where the dye seemed to come off on our hands or the tongs we used to lift the eggs from the dye baths. That should have been my clue on the quality of the dye but I couldn't help stuffing picked Border Leicester wool (from Vanna or Lacy, I never could tell them apart) in the dye jars after DS finished dyeing eggs. I'm still trying to rinse the dyed wool. The colors bleed terribly. Guess this wool will be destined for a project that must need never be washed...

This year we followed our usual Easter egg dyeing routine with a session making Ukrainian Easter eggs or pysanky. (See Next Up: Pysanky)
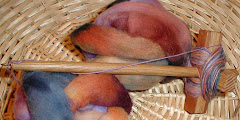
Pysanky is a wax-resist method of dyeing done in stages depending on how many colors you want to use. We started by using a pencil to lightly mark our eggs with the beginnings of a design. The photo shows DS's egg with a ship design. He went for the non-traditional design.

Then we used a kistka to apply melted wax to the parts we wanted to remain the original egg color. (We all chose green eggs tho it's hard to tell that from some of these photos.) DH is holding his egg, mine sets to the left and DS's egg, without any wax, is at the top.

 The next step was to dip the egg in the first color. Color order is chosen by its coverage ability. I stirred up yellow, orange, red, royal blue, and black and set them up on a separate workspace in that order.
When I finished my first coat of wax, I lowered my egg into the yellow dye bath and left it for about 10 minutes as I wanted a fairly deep yellow color. It took longer to apply the next bit of wax as I wanted more of the egg to remain yellow than I wanted the original color to show. Then I lowered the egg into the red dye. It was another 10 minutes before I could remove my egg. These pictures show both sides of the egg.


DS, meanwhile, started working on his egg with the electric kistka -- he doesn't like using the candle flame to heat the kistka, and DH used the red- and white-handled kistky, noting the difference in the funnel opening on each. He also marveled that one little block of beeswax has lasted thru so many eggs over the years. Now that he and DS have decided this is a craft they can do, I may have to buy more.

 Since I only wanted two dye colors, yellow and red, for my egg, I finished ahead of DH and DS who still have work to do on theirs. I needed to get started on dinner and DH obligingly offered to remove the wax from my egg.It's easy to do. Just hold the egg close to the candle's flame and let the wax heat till you can wipe it off with a paper towel but be careful working around the flame.


2 comments:
Nice! But where's a picture of the finished egg? :-)
-Jocelyn
Um, I forgot to take one. [hiding face in shame]
It was a little hectic when we were cleaning up and my Ukrainian egg was packed along with a few of DS's dyed hard-boiled eggs to take to Grandma's Sunday evening. I'll edit the post this weekend and add a picture of the finished egg. It's sitting on my mom's mantel at the moment...
Post a Comment