I can western ham and sometimes smoked picnic shoulder (picnic ham). Sometimes it says semi-boneless. And even though the ham I buy these days is always labeled Ready-to-Eat, which means it's already cooked, I like to cook it in the roaster oven (regular oven would work, too). That way it's hot and ready to go straight into the canning jars as fast as I can get it cut off the bone. How long I cook it depends on the size of the ham -- the package has directions as to temperature and how many minutes per pound as well as recommended internal temp.
Once the ham is cooked, I lift it out onto a cutting board and trim away all skin and fat. That goes into a stock pot along with the bone when I'm done. Makes great ham stock for canning beans or cooking potatoes for potato soup. The ham gets cut into chunks. I try to cut the meat into even-sized pieces about an inch thick. Since I'm never sure just what I'll want the ham for when the jar's opened, I go with large pieces overall -- I can always slice, cube or dice it as needed later.
Hot jars are packed with hot ham to within an inch of the rim. Wipe rim of jar clean. (I use a clean cloth dipped in vinegar as it seems to help cut any grease that may be on the glass jar.) Place lid on jar and tighten ring. Using a pressure canner, process pints and half-pints for 75 minutes and quarts for 90 minutes at the appropriate pressure for your altitude. If you've never canned before check out the latest Ball Blue Book Guide to Preserving
When I told DH I was going to post my recipe for ham salad, he just rolled his eyes and said "what recipe? You just throw it together and taste as you go!" And he's right. I have four ingredients that I combine to make ham salad but I don't measure any of them. One reason is because I rarely have the exact same amount of ham each time because ham salad is a favorite way I use up leftover ham -- after we've eaten it hot from the oven and in cold slices on a sandwich we have it ground up with mayonnaise, mustard and sweet pickles added to make ham salad. But I can give you what I start with and then suggest you let your taste buds lead you on.
Ham Salad
2 cups cold, cooked ham
1/2 cup mayonnaise
1/2 cup sweet pickles or 1/3 cup sweet pickle relish
1 to 2 tablespoons yellow mustard
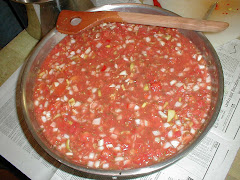
Using a food processor or meat grinder, process ham and pickles. You want them to be finely chopped but not pasty.
I scrape the ham and pickles into another bowl before adding the mayo and mustard as I don't want to risk processing to much. Texture is important here.
Add mayonnaise and the smaller amount of mustard, then taste and adjust mayo or mustard till you have the right combination for you. I don't want to add so much mustard that the salad turns yellow but I definitely like to have a little tang to the salad -- it offsets the sweetness of the pickles, I think.
This is ready to eat at this point but it's even better if you can give it an hour or so in the fridge to chill and let the flavors meld.
----------
If you're tired of sandwiches or crackers, try making little puff pastries to fill. They're pretty easy and they look impressive on a plate. They're also good filled with chicken salad.
Puffs for Filling
(adapted from Better Homes & Gardens New Cook Book, 1976)
2 tablespoons butter
1/4 cup flour
dash salt
1 egg
1/4 shredded Swiss or Cheddar cheese (optional)
Melt butter in 1/4 boiling water. Add flour and dash salt; stir vigorously. Cook and stir till mixture forms a ball that doesn't separate. Remove from heat and cool slightly. Add egg and beat vigorously until smooth. Stir in cheese. Drop dough onto greased baking sheet, using 1 level teaspoon dough for each puff. Bake at 400ºF. about 20 minutes. Remove puffs from oven; cool and split. Fill each puff with 2 teaspoons of ham or chicken salad. Serve immediately or refrigerate for up to 4 hours. (They are actually still tasty the next day but will eventually soften in storage so best not to plan on storing too long.)


3 comments:
I'm laughing at the comment about throwing it all together--it sounds great, Carolyn! I never canned a ham! I've seen them in stores canned, but never did this. Great idea! I usually just cut up slices and freeze it, but I'll bet canning lasts longer! I'll have to try your salad recipe sometime here. Thanks!!
thinking of using this for leftovers.
Ideas? thoughts?
I really want to can my ham, but I can't find anywhere in the Ball book, or the USDA site, info on canning ham. Where did you get your info? Also, if you can more than 1 item, together, (ham & potatoes for example) how do you adjust for processing time? Thanks!
Post a Comment