Thursday, May 7, 2009

Spring Garden Update

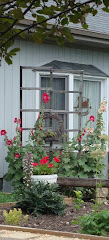
We're finally getting rain this spring and the garden's showing its appreciation.Spinach, lettuce and radishes were on the menu by the first of April and two weeks ago we harvested the first of the asparagus and rhubarb. I even managed to stash about 2 quarts of rhubarb in the freezer but we tend to eat any asparagus available. We're a greedy bunch. [Photo shows lettuce and spinach after the fourth harvest and still producing.]

DH started bok choy, broccoli, and two types of swiss chard in the cold frames earlier this spring and has begun setting them out in the regular beds this past week. The tomatoes we seeded in mid-March are looking great and will probably go into the garden late next week. May 15 is the safe last frost date around here.

I'm starting Hillbilly Potato-leafed tomatoes for DS as they're his favorite and will also have winter and summer squash as well as gourds ready to go out in the garden beds by the end of this month when the nights should be consistently warmer.

The garden got pushed to the side the last few days as DS and DH spent Friday on a hike of Mud Pond trail with Lester Zook's WILD GUYde Adventures. The hike was supposed to happen earlier in the week but was postponed due to rain. And they went canoeing with the same group this past Tuesday -- the rain didn't bother DS in the least.
I had my own trip last weekend when a friend and I went to the Maryland Sheep & Wool Festival on Sunday. We left at 5am, I got back home about 7pm and it rained the whole time. The festival was oh so wet but we had a great time. Met some wonderful people at the Ravelry meetup and, of course, purchased a little fiber, too. I couldn't resist getting a skein of Blue Moon Fiber's Socks that Rock in the Hurdy Gurdy colorway -- for once I was glad it was raining as it meant The Fold's booth wasn't as packed as usual. I could even browse for a few minutes... Then I found some gorgeous dyed Coopworth wool at the Wild 'n' Woolly Farm booth and scooped it up for part of a Ravelry swap package I need to mail out this week.

Wednesday, March 25, 2009

Needle felting on a shirt yoke

My old cotton flannel shirt has seen better days but I thought it deserved a little decoration so needle felted a brown sheep on the back yoke last month.

I used a sheep-shaped cookie cutter to lay out the initial form. Outlined it with a strand of 2-ply natural brown wool handspun yarn and used one of my 38 gauge felting needles to attach the yarn to the fabric.

Once I had the main shape outlined, it was easy enough to fill it in with swirls of yarn. I added the face and legs using black tapestry wool I had in my stash.

DS thinks the design looks more like a bear than a sheep but I'm pleased with the results. The fabric underside has little tufts of wool sticking through (natural part of the needle felting process) so I don't think I'd use this decorative technique on a piece of clothing that would rest directly on my skin. I wear this shirt as a jacket though so that isn't an issue. And I've washed the shirt several times since needle felting without damage to the design. I do turn it wrong-side out before washing, tho.

Tuesday, March 17, 2009

Wondering what to do with that leftover corned beef?

I know, this is not a problem that confronts you today. Today is St. Patrick's Day and all across America many cooks have prepared corned beef for dinner. With cabbage, potatoes, carrots or whatever accompanies the corned beef, folks are pretty much satisfied. Dinner was good. It's tomorrow or maybe the day after, when you're looking at the remains of that corned beef still sitting in the fridge that I'm talking about.

There are a couple of old standbys for using up corned beef. How about corned beef sandwiches, perhaps on rye with mustard? Maybe a pickle on the side or try adding sauerkraut, a mild cheese and thousand island dressing and grilling it for a minute or two if you want to make it a little more special. And there's always corned beef hash either plain or red flannel (with beets AND potatoes). I know some people who only tolerate the initial meal of corned beef and cabbage because they know that within a day or two it will be time for hash, with or without eggs.

Believe it or not, corned beef can even make a decent pate with which to stuff a baguette. Or, if you don't care about presentation and want to eat it now instead of waiting several hours while it chills, mix minced corned beef with mayonnaise, pickle relish and the veriest bit of mustard. Spread it on your favorite cracker or make a sandwich.

A successful potluck casserole I've made on more than one occasion is Lazy Day Reuben Casserole. It's one of those layered meat, noodles, veg and sauce combos that use condensed cream of ____ soup or, my preference, a homemade alternative. Another favorite is a sandwich braid, Reuben Loaf, made by layering corned beef, cheese and sauerkraut on bread dough before baking.

There are many other ways to incorporate leftover corned beef into meals. Include a cup or so of diced corned beef in macaroni and cheese or scalloped potatoes. And if making scalloped potatoes, a layer of sliced cabbage and a 1/2 teaspoon or so of Dijon mustard mixed into the cream sauce adds to the mix. Use diced corned beef as a filling for pasties, crescent roll turnovers or empanadas. Whatever you call them, the corned beef can sub for the meat in your basic recipe. To make it individual to corned beef, I like to brush a light coating of mustard on the inside of the dough before sealing.

And there are more ideas all over -- I've read recipes for corned beef-potato pizza, a suggestion for using the reuben sandwich ingredients to create a baked potato topping, Emeril Lagasse's Cabbage-Potato Soup and Taste of Home's Reuben Soup each call for corned beef in small enough amounts to qualify as a way to use up leftovers. Just don't waste something that only today (yesterday?) you were enjoying so much.

Corned Beef Hash

4 tablespoons butter, divided
1 tablespoon oil
1/2 medium onion, finely chopped
1/2 medium green pepper, chopped - optional
1-1/2 to 2 cups cold cooked corned beef, free of all fat and gristle and finely chopped
2 to 3 cups cold cooked potatoes, coarsely chopped
5 tablespoons beef, chicken or vegetable stock
salt and pepper, to taste
2 tablespoons Worcestershire sauce
2 tablespoons fresh parsley, finely chopped - optional

Cook onions and green peppers in 2 tablespoons over medium heat in a 10-inch heavy skillet for about 5 minutes or until they soften without browning. Scrape them into a large mixing bowl. Add corned beef, potatoes, stock, salt and pepper, and Worcestershire sauce to bowl. Mix gently to combine. Let hash rest for a few minutes in bowl so liquid can be absorbed.

To cook hash, heat 2 tablespoons butter and 1 tablespoon oil in 10-inch skillet. When the fat is hot but not sizzling, add hash, patting it down in the pan gently with a large spatula. Cook over moderate heat about 40 minutes, shaking pan every now and then to make sure hash isn't sticking to bottom. As it cooks, the hash will inevitably produce some fat; tip the pan and skim it from the sides with a small spoon, or better still, with a bulb baster. During the last 10 minutes of cooking, to remove any extra fat, lay a double thickness of paper toweling on top like a blotter, pressing it down on the hash. Repeat this blotting procedure as often as you think necessary, being careful not to get paper toweling near flame.

To serve, turn the hash out onto large round platter. It's best to do this by holding the platter over the skillet and up-ending the skillet to turn the hash out. If part of the crust sticks to the pan, remove it and patch it into place. Sprinkle the top with parsley and serve alone or with condiments such as mustard, pickles, horseradish, and the like.


Red Flannel Hash

1/4 pound salt pork or thick bacon, finely diced
1/2 medium onion, finely chopped
1/2 medium green pepper, finely chopped
1-1/2 to 2 cups cooked corned beef, free of all fat or gristle, and finely chopped
1-1/2 cups cooked or canned beets, diced
4 tablespoons fresh parsley, finely chopped, divided
1-1/2 to 2 cups cold cooked potatoes, coarsely chopped
6 tablespoons heavy cream or evaporated milk
salt and pepper, to taste

Render the pork by frying it in a 10-inch heavy skillet over moderate heat. Stir almost constantly wtih a wooden spoon until the fat has dissolved, then remove the brown bits and put them aside. Pour half the fat into a dish and save it until later.

Heat remaining fat in skillet and over moderate heat, cook onions and peppers for about 5 minutes or until they soften without browning. Scrape them into a large mixing bowl. Add corned beef, beets, potatoes, 2 tablespoons parsley, salt and pepper to bowl. Moisten mixture with cream. Mix gently to combine. If you want you could add the brown pork bits left from rendering the fat. Let hash rest for a few minutes in bowl so liquid can be absorbed.

To cook hash, add remaining reserved pork fat to 10-inch skillet. When the fat is hot but not sizzling, add hash, patting it down in the pan gently with a large spatula. Cook over moderate heat about 40 minutes, shaking pan every now and then to make sure hash isn't sticking to bottom. As it cooks, the hash will inevitably produce some fat; tip the pan and skim it from the sides with a small spoon, or better still, with a bulb baster. During the last 10 minutes of cooking, to remove any extra fat, lay a double thickness of paper toweling on top like a blotter, pressing it down on the hash. Repeat this blotting procedure as often as you think necessary, being careful not to get paper toweling near flame.

To serve, turn the hash out onto large round platter. It's best to do this by holding the platter over the skillet and up-ending the skillet to turn the hash out. If part of the crust sticks to the pan, remove it and patch it into place. Sprinkle the top with parsley and serve alone or with condiments such as mustard, pickles, horseradish, and the like.

Of course, if you wish, you can omit rendering fat from the pork called for and substitute butter and/or oil as in regular hash recipe just above.


Pate of Corned Beef

1/4 pound butter, creamed
2 cups cooked corned beef, ground -- twice, if possible
1 tablespoon onion, grated
3 tablespoons heavy cream or evaporated milk
2 teaspoons prepared mustard
1 teaspoon dry mustard
1 teaspoon lemon juice
2 tablespoons fresh parsley, finely chopped
2 tablespoons chives, finely chopped
1/4 teaspoon salt
1/4 teaspoon black pepper
2 teaspoons Worcestershire sauce
loaf of French or Italian bread, about 12" long and 3-1/2" in diameter

Cream the butter in a mixing bowl by beating it with a large spoon for a few minutes until it is smooth. Then, a few tablespoons at a time, beat in the corned beef and, one after the other, the onions, cream, mustards, lemon juice, parsley, chives, salt and pepper, and Worcestershire sauce. You could use an electric mixer wtih a whisk beater or use a food processor or beat the pate by hand until it is as smooth as you can possibly get it. Just be careful not to overmix it if using the processor. Taste for seasoning, remembering that when the pate is chilled, its flavor will be considerably muted.

Slice 2 inches or so off the ends of the bread, save for another use. With your fingers and the aid of a long thin spoon, remove as much of the soft insides of the bread as possible without damaging or breaking through the crust. When the bread is a hollow tube, stand it on one end on a sheet of waxed paper and carefully fill it with the soft pate, packing it down as you proceed. If there isn't enough pate to fill the bread, simply cut off the hollow portion.

Wrap filled bread in waxed paper and refrigerate for a few hours or until the pate is firm. Slice into 1/8- or 1/4-inch rounds with a serrated knife and serve. You may briefly heat the bread in a hot oven to crisp the crust but do this with caution as the pate will soften too much to slice if the loaf becomes too hot.

Source: Michael Field's Culinary Classics and Improvisations (1967)


Reuben Loaf

1 batch bread dough *see note
1/4 cup thousand island salad dressing or a grainy mustard, whichever you prefer
1 to 2 cups cooked corned beef brisket, diced
4 ounces Swiss cheese or mild cheese of your choice, shredded or thinly sliced
1 cup sauerkraut, rinsed and drained
1 egg white, beaten - optional

Preheat oven to 400F.

Turn dough out onto a lightly greased (15x10-inches) baking sheet. Roll dough to a rectangle that almost fills the pan.

Spread dressing down center third of dough. Sprinkle area spread with dressing with layers of beef, cheese and sauerkraut.

Make cuts from filling to edges of dough 1 inch apart on both sides of the filling. Alternating sides, fold the strips at an angle across filling. Brush dough with egg white.

Bake for 25-30 minutes or until lightly browned. Serve immediately; refrigerate leftovers.

Yield: 6 to 8 servings.
Source: Country Woman

*Note - Use your favorite plain bread dough. Can be made by hand, in the bread machine on dough setting or use a loaf of thawed frozen dough. If making yourself, a recipe which uses 3 to 4 cups flour or will yield a 1.5-pound loaf would be about right.


Lazy Day Reuben Casserole

2 cans condensed cream of chicken soup, **see note
1-1/3 cups milk or thinned yogurt
1/2 cup onion, chopped
3 tablespoons mustard
2 pounds sauerkraut, drained (and rinsed if too salty)
8 ounces egg noodles
12 ounces corned beef brisket, diced
2 cups Swiss cheese, shredded
3/4 cup rye bread crumbs, toasted
2 tablespoons margarine, melted

In bowl, mix soup, milk, onion and mustard until blended.

In greased 13"x9"x2" baking dish, spread drained sauerkraut; top with uncooked noodles. Spoon soup mixture evenly over noodles. Sprinkle with crumbled corned beef, then cheese.

In bowl, stir together rye bread crumbs and melted butter until well blended; sprinkle over top of cheese. Cover tightly with foil.

Bake in 350°F oven for 60 minutes or until noodles are tender.

I've had this recipe so long I don't know exactly where it came from but I think it was in an old Progressive Farmer from the '70s.

**Note -- I use a homemade version of cream soup most of the time. Here's one recipe that will make several "cans" worth as you need it.


Homemade Cream Soup Substitute

2 cups instant non fat dry milk
3/4 cup cornstarch
1/4 cup chicken bouillon, instant or other preferred bouillon flavor
2 teaspoons dried onion flakes
1 teaspoon each basil and thyme - optional
2 teaspoons pepper

Combine dry milk, cornstarch, bouillon, onion flakes, basil, thyme and pepper.

To make the equivalent of one can of condensed soup, use 1/3 cup of the mix and 1-1/2 cups water and cook over moderate heat until thickened.

NOTE: Beef or vegetable bouillon may be used in place of the chicken. Mushrooms may be added to the sauce for a mushroom soup base. I like to cook a little celery in butter and add to prepared recipe when it calls for celery soup.

For more kitchen aids check out Kitchen Tip Tuesday at Tammy's Recipes.

Sunday, March 15, 2009

Seed-starting

We planted most of our tomato seeds this morning. None of them were from seeds we'd saved -- those few will go in later this month.

Today's batch included some organic tomato seed from Southern Exposure Seed Exchange that DH picked up at Countryside Natural Products last week. Radiator Charlie's Mortgage Lifter, Brandywine, Arkansas Traveler and the smaller Yellow Pear tomatoes, which DS and I like to pop straight off the vine, filled about 30 cells each.

After DH went to work, DS planted this year's Tomatosphere tomato seed (Heinz 9478 - a plum tomato hybrid). Tomatosphere is an educational outreach program co-sponsored by the Canadian Space Agency, Heinz Canada Ltd., etc. This is the first year DS has participated -- we're signed up as a group with some other homeschooling families. He received two packets of seed as part of this year's blind study. One is a control group and the other batch was exposed to a simulation of the atmosphere on Mars.

He'll monitor their germination and any growth till they produce their first tomatoes. Then we submit his results so they can be compiled with all the other students' reports. After he turns in his summary, he'll learn which of the two packets was the control group, too. And, of course, any tomatoes produced will be absorbed into our usual canning and preserving process.

I'm not wild about planting the F1 hybrids when we hope to save tomato seeds this year but they'll go into a bed at least 50 yards from the other tomatoes so that should lessen the chance of cross-pollination. And DS is excited about the experiment which outweighs any qualms I might have.

Tuesday, March 10, 2009

Another grain worth soaking

Brown rice is better for you than white rice. I accept that. My family accepts that. The difficulty has always been, in at least a few recipes, we continued to prefer the light fluffiness of white rice. It was similar to the problem we had when switching to breads made only with fresh ground wheat. It worked for most applications but, in the case of the bread, we had to tweak a few recipes before we had sliced bread we enjoyed for sandwiches such as peanut butter and jelly. I just couldn't seem to cook brown rice where the grains would separate and fluff as white rice did. So I kept a box of white rice at the back of the pantry shelf, just in case.

Well, no more. A couple of years ago I picked up a copy of Sally Fallon's Nourishing Traditions and read it from cover to cover. Previously I'd read good things about the book from a couple of folks on Fractured Frugal Friends, recommendations on various Weston A. Price Foundation-related sites, etc. Even one of my favorite cookbook authors, Sue Gregg, references the book on her site and in her more-recent books.

Fallon's method for preparing brown rice gives me fluffier rice with no real added work and, in most cases, less actual cooking time than for regular brown rice. The trick is the rice is soaked before cooking. I can cook it for use as plain rice or I've found I can add it to many of my recipes by subbing soaked rice for the plain rice and using the soaking liquid as the water the recipe cites. If the recipe calls for some type of broth instead of water, I include a seasoning packet (storebought or homemade) along with the liquid left after soaking. Here's the recipe:

Brown Rice

2 cups brown rice (long- or short-grain)
4 cups water
4 tablespoons yogurt, whey, kefir, buttermilk, lemon juice OR vinegar
1 teaspoon salt
1 to 2 tablespoons butter

Combine water and yogurt (or one of the other subs listed) in a pan and stir to mix. Add rice and leave out on the counter in a warm kitchen for at least 7 hours. Place pan over heat and bring to a boil. Skim, if necessary, and turn heat down to lowest setting. Stir in salt and butter and cover with a tight lid. Without removing lid, cook for about 45 minutes.

I have successfully tripled this recipe, using a large dutch oven, and frozen the extra rice. If I thaw it overnight in the fridge it works well for fried rice or when I want rice with a meal but don't want to prepare it from scratch.

If you have a rice cooker with a delay timer, you can prepare this rice in it. I presently don't have a rice cooker but put this in to soak in the morning when we were visiting friends with one and we had beautiful brown rice at supper.

Kitchen Tip Tuesdays

Tuesday, March 3, 2009

Microwave popcorn in a paper sack

Years ago I regularly made microwave popcorn in brown paper grocery sacks and dutifully nuked my paper towel-wrapped hot dog-in-a-bread-slice for 30 seconds, too. The hot dog usually split and the bread became hard as a rock so I quit fixing them that way once the novelty of my mom's mid-1970's combination electric oven and microwave wore off. The popcorn, however, was excellent, so why did I stop making it?

I know one reason was the air popper someone gave my dad for Christmas. Another trend to try and later discard. Next up was the popcorn popper I used at school. It was one of those see-through dome-lidded ones (Stir Crazy, I think they're called) with a stirrer that kept the popcorn shifting around the bottom of the pan. Popcorn didn't burn, the kernels popped evenly and it tasted great. I even bought another when the first one finally died. But cleaning is a problem -- only the plastic lid can be submerged in dishwater, the bottom of the unit has to be wiped off carefully and eventually develops a sticky build-up that's hard to remove. Plus, it takes up pantry space.

One thing I haven't mentioned is regular microwave popcorn and that's because I don't care for it. I'm also the oddball who will buy popcorn (but only fresh-popped) at the movies but insist on NO "liquid butter" (or whatever they want to call that nasty oily stuff that pours from the metal spout) and no extra salt. I like the flavor of popcorn and while I don't object to real butter drizzled over a bowl of the stuff, I really prefer popcorn popped in peanut or sunflower oil and lightly salted. That's it.

So all this is to say I've started making my popcorn in the microwave in a brown paper sack again. It works great just like when I was a kid. I like to use a small amount of oil when popping the corn because I think it tastes better and helps the salt adhere. The process is simple.

Microwave Popcorn in a Paper Lunch Sack

1/3 cup popcorn
1/2 teaspoon oil (I like peanut or sunflower)
salt

Pour popcorn kernels into brown paper sack. Drizzle oil over kernels in bag. Fold over the top of the bag a few times. Place in microwave and cook on high heat for 2 to 3 minutes, or until popping slows to almost stopping. Carefully open bag away from face (steam will rise), sprinkle with salt and enjoy!

Note:
Given that I usually carry fabric bags to the store so I can avoid plastic (or paper) grocery sacks, it's strange to be using paper bags for this purpose. My only excuse is that my mom bought a "box and contents" at auction a few months ago and included in the contents was what must be a lifetime supply of brown paper lunch sacks.

Since none of us carry our lunch in such bags, I've been trying to come up with other uses. Other than using them to pop corn, the best use has been decorating the bags for use as gift bags -- DS likes to draw on the ones he makes while I've tried stencils, stamping, glueing fabric designs, rick rack and paint. But I still have many, many bags so suggestions appreciated.

Check out Kitchen Tip Tuesdays at Tammy's Recipes for more recipes and kitchen ideas.

Sunday, March 1, 2009

First planting for 2009

Buttercrunch lettuce, pak choi, Bloomsdale spinach and some variety of broccoli seed all went into the cold frames this past week. No signs of germination so far and today we have an inch of snow with more expected overnight. Lows will be back in the teens this coming week, too. May be a while before we're eating those fresh greens...

Elsewhere around the garden daffodils have popped up and the forsythia is loaded with buds. I brought some forsythia branches in for forcing and really wish I had at least one pussy willow to use for the same purpose. If it's not too late (if the buds haven't started opening) I'll cut a few branches from the pussy willow on my mom's pond dam this week and then let the cuttings root for later planting here.

Also must decide this week on our order of tree seedlings available thru the local soil and water conservation office. I know we want to add more red twig dogwoods and highbush blueberries. I'd like to include elderberry, service berry and chinquapins, too, but I know I could probably find seedlings of all those along the field woods if I looked so may go with just the dogwoods, blueberries and a witch hazel -- I love those spidery yellow petals that appear in late fall. So nice to see them just when everything else is losing leaves and color.

DH and I are signed up to attend an Extension Service workshop next weekend, "Mow is Less," which is touted to equip owners of 1-10 acres to be better stewards of their property. The program cost, $30 for a couple, includes the all-day workshop, lunch, a resource cd and a copy of "The Woods in Your Backyard: Learning to Create and Enhance Natural Areas Around Your Home." I came across a description of the book last year and had it on my list to purchase so considering the manual costs $20 it seemed like a deal for the workshop combo. Perhaps not a true permaculture course but the closest thing offered in our neck of the woods to date.

It's beginning to feel like spring around here even with snow falling.

Tuesday, February 10, 2009

Oat groats for breakfast

I love oatmeal. When I was a kid my mother sometimes would fix Quick Quaker Oats for breakfast and I never complained. Warm oatmeal with a little milk and sugar and a piece of buttered toast is probably my favorite morning meal.

My grandmother usually prepared Old Fashioned Quaker Oats and I liked her breakfasts better but never gave much thought to why. When I first tasted porridge made with steel-cut oats I understood why I preferred my grandmother's oatmeal to the quick-cooking kind. I like oats! The old fashioned rolled oats are more like the real thing than the chopped up quick-cooking oatmeal. And don't even try to compare instant (ugh) to any of the other choices.

So now I begin preparing our morning cereal the night before. I soak a cup of oat groats (hulled whole oats) in water overnight and finish cooking them in the morning. They're very flavorful and a little chewy. They don't have to be soaked ahead of time but it cuts down on the morning cooking time which means we can eat breakfast sooner. Usually a good thing around here.

Oat Groats
Yield: 4 servings

1 cup oat groats
3-1/2 cups water
1/2 teaspoon salt

Rinse and drain groats if you wish. (I do if they seem dusty or appear to have chaff mixed in.)

Bring water to boil in heavy medium pan. Add salt and oat groats. Stir to combine. Boil for 5 minutes or cover and turn off heat immediately. Your choice. The 5-minutes of boiling will further reduce cooking time in the morning but isn't required. Set covered pan to side and leave out to soak overnight.

The next morning, return pan to heat and simmer till the water is absorbed and oats are tender. 15-20 minutes is about right but the process can take up to 45 minutes if the oats weren't soaked overnight.

Any leftover oats can be reheated for breakfast another day. (Store cooked oats in fridge.) Or add them to bread dough. I can incorporate 1/2 cup cooked grain in the basic doughs without fiddling with the other ingredient amounts. More than that and I may have to adjust liquid or flour amounts. YMMV

Variation:
If you like hot rice as a breakfast cereal as DS and I do, add 1/4 cup brown rice with the groats and increase water by 1/2 cup. It doesn't alter the flavor much but will add contrast to what may appear to be a bowl of plain brown grain. At least till you taste it and then the full oat-y flavor will burst forth. Yum.

For more recipes and kitchen ideas check out Kitchen Tip Tuesdays at TammysRecipes.com.

Saturday, February 7, 2009

Fifi rocks! Or, how to hatch eggs in the worst winter weather.

Late last spring we bought a bantam silkie pair and dubbed them Fifi and Mr. Fluff. Fifi almost immediately began to lay and went broody. In early June she hatched one bantam silkie pullet, Peep, two DominiqueX pullets, Brayer and Ares, and one AmeraucanaX cockerel, Squirrel. (We added fertile eggs to her clutch from the chickens in the portable electric netting as Mr. Fluff doesn't seem up to the task of covering the full-size backyard girls.)

After weaning* the first batch, Fifi went on to set another clutch resulting in two more DominiqueX pullets, Checkers and Chess, and one AmeraucanaX pullet, Bronwyn, hatching out in mid-September. Those are just now beginning to lay. Every day or two we find another mid-size egg (between Peep's bantam-size egg and the regular backyard girls eggs) in the nest box.

In mid-January, Fifi became broody again. She began gathering eggs, mainly hers and Peep's, around her and seemed prepared to set another batch. My mom was rather disappointed that we were unwilling to allow Fifi to keep her own eggs for hatching but as we can only house so many chickens around here, we wanted to increase the chance that any hatching chicks would be able to stay "at home" and not have to be sold as would be likely should we hatch more bantams. Thus DH gathered eggs from the electric net chickens and subbed them for Fifi's stash.

He was concerned that the eggs he placed this time, tho fertile, wouldn't have much chance of hatching, tho, as only one was still warm when he gathered it. The temps that week were hitting 0F. at night and seldom rising above 20F during the day. We had at least one egg freeze in the nest box before it could be collected. Didn't seem like the best time to be hatching but try telling that to a broody hen!

Fifi did her job as usual, however, and on Wednesday of this week DH spotted a little yellow head popping out from under her wing to see what was going on when he gathered eggs. It wasn't until Friday that we knew for sure she had two chicks. (DS is holding Fifi and DH has the two chicks in the photo.)

She'd started out with four eggs but late last week I found one egg pushed out of her nest, a foot or more away from her. It was cold and she made no demur when I picked it up. I wasn't positive it even had been under her until I checked it's contents and found what to me appeared to be a perfectly formed chick. Since she didn't object to my taking the egg I have to think she'd discarded it for some reason but don't know that for sure or why she would. And Wednesday, when DH spotted the first chick, he also found a still damp but out-of-the egg chick that was no longer living. Again, we don't know what happened to it tho we'd found one in the same condition from her second hatching, too. Nature can be hard sometimes but I wish I knew if it was something I could prevent in the future.

For now, Fifi and her two chicks are doing fine and we moved them into their own pen this morning so they can go in and out without worry of stray cats or other wildlife which can get into the backyard even tho it is fenced. Plus the other hens won't bother them nor eat all their feed as they're wont to do.

Our recent snow is melting as temps are expected to hit 55F. or even 60F. by tomorrow. If nighttime temps drop back to the teens, we can put a heat lamp in Fifi's house but when I looked out a few minutes ago she had already led the little chicks outside for a browse in the sunlit grass. Since this is her third time in the chick pen, I think she's comfortable with it and will go on to raise another fine brood of chicks. I'm just hoping they're both pullets...

*What is the correct term for when the mama hen begins to ignore her rapidly growing chicks?

Wednesday, February 4, 2009

Needle felted sheep


These little guys are fun to make. They only take one felting needle and about a 1/2 ounce of wool each.

I used a triangular needle, 38 gauge, but there are other types. Two were made from wool roving but the white sheep was made from washed fleece. The bit of pink-colored wool used inside the ears of two of the sheep came from a bit of Kool-Aid dyeing I did a while back. I used about 2 inches (total) of a 4-ply black tapestry wool yarn for forming the mouth and nose on each sheep. One of the sheep has two tortoise-shell beads sewn on for eyes. The others are waiting for me to find suitable small beads in my stash.

The process of needle felting is fairly simple. After deciding what you want to make, break the overall form down into a few basic shapes. (Yes, this is like those drawing lessons where you are to imagine heads as ovals or spheres, legs as cylinders, etc.) In the case of these sheep, each one required 9 individual pieces: 4 same-size cylinders for the legs, 1 large cylinder for the body, a somewhat cone-shape for the head, and 3 flat leaf-shaped pieces for the two ears and the tail.

Take small amounts of wool, mere wisps in many cases, and roll them into the shapes you need. For legs you may want to roll the wool around a wooden skewer or even a toothpick if the animal is small. Then use the felting needle to run through the wool. Over and over again.

You'll notice after the first few tries that the wool compacts where the needle penetrates it. The form will go from being loose and airy, like a light cotton puff, to being more firm. More like one of those cylindrical cotton pads a dentist uses to pack around a gum. Leave a bit of loose wool at the end of the leg where you plan to attach it to the body. Then needle that bit in and out to attach it securely.

Remember that the felting needle is very sharp and barbed. You don't want to accidentally run it through you in the process. Using a foam pad as a working surface is what's most often recommended.

The pad should be thick enough that the needle doesn't extend past the pad when poking it into the wool. Another reason for using a pad is that the action of the needle hitting a hard surface like a tabletop could cause the needle to break. High-density foam (available at some craft stores), upholstery foam such as used for couch cushions or firm pillow forms, and even the packing foam used for electronic equipment can work for this purpose. Just don't use styrofoam or similar substance that will crumble when penetrated by the felting needle.

Instead of a foam pad, I've been using a folded Shetland sweater I fulled in the washing machine. (The sheep are standing on it in the photo above.) Folded, it offers a decent surface for stabbing at the wool. Drawbacks, which haven't bothered me so far, are every so often I have to pick a few hairy strands of wool from the sweater off of the sheep piece I am working on and the working piece and pad can stick together like they've been velcroed if I'm not careful about pulling up the working piece every few jabs. The last problem isn't one for me as I like to turn the working piece in my hand after every few pokes with the felting needle to be sure it's felting evenly and that the shape is staying as I want it. Not flattening out, for example.

DH wants to try this craft and is determined he's going to make a llama so we can have a flock of needle felted sheep made from our sheep's wool with a guardian llama just like Andy, too. For me, I want to try working with some dyed wool, perhaps making a sun, moon and stars mobile or a fiery-faced sun with wool locks coming out from his head like sunbursts.

Later this month I'm going to do a short class on making these sheep for my fiber guild's meeting. Since the other members inspire me with their hand-dyed tops, lacy shawls, inkle-woven shoelaces, etc., I've decided to work up a white sheep/black sheep needle felted design for the yoke or bottom edge of a long-sleeve denim shirt I found at the thrift store last month. What better way to demonstrate the many uses of a felting needle, right?

Tuesday, January 27, 2009

Winter salad

I love crisp mung bean sprouts. Fresh ones, not canned. DS and I made a quick trip north recently, stopping at an oriental market on the way to pick up a few things including a couple pounds of fresh bean sprouts. I know, I can sprout my own. I even have a couple of mesh lids that fit wide-mouth canning jars and make the job of rinsing easier. But sometimes I succumb to the woman inside who shouts "Look at those bean sprouts! They're beautiful -- Buy them." And the good thing is, they're very inexpensive at the market compared to local supermarkets' prices for fresh sprouts.

So what does one do with bean sprouts measured in pounds? Egg foo yung is a favorite and I have good luck freezing any leftovers so that takes care of several cups of bean sprouts. But in the winter when fresh produce at the store is pitiful -- shipped 1,000 miles or more and usually looks like it, too -- bean sprouts salad is a welcome change from DH's cold frame lettuce and winter root vegetables and it easily uses a pound of sprouts.

I found this salad recipe several years ago at SproutPeople and the dressing is out of this world! The salad's good as is or add shredded chicken for a main dish. Try serving it over bean thread noodles if you have them. If you don't have fresh bean sprouts, try subbing Napa cabbage or regular green cabbage. And, once you try the dressing, you may want to use it to make a chicken salad all on its own, without the sprouts. That's okay, too.

Bean Sprout Salad in Outrageous Dressing
Serves 4

1 pound (or more) mung bean sprouts
1 cup chopped cucumber
1/2 cup (or more) grated carrot
1 cup (or more) chopped sweet peppers
2 cups Napa cabbage, chopped

Outrageous Dressing

3 tablespoons tahini or crunchy peanut butter (or combination)
2 tablespoons soy sauce
4 tablespoons vinegar
1 teaspoon to 1 tablespoon hot red pepper oil
1/4 to 1 teaspoon cayenne pepper
1 teaspoon sugar
1 tablespoon toasted sesame oil
2 tablespoons sunflower oil
1 tablespoon minced ginger
1 tablespoon minced garlic
1 tablespoon minced green onions
1 tablespoon white wine
1 teaspoon hot mustard (optional)
1/2 teaspoon salt
1 1/2 cups broth (chicken or vegetable)

Mix sprouts and chopped vegetables in a bowl.

Mix all dressing ingredients together and pour over salad.

Chill salad, if desired, and serve garnished with more chopped scallions and toasted sesame oil.

Optional:
Poach sprouts for 30 seconds to 2 minutes by putting them in rapidly boiling water, remove to strainer and cool quickly with cold water. Drain well.

For more recipes and kitchen ideas check out Kitchen Tip Tuesdays at TammysRecipes.com.

Tuesday, January 20, 2009

Date Krispies

These no-bake treats may not look like much but they taste great! My sister's been preparing them at Christmas for years and lately I've taken to making a batch when the weather's cold and we want something sweet to eat. DS and I made these when the temperature hit 0F. here this past week. Seemed like we needed a treat...

The recipe is fast but there is a short waiting period till the mixture is cool enough to shape into balls. Wetting my hands with cool water before shaping helps me work the mixture before it's completely cool and keeps the dates from sticking to my fingers.

Rolling the balls in confectioner's sugar is our preferred finishing method but even DS, who doesn't care much for coconut, likes the balls rolled in unsweetened coconut. And, if I'm making them as part of a Christmas basket, I often finely chop pecans or walnuts and roll the balls first in the sugar, then in the nuts. Yum!

Date Krispies

1 stick (4 ounces) butter
1 cup sugar
1 egg, lightly beaten
1 cup dates, chopped
3 cups crisp rice cereal such as Kellogg's Rice Krispies
1 teaspoon vanilla extract
Powdered sugar, coconut, chopped nuts - optional

Melt butter in large saucepan over low heat. Stir sugar, dates and egg together in small bowl and pour into melted butter, blending well. Cook over low to medium heat, stirring often, till mixture comes to a full boil. (Boil that cannot be stirred down.) Remove from heat. Add vanilla extract and cereal. Stir to combine.

Let sit till mixture is cool enough to handle with bare hands. Wetting hands with water will help keep mixture from sticking to fingers. Roll into balls about 1-inch in diameter. Roll balls in powdered sugar, shredded coconut or finely chopped nuts as desired. Makes about 40.

For more recipes and kitchen ideas check out Kitchen Tip Tuesdays at TammysRecipes.com.

Monday, January 19, 2009

First new knitting project of 2009 finished

All my forced downtime the first couple weeks of this year at least meant I had time to knit. This hat went so quickly! I decided to make a simple Garter Stitch Cap with this soft mostly-merino Garden Party Fibers (Handspun by Jacquetta) yarn I bought a few years ago. My plans are to use the leftover yarn to trim a pair of felted mittens I'll cut out of an old Shetland sweater I recently felted in the wringer. Maybe knit a short cuff or needle felt a design on the mittens? Haven't decided yet.

The pattern I used for the hat came from Homespun, Handknit, one of my all-time favorite knitting books. The pattern couldn't be simpler: Knit 1 round, purl 1 round on circular or dp needles till time to shape the top. Then alternate a decreasing knit row with a plain purl row for another 7 rows or so. The colorful nubby bulky yarn stars here.

Tuesday, January 6, 2009

Sausage balls: quick breakfast, tasty snack or soup accompaniment, and, um, spur-of-the-moment chicken treat?

A Christmas gift this year included homemade pork sausage. The presenter gave it already frozen in pint-size glass jars and we knew from past years' batches it would be perfectly seasoned with a good balance between lean and fat. In other words, a perfect sausage for making breakfast patties, sausage brunch casseroles or quiches, combining with ground venison for sloppy joes or meatloaf and for making not-too-greasy sausage balls. Yesterday was the day for sausage balls.

Serve them warm from the oven with a flavorful mustard (we like Nectarine Mustard) for dipping and they can be stored in the refrigerator for a few days -- reheating as needed in oven or microwave. Also great for freezing, either before or after baking. I rarely freeze before baking simply because my sausage is often frozen before preparation but either way works great.

A few sausage balls make a great quick breakfast with a glass of juice or bowl. And always a good choice for a snack -- they often show up at parties because everyone likes them and they're so easy to have on hand in the freezer. They can even serve as a chicken treat as happened today when I was caught outside by our backyard girls without any readily accessible treats.The chickens, particularly Turkey, the large reddish-brown turken gobbling down her snack, are as bad as the dog when it comes to begging for a treat. Heck, Turkey doesn't even beg, she demands. Failure to produce a treat often leads to her jumping up to sit on your arm or shoulder as she squawks her frustration at being denied a treat. So today, in the drizzling icy rain, I didn't want to get into a discussion of poultry nutrition with her so I gave in and shared a bit of sausage ball I was munching on while gathering eggs. Madame President, the silver-laced Wyandotte, was quick to share, too. Dolly and Jabber, the white hen, even managed to get a bite. Seemed to rank right up there as treats go.

Yesterday DS did the mixing by hand but if you don't have a child around who likes to mash things together when cooking, just use an electric mixer on low or a few quick pulses of a food processor to do the messy job. I've also heard of cooks putting the ingredients in a large plastic bag and kneading it thoroughly from the outside of the bag. If you use a cookie scoop to from the sausage balls, you never need get your hands gooey.

Bisquick is a traditional ingredient in the simple sausage ball recipe but we mainly eat fresh ground whole wheat so I tweaked the recipe as usual. Plus, I think the whole wheat flour adds a richer, nutty flavor to the mix. And the butter is optional -- the sausage usually provides plenty of fat without the added shortening. (I didn't use it for this batch and can't tell any difference in texture or taste.) If you do use Bisquick, just substitute 2 cups of the regular or low-fat version for the first four ingredients listed below.

Sausage Balls

2 cups whole wheat pastry flour
2 tablespoons butter, lard or shortening
1 tablespoon baking powder
1 teaspoon salt
1 pound bulk pork sausage
1 small onion, diced (optional)
1/2 pound sharp cheddar cheese, shredded
up to 1/2 cup milk or buttermilk

Preheat oven to 350F.

Cut fat into flour with pastry blender as when making biscuits. Add other ingredients except milk and stir to blend. May use mixer or food processor as described above. Sometimes it's easier to add sausage in small bits and then stir in shredded cheese last. YMMV. Add up to 1/2 cup milk or buttermilk slowly to mixture to help bind ingredients.

Form batter into small balls, no larger than 1-inch in diameter. Place on baking sheet with low sides. If you're not sure of the low fat content of your sausage, line baking sheet with aluminum foil and turn up foil edges to help contain grease that may melt from balls while baking.

Bake at 350F. for 15-20 minutes. This makes about 3-4 dozen sausage balls at 1". Mine are soft when I take them out but upon breaking one open, the sausage has changed color and the dough is similar to the inside of a biscuit. If baked too long, they will become hard and almost rock-like after cooling.

For more good ideas (but maybe not chicken snack recipes) check out Kitchen Tip Tuesdays at Tammy's Recipes.

Friday, January 2, 2009

Cleaning out the freezer leads to canning beef stock...


About 10 pounds of beef soup bones became 14 pints of rich beef broth.

One of DH's least favorite jobs couldn't be put off any longer so we tackled the chest and upright freezers last week and discovered several packages of meaty soup bones languishing in the bottom of the chest freezer. We all love vegetable soup but there was too much for a regular batch so I decided to put up most of the stock for later use and added chopped vegetables to the rest to make a pot of soup for immediate consumption.

I've included the basic stock recipe below but it's open to interpretation. For example, throughout the year when I scrape carrots and peel onions, I often throw the unwanted portions (aka carrot peels, onion skins) into a freezer bag for just this kind of cooking. Then when I want to make soup stock, I use those parings as the vegetable basis. If I don't have enough on hand in the freezer, I use unpeeled but scrubbed carrots and the same with onions and celery. No need to trim away the peel as long as it's clean. You almost can't have too many vegetables in the pot -- they all add to the final flavor of the stock after all.

Beef Stock

10 pounds meaty beef bones
3 large, scrubbed carrots, chunked
3 large stalks of celery with leaves, chopped
3 large unpeeled onions, quartered
2 cloves garlic, crushed
1 teaspoon black peppercorns
2 large bay leaves
2 sprigs fresh thyme

Heat oven to 425F. Place all bones in large roasting pan. Bake uncovered for 30 minutes. Add onions, celery, and carrots. Bake, turning tones and vegetables occasionally, an additional 30 minutes or until bones are evenly browned.

Transfer ingredients to a large 2-1/2 gallon stockpot or use large electric roaster oven. If you don't have one pan big enough for the whole amount, split all ingredients evenly between two smaller pots. Add 2 cups water to roasting pan, scraping up browned bits. Pour over bones and vegetables in stockpot. Add at least 1-1/2 gallon additional water or enough water to cover ingredients by 2 inches. Bring just to a boil, skimming foam as needed.

Reduce heat and simmer partially covered for 4 to 6 hours, adding hot water if necessary to keep ingredients submerged. Strain stock through fine sieve of through triple layer of damp cheesecloth-lined colander set over large bowl or pot. Discard solids. (Meat may be pulled from bone and used for another purpose. Taste before using in another recipe as the long cooking pulls much of the flavor from the meat.)

Cool stock overnight in refrigerator. Next day, remove and discard layer of fat. Return stock to pot and bring to a boil. Immediately fill hot quart or pint jars with stock, leaving 1-inch headspace. Wipe jar tops and threads clean. Place hot lids on jars and screw bands on firmly. Using pressure canner, process quarts for 25 minutes and pints for 20 minutes at appropriate pressure for your altitude.

If you've never canned before check out the latest Ball Blue Book of Preserving or the USDA-funded website, National Center for Home Food Preserving, for detailed directions.

Tuesday, December 30, 2008

Invalid Cookery

Not many cookbooks these days include chapters on cooking for invalids but if you pull out older ones, especially from the early 20th century, they often have a chapter on preparing soothing draughts such as barley water or nourishing dishes like blancmange or some type of gruel. Sound delicious, huh? Here's a link to an online cookbook circa 1902 with a chapter on the subject.

I'm thinking of this as I'm home from a short hospital stay during which I shared a room with a fellow surgical patient who will be on an all-liquid diet for 21 days, clear liquids* only for the first week. It got me considering her options and my own. My diet isn't restrictive but is still limited by how I'm feeling; I couldn't tolerate a steak and loaded baked potato right now if you paid me.

Some meal planning guidelines for invalids come easy. If the doctor recommends clear liquids or no citrus fruits that's clear cut but if you're in charge of setting the menu without medical directives keep these things in mind. Invalid meals should be healthy, easy to digest, easy to swallow or chew as necessary, served at the right temperature for the food and/or the patient's preference.** Easy on the pocketbook, good for the whole family (meaning fewer separate dishes to prepare) and quick to prepare are things worth considering, too. Remember comfort foods may be as much about presentation as ingredients. Toast cut into triangles or cookie cutter shapes, applesauce sprinkled with cinnamon sugar, orange slices arranged in a sunburst on a small plate -- something mom used to make for them when they were small.

I have at least one cookbook devoted to invalid cookery and it's from modern times: Laurel's Kitchen Caring: whole food recipes for everyday home caregiving by Laurel Robertson of Laurel's Kitchen: a handbook for vegetarian cookery and nutrition
fame. Robertson includes simple recipes like Ginger Tea which she recommends for relief of mild stomachache or headache, or for nausea, colds or fever. It's a standby at out house for mild stomach problems.

Ginger Tea

1 quart water
2" nub of peeled and thinly sliced gingerroot

Drop gingerroot into boiling water and simmer for 10 minutes. Strain and serve plain or with honey. Cool and keep extra in a jar in the fridge for a few days. Serve cold or reheat as needed.

-----

This one's in Robertson's book, too, but my mom's made this blend as a sore throat or light cough relief for years.

Lemon and Honey

Squeeze a lemon and stir in honey in an approximate equal amount, to taste; then add boiling water to make a cup. Sip to soothe throat. Add a shot of whiskey to an adult's cup for a hot toddy.

-----
For heartier fare, rice is a good choice. It can be served bland with just salt, pepper and maybe a pat of butter or you can tempt appetites with Robertson's Green Rice Casserole:

1 small bunch green onions or 1 small yellow onion, chopped
1 clove garlic
vegetable oil
2-1/2 cups cooked brown rice
1/3 cup chopped parsley
1/2 cup grated cheese (try swiss, mild cheddar, or Monterey jack)
2 eggs, lightly beaten
2 cups milk
3/4 to 1 teaspoon salt

Preheat oven to 350F.

Saute garlic and onion in oil until soft. Crush garlic with fork. Combine with remaining ingredients. Pour mixture into greased 2-quart casserole. Bake about 45 minutes, until set. Cool slightly if you want to slice it into squares.

Tailor it to diet needs--

Lower fat: Cut cheese in half, use skim milk. Sub 4 egg whites for whole eggs.
Vegan: Omit cheese, milk and eggs. Add plenty of sauteed mushrooms and chopped grilled bell peppers. Lighter dish -- delicious.
Bland, but good: Leave out sauteed onion and garlic, cosider substituting a preferred salt-free seasoning blend such as Mrs. Dash or Spike for salt.

-----
Robertson even includes a recipe for barley water. It's suggested for anyone with weakness, irritated digestive tract or sore throat.

Barley Tea

2 quarts boiling water
1/2 cup barley, whole-grain "naked" or hulled, but NOT pearl
3 cardamom pods (or 1/4 teaspoon ground cardamom)

Boil water in large saucepan. Wash barley in cold water and drain. Put it in boiling water and simmer actively about 30 minutes, until water is a deep pink and cloudy. Either strain it or let stand and then pour off the clear liquid. If desired you can add another quart of water to the barley and boil again, combining the liquid from both batches. You should end up with about 8 cups of barley tea but you can make it stronger or dilute as desired.

With mortar and pestle, finely grind seeds from cardamom pods and add to hot tea. Serve hot with honey or sugar. May store extra in refrigerator to reheat over the next couple of days as needed.

For more kitchen tips check out Tammy's Kitchen Tip Tuesday posts.

-----
*The test is, if you put it in a glass, you can see your hand through the glass. Water, weak black tea, weak herbal teas like chamomile or raspberry leaf, mild clear broth, and diluted apple juice can be appropriate.

**I can still remember ending up in the hospital overnight after a bicycle wreck as a young teen. No food since the previous morning and I thought I was starving. My mouth was filled stitches so I needed something soft or, even better, liquid and not too hot temperature-wise. Instead I was served a steaming (truly!) bowl of oatmeal, thin toast and canned orange juice. I couldn't eat any of it. The toast was dry and had to be chewed thoroughly, the juice was too acidic and by the time the oatmeal had cooled enough to try, the tray had been removed. I spent the next week eating all my food thru a straw. That was one of the few times I would have appreciated something like Carnation Instant Breakfast drink...

Sunday, December 28, 2008

Out of sight, out of mind?

I feel like Dr. Zeus' Whos down in Whoville. So many things have kept my "shouts" from being heard lately. I was optimistic in mid-October that I could get on with our usual winter activities but we didn't get a hard freeze till the very end of October so I kept canning beans (over 150 quarts put up), tomatoes in several forms (salsa, whole tomatoes, and juice to name the main ones) and those pears! We went back to the still-loaded tree with a 15-foot ladder in late October and DH picked three more bushels. Some I wrapped in paper and the rest we spread out to ripen then dried or ate in all their oh-so-sweet juicy glory. The last of the paper-wrapped ones kept till the week before Christmas -- still tasted great, were extremely juicy but the skins had begun to toughen. I will definitely wrap some the next time we have such a bumper crop. I managed to write a few posts off and on during Novemeber and early December but they're stored away as document files till I can get photos sorted and really just TIME to put them up.

Christmas came and went in a blur. I made a few gifts this year but not as many as I'd planned so I've started on next year's in an attempt to spread the work over as many months as possible. I cast-on this yarn Christmas night in order to start a simple garter-stitch hat with a rolled brim for one of DS's cousins. To go with the hat, I'm planning to make a pair of felted mittens trimmed with the same yarn using the fulled shetland sweater showing underneath the skein. The cousin is in the fast-growing age range so I'll wait till closer to next Christmas before cutting out the mittens. The yarn came from GardenPartyFibers.com several years ago but I've lost the label to tell me the name of the colorway. It's very soft, probably merino, and the colors blended together well in the sample I knitted.

One thing I did make this year was knitted cotton dishcloths. I made variations of the two styles shown in the photos below. They're very fast to knit and I can remember the patterns without having to refer to a printout. Along with some handmilled soap or, when short on time or inclination, liquid soap from someplace like Bath & Bodyworks, they made a thoughtful gift that was quick to put together.

Tho I've used the pattern often over the past five years or so I noticed that the pattern for the blue-and-white dishcloth was printed on the yarn's label and it's also listed in Mason-Dixon Knitting as a ballband dishcloth and can be found on-line under other names such as textured slipstitch dishcloth. The other dishcloths are diagonally-knit and the pattern is so simple. It can be found all over the place including in one of my posts from earlier this year.

For the my fiber guild's gift exchange I made a paper star (sometimes called a Polish Star) just like the ones my mother taught me to make as a kid. In exchange I received two inkle-woven chenille ornaments with tassels. They're too lovely to pack away till next Christmas so I'm going to hang them in my workroom. Wish I had a picture but no time tonight. One of those things that have kept me from posting regularly requires surgery scheduled for tomorrow so I'm off to pack for an expected short hospital stay and have a last drink of water before the no food-no drinks rule kicks in at midnight. On the positive side, I'm looking forward to downtime during recovery as I may be able to catch up on some knitting and posting.

Tuesday, October 14, 2008

Back to rug hooking

The garden isn't finished for the year yet. Far from it, really. DH has lettuce, spinach, swiss chard, radishes, turnips, green cabbage, and more beets coming along nicely. He picked a dishpan of green beans this morning and the tomatoes are still producing so we'll be putting up salsa tomorrow and again at the weekend, I expect. But things have slowed down enough that I can start thinking about other projects again.

So after going to a not-to-be-missed semi-annual church rummage sale last weekend, I have several pieces of 100% wool clothing ready to be ripped apart at the seams. To be honest, I hate this part and not just because it can be tedious work. The clothes are often in good condition and it seems a shame to tear them up but then I remember that this is an excellent way to recycle styles that no one wanted. The church runs a community clothes closet and the money from the rummage sale supports that effort. More importantly for my conscience, however, is the fact that the clothes were passed over by the folks who make use of the clothes closet. Makes me feel less guilty for cutting them into strips. The weekend's haul was especially nice as I found woolens in colors besides the more typical grey, black, and tan. I can always overdye if I need a special color but I love having ready-to-use strips, too. It's like having a box of beautiful yarns -- so much fun to look at and the design ideas really start to flow when I look at them all.

One project I'm ready to tackle this fall will be a panel for the top of a footstool. It's about 18x24-inches and could use an overhaul. I recovered it over 15 years ago but Holly-dog has since managed to chew all four corners. And just the other day, DS went to move it and said something poked him along one side. Yep, that would be the heavy-duty staples I used to secure the seam... Time to reupholster. I haven't decided on a design yet but I really want to include a bit of the lovely lavender I found at the rummage sale. For some reason I keep coming back to a tropical fish drawing DS made for the county fair several years ago. May have to adapt it for this project.

Sage House Studio's Rug Hooking Tips and Techniques page gives a quick overview of preparing wool for hooking as well as tips on dyeing. The site is also loaded with cute patterns and pictures of finished rugs, door and window toppers, and pillows.

Tuesday, September 23, 2008

Pear Honey

At today's monthly Garden Club meeting, I mentioned the pears we'd picked at the start of September and one of the members asked if I ever make Pear Honey as it was her sister's favorite type of preserves. Yes, we love it, too!

I use the recipe from Helen Witty's "Fancy Pantry" (sadly OOP but one of my favorite cookbooks) and make it every year I pick pears. The syrupy preserve is what Witty describes as "spoon sweets." We like it spread on toast or a hot biscuit and it tastes wonderful warmed and poured over waffles. Pancakes would work, too, but there's something about the thick sweetness that cries out for a crisp waffle. YMMV And a few spoonfuls over ice cream, vanilla pudding or a slice of pound cake make a company-worthy dessert out of something plain.

It doesn't take a lot of effort once you've pared, quartered and cored the pears so give it a try if you have a few pounds of fragrant, ripe but not soft, pears on hand. Sometimes I vary Witty's recipe by adding a can of crushed pineapple along with the pears. It gives the honey an additional tang but does dot it with "pineapple lumps" instead of it being smooth in appearance.

Pear Honey

4 pounds pears
water, as needed
3 tablespoons fresh lemon juice
zest of 1 lemon, grated
6 cups sugar

Peel and quarter pears, removing core. Dip them into a bowl of cold water to hold till all are ready.

Combine 6 cups water with the lemon juice in a large pan. Shred or grate pear sections; add the shreds to the lemon water. May use food processor to shred pears, if desired.

Combine the grated lemon zest with about a quart of water in another saucepan and bring to a boil. Simmer 5 minutes, drain zest and add to pear mixture.

Bring pears to a boil over medium-high heat. Gradually stir in sugar; return the mixture to a boil. Adjust the heat and simmer the mixture, uncovered, stirring it from time to time, until the shreds of fruit are clear and the syrup has thickened, about 1 hour.

Watch carefully towards the end of cooking and stir often to prevent burning. (I use a flame tamer on my gas stove.) The pear honey is thick enough when a small spoonful placed on a chilled saucer thickens to the consistency of a soft preserve, not a stiff jam, when it is refrigerated for a few minutes. To prevent overcooking, set the pan off the heat while testing.

Ladle hot pear honey into pint or half-pint jars, leaving 1/4-inch headspace. Seal and process in boiling water bath canner for 15 minutes (either size jar).

If you've never canned before check out the latest Ball Blue Book of Preserving or the USDA-funded website, National Center for Home Food Preserving, for detailed directions.

For cooking tips, check out Kitchen Tip Tuesdays at Tammy's Recipes.

Sunday, September 21, 2008

More produce to process

The pears we picked at the beginning of September are ripening. I spread them out in a single layer on some sheets of cardboard in an outbuilding at my mom's and everytime I go to her house I check their status. Have been bringing a few pounds home each trip and the dehydrator's been running every day as I dry cored, quartered but unpeeled pears. I really like doing pears this way as the worst part for me is dealing with the peeling on a pear. The dried pears make a sweet snack in winter right out of the jar. We pack a lunch for the homeschool co-op we participate in and dried pears, nectarines or peaches are perfect to throw in the lunch bag for the three of us.

For helping a friend stack hay for an hour or two on Friday DH received a bushel of freestone peaches. Those I'm dipping in boiling water to skin, halving and pitting them and stacking zip bags in the freezer. They make great additions to yogurt fruit smoothies -- one of our favorite quick breakfast fixes. If I have too many for the freezer, I think I'll make peach preserves. Last winter we ran out of the jars I put up a couple of years ago. Will make a nice change from the rhubarb-strawberry preserves put up this spring.

DH and I picked three bushels of apples on Friday afternoon and turned about half a bushel into fresh applesauce that evening. We gave a bucketful of apples to my mom for fried apples and the rest will keep for a while so I'll work on making more applesauce over the next couple of weeks. The apples came from a friend who has eight overgrown trees in her side yard. I was glad to get them as our old apple tree came down in a windstorm this spring and tho we planted several new ones this spring they won't start producing for a few years. We took a big bowl of applesauce to an annual homeschool picnic Saturday and I overheard one of the mother's telling her little boy that was "real applesauce." I'm not sure what that means they normally eat...

DH picked the last of our corn this morning and we had most of it for lunch today. Matter of fact, except for the fresh applesauce, that's ALL we had for lunch. Yum! Hate to see the last of it. What was left, I cut from the cob and will have tomorrow. Maybe reheated with a little butter and some lemon pepper or DS is requesting corn fritters. I have errands lined up all morning tomorrow so it depends on how fast I can get back home as to how it will show up on the menu.

Bugs found our second planting of green beans but aren't doing too much damage. Not enough beans to can but I snapped the bowlful and cooked them with a few new potatoes. DS can eat green beans every day and I love them like this with chopped sweet onion sprinkled over top. DH doesn't care for the potatoes when cooked with green beans but I go light on them so he can spoon up just beans if he wants.

There weren't enough tomatoes to bother canning either so I dipped them in boiling water after I finished with the peaches and pulled off the skin, cored and chopped them. Along with a few garlic cloves, a chopped onion and carrot, they made a fresh-cooked tomato sauce for a pan of baked ziti. DH lobbied for fresh salsa but was happy with the ziti. Our cilantro loves the cooler days and, if past years are a measure, we'll have fresh cilantro till January so I promised he won't miss out on more fresh salsa.

Tuesday, September 16, 2008

Searching for leftovers ideas?

It's an endless quest, I think.

As soon as I figure out what to do with rhubarb, how to use up a lot of zucchini, or a bunch of eggs, the cucumbers or peppers or something else explodes in the garden. And on top of the produce, which in most cases could always be "put up" in some way for later use, there are all those true leftovers like the last few ounces of a baked ham, three stalks of steamed broccoli left from lunch, a half cup of plain yogurt, a half dozen small new potatoes boiled in their jackets and more. All just sitting in the fridge or on the counter. Sometimes when we're really swamped, the garden produce piles up on the kitchen floor in enamel dishpans and big plastic buckets.

There is hope, tho. Many cookbooks, especially older ones, have a section on using leftovers. Cookbooks that don't have a specific section on the subject can still offer help in the form of their index. Just look up the ingredient you're trying to use up and, if you're lucky, there will be recipes indexed under that heading.

This list of my cookbooks tagged as "use-it-up" on LibraryThing don't all mention leftovers in their titles, but they're books I've found helpful for that purpose. If I could only have a couple I'd probably choose Lois Carlson Willand's "The Use-It-Up Cookbook: A guide for minimizing food waste" and Jane M. Dieckmann's "Use It All: The leftovers cookbook." Both give actual recipes for many dishes but they also suggest general ways to use up leftovers such as using the juice drained from canned fruit to make gelatin or as the liquid in a fruit smoothie. Yes, some of the suggestions are plain common sense, not necessarily a new idea never before revealed to mankind, but then sometimes that's what I need. Menu planning can be boring and I can get stuck in a rut no matter how much I may enjoy the creativity of cooking overall.

There are also websites that let you enter one or more ingredients which you have on hand and will suggest recipes that use those items. (Start with one of these: bigoven.com, cookingbynumbers.com or recipematcher.com ) I don't think they were all set up with leftovers in mind but they can be useful for that purpose, too.

Also, when I come across recipes that call for pre-cooked ingredients or some other ingredient that I'm likely to have on hand as a leftover, I try to bookmark or save to a file where I can search for it by a keyword when the need arises to use up leftovers. (Sometimes that's daily!) And, since I like list-making, I have a few pages in a household journal labeled "recipes that call for ______" with foods like cooked poultry, eggs, day old bread, etc. filling in the blank. As I look thru my cookbooks (yeah, I like to read them even when not searching for a recipe) I note the cookbook title, recipe name and page number under the appropriate use-it-up heading.

I even set up a category in the recipe database I use, MasterCook, called "use-it-up." MasterCook lets me search by ingredient so it's not absolutely necessary to use the tag in order to find a recipe that calls for yogurt, say, but since the ingredients' names can vary (whole milk yogurt, fatfree yogurt, etc.) I like to be able to scan the category, too. Every little bit helps when I'm stumped for ideas. I know we save grocery money when we don't waste food and that's the whole point of the exercise. Well, that and I believe we should be good stewards of the earth's resources. I feel a twinge of guilt if I let something good go to waste just because I was too lazy to be bothered to figure out how to use it.

So, what leftovers do you always seem to need help using up? Maybe someone has a great idea and is just waiting for you to ask the question. For my part, I'm always looking for good ideas for bread -- we can only eat so many bread puddings, stratas, croutons, dressings and melba toasts. They're all good but I admit the chickens often get bread scraps around here.

And just to let you know what prompted this leftover essay, I found two partial pints of sweet cherries in the fridge when I cleaned it out this week. The fruit went into the following recipe, one of my favorite use-it-up recipes taken from WWII-era The Good Housekeeping Cook Book, and the juice was added to a pitcher of lemonade to make cherry-lemonade. Both went over well with the family.

Fruit Cottage Pudding
6 servings

2 to 3 cups sweetened fruit, canned, frozen or stewed*
1 cup flour
1 1/4 teaspoons baking powder
1/8 teaspoon salt
1/8 cup vegetable oil or softened butter
1/2 cup sugar
1 egg
6 tablespoons milk
1/2 teaspoon vanilla extract

Preheat oven to 350F.

In the bottom of a greased or oiled 1 1/2-quart baking dish, place sweetened fruit.

Combine flour, baking powder, sugar and salt in a medium-size mixing bowl. Add oil, egg, milk and vanilla. Stir till smooth. May use mixer but a wooden spoon or spatula will do the job easily.

Bake 60 minutes or until the cake batter tests done. Serve warm or at room temperature.

*Note: Try rhubarb sauce, applesauce, berries, pineapple chunks, cherries, cooked prunes, plums, etc. Combine fruits such as cooked rhubarb and frozen strawberries or raspberries, stewed prunes with apricots, pineapple with cherries, whatever you have on hand. If using fresh fruit, cook on top of the stove or in the microwave with a little water to soften first. Sweeten with sugar or honey as desired.

Check out Kitchen Tip Tuesdays at Tammy's Recipes for more good ideas.

Monday, September 15, 2008

Pickled pepperoncini peppers or hot banana peppers

Pickled peppers are a pantry staple here. DH always plants several types of peppers and every year I put up quarts of hot banana peppers (aka Hungarian Wax?), and sometimes jalapeno or serrano peppers. Years ago I used to put up the sweet banana peppers, too, but DH has gone completely to the hot side in recent years and doesn't plant them anymore.

This year after several years of me asking "why not plant pepperoncini, too?" he finally decided to take the plunge. (Which is a real good thing as I've not found pepperoncini to be readily available at our local farmer's market in previous years.) We've had a good crop so far and I'm on the third canning session for pepperoncini. The crockpot will get a workout this winter as we all like Italian beef sandwiches on hearty homemade wholegrain rolls. And, tho I've tried preparing the roast with hot banana peppers, I prefer the milder (to my taste anyway) pepperoncini peppers. (BTW, why is it every time I go to type that word I misspell it as pepperocini? Anyone else with that problem?)

I use the same recipe for pickling any of the hot peppers. It's very basic and easy to do. It's okay to combine different pepper varieties in the same jar, too. For heat distribution while processing, it might be best to stick with similar sizes of peppers, tho. These can also be sliced into rings before jarring but I find the texture is better if they're left whole then sliced before serving, if desired. If you've never canned before check out the latest Ball Blue Book of Preserving or the USDA-funded website, National Center for Home Food Preserving, for detailed directions.

Pickled Peppers

4 quarts peppers
1-1/2 cups salt (non-iodized or pickling salt recommended)
1 gallon plus 2 cups water, divided
2 cloves garlic
2 tablespoons prepared horseradish, optional
10 cups vinegar (5% acidity)
1/4 cup sugar

Wash peppers. Leave up to an inch of stem on each pepper. Cut two small slits in each pepper. (Wear plastic gloves to prevent burning hands.)

Dissolve salt in gallon of water. Put peppers in a large non-reactive container that will hold the peppers and the gallon of water. Pour salt water over peppers and put a dinner plate on top to hold peppers below level of water. May need to weight plate with a glass jar filled with water and capped. Let stand at room temperature for 12 to 18 hours.
Drain and rinse peppers, then drain thoroughly. Combine 2 cups water and remaining ingredients in large saucepan; simmer for 15 minutes. Remove garlic.

Pack peppers into hot sterilized canning jars, leaving 1/2-inch head space. Pour boiling hot pickling liquid over peppers, leaving 1/4-inch head space. Adjust lids.

Process half pints and pints for 10 minutes, quarts for 15 minutes in boiling water water.Oh, and the Pepperoncini Beef is a simple crockpot recipe. Put a beef chuck roast in the slow cooker. Pour liquid and pepperoncini from pint canning jar over roast and cook on Low for 6 to 8 hours. That's it. If peppers were canned in a quart-size jar, just put half the peppers and half the liquid over beef or use a larger roast and the whole quart. Original recipe based on a 2-1/2 to 3-pound roast. Venison works great, too. If you want to get fancy add garlic, onions or an Italian dressing seasoning packet along with the peppers and their pickling juice.

Tuesday, September 2, 2008

Yamazetti, Yummazetti, Ya-Ma-Zetta or Y________ ?

Anyway you spell it, the dish always seems to come back empty after serving.

I'd never heard of the casserole till about 30 years ago when it showed up on a friend's family supper table. Then I began to spot it at potlucks, church dinners and the like. Finally I found a couple of recipes in a local Amish cookbook, "Dutch Cookbook - Stuarts Draft 1979." So I thought of it as some sort of Pennsylvania Dutch word meaning "darn good hot dish."
When I mentioned it in a recent post, I started hearing from others who either made the dish regularly, were looking for a recipe or had heard of it but wanted to know more such as where it came from originally. The truth is, I'm not sure anyone knows that; kind of like the correct spelling of the name. Or even, what is the correct name?

A 1993 Reiman Pubs cookbook, "Country Ground Beef," gives a recipe that's very similar to others I've come across but it's titled "Marzetti." Other cookbooks refer to a dish called "Johnnie Marzetti" and Wikipedia even has an entry for a similar (the same?) dish giving the origin as an Ohio restaurant.

So what's the recipe? Well, that depends on who you ask. Constants appear to be ground beef, cheese, tomatoes and noodles. Other ingredients come and go depending on your recipe source.

It's a very forgiving recipe. If you have Swiss cheese but not the more commonly listed Cheddar, that's fine. A can of diced tomatoes instead of condensed tomato soup or sauce? That's okay, too. Want to sneak in a few vegetables? Layer in some chopped zucchini or a can of green beans, drained, or a cup or so of corn if you want to make it stretch to another serving, perhaps. If you have some leftover veg from yesterday's dinner consider layering them between the noodles and sauce. Be adventurous but not crazy. I wouldn't recommend sweet and sour cabbage, say, but leftover plain or buttered steamed cabbage or peas and mushrooms wouldn't be amiss.

Below is the recipe I start with. It's the one I was given over 30 years ago when I first came across the dish. Remember there are lots of variations. On occasion I've subbed a couple cups of chopped cold roast beef for the ground beef. Just cook the onion and celery in a bit of butter, oil or broth then mix with the cold beef. According to Wikipedia, the Panama Canal Zone's version of this dish always includes celery and olives. So the sky's the limit.

Yamazetti

8 ounces dry noodles, cooked
1 to 1-1/2 pounds ground beef
1 onion, chopped
1 stalk celery, diced
1 (10-3/4 ounces)can condensed cream of _____ soup*
1 (10-3/4 ounces) can condensed tomato soup
1 cup sour cream or plain yogurt
2 cups grated cheese

Brown ground beef in skillet, adding onion and celery as beef cooks. Spoon cooked noodles into 9x12-inches baking dish. Combine soups and sour cream or yogurt.

When beef is done, drain if necessary. Spoon beef over noodles. (Add 1 or 2 cups of any desired vegetable as discussed in post above.) Spread soup mixture over top. Sprinkle with cheese.

Bake at 350F. for 45 minutes to 1 hour or until bubbly and cheese melted.

Casserole reheats well for packed lunches and also freezes well. Make one to serve and one to freeze for another day.

*Note: Almost any condensed cream soup will work. The lady who gave me the recipe always used cream of chicken but I use whatever's on hand so cream of mushroom and cream of celery are often subbed. Recently I came across cream of squash blossom soup and it works great, too. If you like the cream soup, it will probably sub with no problem in this recipe.

For cooking tips, check out Kitchen Tip Tuesdays at Tammy's Recipes.