Wednesday, September 23, 2009

Grapes - juice, jelly and wine


The grapes came in three batches this year -- most of what we picked were concords and all were growing within a 2-mile circle but they ripened over several weeks instead of all at once. A change from the last few years.

The first batch, picked from my mom's two grape vines, we turned into grape juice just like last year. We put up a little over 40 quarts. The next batch, a little over three 5-gallon buckets full, came from vines at my sister's old house. No one wanted the grapes so we picked them, used one bucketful to make grape jelly and gave the rest to some friends for making grape juice.

While we were picking my sister's grapes we exchanged greetings with a neighboring friend and got to talking about what we'd do with the grapes. She's a winemaker and before we knew it we decided to take the carboy we use for beer-making out of storage and try our hand at a batch of grape wine, too. Since we'd already promised those grapes to some other friends, we waited till the last vines we usually pick were ready and used them to mix up a small batch of concord grape wine.

The recipe is very straightforward. After rinsing and stemming, we measured grapes by the quart and added the same number of quarts of water to the carboy as we did grapes. The sugar was calculated by cup with a measure of one cup to each quart of grapes used. We were advised if we wanted a slightly sweet wine to increase the sugar by roughly a scant 1/4-cup per quart or no more than four cups to 5-gallons of combined water and grapes. The wine yeast we used, Red Star's Montrachet, was what I already had on hand from an earlier field trip to Dinosaurland.

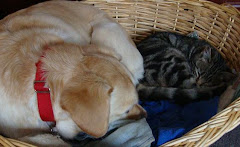
After combining the grapes, sugar, yeast, and water (mixing the yeast with a little of the water first), DH moved the carboy from the kitchen worktable to an empty corner in the home office. It's far enough from the woodstove to stay relatively cool come cold weather yet in a spot where I see it every day so can monitor the water level in the jar in order to maintain the necessary airlock. The first day or two, I found myself talking to the dog only to discover she wasn't in the room. The sound of the air escaping from the tube into the jar of water is the same sound Holly-dog makes when she's asleep and dreaming -- little ruff, ruff, ruffs emanate from that corner all the time now.

So the fruit and sugar went into the carboy on September 19. It wasn't particularly difficult to prepare though none of my funnels were the right size to channel the grapes into the narrow opening on the carboy. I did that slow but steady job by picking up grapes by the handful and letting them roll into the jar using my other hand as a shield. When DH tried it grapes bounced everywhere but into the carboy so I did the grapes then he handled the sugar and water with yeast. I've been assured that it will look terrible, what with fermenting grapes and all, before we get to the next step in roughly three months but our adviser promised to come help with that...

Here's what it looked like today, the fourth day of fermentation. And below are a couple pictures of DH and DS from last week, picking the last of the summer (wine) grapes.

Sunday, August 2, 2009

Fresh blackberries


Today's featured home-grown food was blackberries. DS's been picking them every morning for breakfast but today we each had a bowl of berries with some top cream and a couple of honey wafers for dessert with our lunch. The honey wafers are similar to a sugar cookie or thin shortbread. They only take 4 ingredients and are good keepers -- if you can keep them hidden, that is.

I kept the rest of the meal simple, too. DH grilled our garden-fresh squash (green and yellow zucchini), onions and potatoes over the gas grill. Prior to grilling I par-boiled the potatoes and drizzled a little olive oil and soy sauce over the squash and onions. Also made a tomato and mozzarella salad using our yellow pear tomatoes and Genovese basil plus cheese I'd picked up Saturday at the farmer's market. When the grilled veg was ready I sprinkled chopped chives over the potatoes and passed butter, as desired, at the table.

Honey Wafers

1/2 cup butter
1/2 cup honey
2 cups all-purpose flour (I use fresh-ground soft wheat)
1 teaspoon baking soda

Cream together butter and honey, warming them carefully for a minute or two, if desired, for easier blending. Combine dry ingredients and add to (cooled) creamed mixture.

Chill dough 1 hour or until firm enough to roll easily. Roll out 1/8" to 1/4"-thick on lightly floured surface. Cut with floured cookie or biscuit cutter. Can also be chilled in log shape and then sliced 1/8" to 1/4" and baked as needed.

Bake on greased cookie sheet in 350°F. for 8-10 minutes if 1/8"-thick or 12-15 minutes for 1/4"-thick cookies.

I usually prefer a mild honey in these but orange-flower honey with bits of orange zest added is a wonderful variation. Try adding 1/2 teaspoon ground cinnamon and 1/4 teaspoon each ground cloves and allspice to make a spice-scented version.

Yield: 36 2" cookies

Saturday, August 1, 2009

How does my garden grow?

Yellow pear tomatoes plus blackberries. Green beans, potatoes, red and yellow onions and more.

The last few weeks it's felt like the dam broke. We put up over 50 quarts of green beans from one short (15'?) double row and that's not counting the many pickings we ate and gave away. The two rows of potatoes DH's dug so far yielded 2 bushel baskets plus another 20 pounds we ate or gave away. I have a half-bushel of yellow onions and almost that many red (purple) onions lying on newspaper in the shed. Haven't done anything with the garlic except pull some to eat -- still have to harvest and lay it out to dry before storing. Squash, cucumbers and now Sugar Baby watermelons are coming in daily, too.

And blackberries! This past week, DS has been picking blackberries every morning for our breakfast. Today he's over at my mom's and they're planning to pick her blackberries before he comes home. It's anyone's guess how many will make it in the bucket vs. how many get eaten but I'm sure we'll have enough to freeze a few bags for use this winter in smoothies or maybe in a cobbler.

Tomatoes started ripening in mid-July but it wasn't till this past week we had many worth eating. The first all had blossom-end rot, the curse of well-dependent gardeners, I think. Now we have them coming in by the dishpan and I'll be canning tomorrow -- probably ketchup as we're on the last jar from last year.

This year we planted some new-to-us yellow pear tomatoes. I've had them from friends' gardens but never tried growing our own till early this spring when I started about a dozen peat pots with seeds. They're so small and perfectly pear-shaped. The taste is sweet but with just enough tang it keeps them from being bland. And the color's lovely in salads or chopped for salsa. When we get overrun with them, I'll just toss the extras in with the other tomatoes for canning but I'm thinking some yellow tomato preserves would be pretty on the shelf and tasty, too.

The county fair's coming up and I always like to have a few entries in the canning classes. I'm wondering how the yellow pear tomatoes would look in a canned salsa, maybe using red onions, too. I know I'll like them dried and can already picture them as bruschetta -- they'll be darker dried than they are fresh but the yellow color stays true enough to add a nice dash of color to the table in the winter months.

Sunday, July 12, 2009

Another marinated summer salad -- this time with homemade Catalina dressing

The days of the week blur together lately. I put up 19 quarts of green beans, 15 quarts of pickled beets, dried 8 pounds of beets, 16 pounds of various types of summer squash, 9 pounds of cucumbers and more this past week. I swear the corner of the kitchen in this photo is never empty. As soon as I take care of one dishpan of vegetables, another seems to magically fill and take its place.

To get us through busy weeks like this, I rely on make-ahead dishes and "twice is nice" menus. The latest addition to my cookery repertoire is a marinated salad that can be made in advance, uses up lots of garden produce and makes a great side dish or topping for use with a tortilla roll-up and which, with the addition of chopped cooked chicken, sliced hard-boiled eggs or a can of rinsed and drained beans, can serve as a main dish.
For one of our completely local meals this week I included this salad, topped with hard-boiled eggs and accompanied by zucchini chips and a glass of mint tea. All but the tomatoes came from our homestead and those came from the local farmers' market. Next week when I make another bowl, I'll add a couple of our just-ready peppers, either bell or sweet banana.

The dressing I use is a homemade Catalina. You could use a bottle from the store but I don't because the homemade is so easy to make and it has the spicy tang I can't find in a bottled version these days.

The recipe allows for a lot of variation. Just be sure to use fresh vegetables that won't go limp sitting in the dressing. For that reason, I prefer to use a meaty plum tomato and remove the seeds before chopping. Chop as much of each vegetable as you want to include. I don't measure but just use a bowl that will hold a little more than I want to make. That way I have room to toss the salad in the dressing without spilling it. When I have enough veg chopped, I pour on the dressing, toss to coat then cover and refrigerate till serving time. It needs at least an hour or two to blend flavors before serving. Leftovers will keep 3 days or so in the fridge.

Catalina Dressing

2/3 cup mild-tasting vegetable oil
1/4 cup ketchup*
2 tablespoons honey (or 1/4 cup sugar)
1/4 cup white wine vinegar
1 tablespoon grated onion
1/2 teaspoon Worcestershire sauce
1/4 teaspoon salt
1/8 teaspoon hot pepper sauce

Combine all ingredients in a jar with tight-fitting lid. Shake to blend and then let sit for an hour or so before using. Shake thoroughly or use wire whip each time before serving.

Makes about 1-1/2 cups.

*I use Farm Journal's "Western Gourmet Ketchup" which I can every year using our garden tomatoes. (Recipe available here.) It has a sweet tangy flavor and works well in this recipe but probably any flavorful bottled ketchup would serve.

Wednesday, July 8, 2009

Making apple cider vinegar

It's a little early in the year here to be thinking of making cider but we're using a lot of apple cider vinegar for pickling and salads these days so now's as good a time as any to explain the process for turning non-pasteurized apple cider into vinegar.

First thing to know about making your own vinegar is that you shouldn't use it for canning unless it has an acidity level of at least 4.5% and some canning recipes call for 5%, which is what many store-bought jug vinegars say they have. However, there's no need to test the acidity level if you just want to use it for salad dressings, regular recipes or other general household use.

Next thing is, the directions I've included here are how I do it. There are lots of variations that will yield similar results. And there are vinegar connoisseurs just like with wine. So try my method if you want but look around and you'll find other ideas on how to do it and what to use. Vinegar can be made from almost any liquid that contains enough sugar so don't stop with apples -- experiment with grapes (how about making wine vinegar?), peaches, beets, berries or what have you.

If you press your own apple cider, you're well on your way to making vinegar but if you buy it, be sure to choose non-pasteurized cider. Also, check the label to be sure it's preservative-free. Many cider mills add sodium benzoate as a preservative and that can make it less likely that your cider will ferment or turn into hard cider which is the first step in making apple cider vinegar.

When I make vinegar, I set aside a couple gallons of cider in crocks. I make sure to leave lots of headroom in the crock as the cider will be frothy and may foam over the top during the first fermentation stage. There's nothing wrong if it does this -- just wipe the crock off and let it continue to sit -- but it can be messy and draw fruit flies. So I use a 2-gallon crock to hold 1-1/2 gallons of cider. I cover the container with a clean cotton tea towel, tying it with a piece of string so dust and bugs can't get into the crock over the next few months.

As the sugar in the cider changes to alcohol, it becomes hard cider. That can take anywhere from 1 week to 6 weeks, depending on the temperature and the sugar content of the apples used to make the cider. Some people choose to hurry this stage along by adding yeast but I prefer the easy path and just set the crock in a corner of the pantry for several months.
If I have a mother-of-vinegar (pictured above) from a previous batch of vinegar I may carefully pour that into the crock, on top of the vinegar, to help the process along but wild spores floating in the air will start the fermenting process, too. Check the cider after a few months to see if it's strong enough. The process usually takes from 4 to 6 months, start to finish. And that's all there is to it.

If you do want to use homemade vinegar for canning, this link offers a good description of the steps for vinegar titration. The process is similar to testing the acidity level of wine. But, again, if you don't plan to use your vinegar for canning you don't have to bother with this. Just go with vinegar that tastes and smells good to you.

Monday, July 6, 2009

Sweet pickles or how to use up a few cucumbers


My mom always made 14-day pickles and I still make them but they take so long I try to can enough to last a couple of years. So on the "off" years I've been making Helen Witty's bread-and-butter pickles with onions from her "Fancy Pantry" cookbook. We really like their sweet crunch and any extra pickling juice goes over a jarful of sliced onions that I stash in the fridge for use in salads or on sandwiches.

This weekend I put up 25 pints of bread-and-butter pickles minus the onions as these jars are intended for my mother's pantry instead of ours. She doesn't do much canning anymore but likes to keep her pantry shelves full of good things my sister or I have put up.

The recipe is easy and though timing plays a part, it doesn't require a do-or-die schedule. Also, I use Witty's ingredient list as written but I play fast and loose with the directions because I rarely have ONLY a dozen cucumbers ready for pickling at one time. I most often prepare my cucumbers by washing, slicing and putting into a clean food-safe 5-gallon plastic bucket. Pour clean water by measured gallon over the cucumbers and then pour the water off and mix up lime and water as needed to cover cucumbers using Witty's proportions of 1 cup pickling lime to 1 gallon cool water. And add the sliced cucumbers to the lime-water mixture. This way I'm sure to have enough water to cover any amount of cucumbers I have on hand.When it comes time to mix up the pickling liquid, I multiply the ingredient amounts so the yield will be about two-thirds of the amount of water required to cover pickles in the first step. If I have any liquid left over after canning, I pour it over onion slices and store the mixture in the fridge to use fresh.

Extra-Crisp Bread and Butter Pickle Slices
from "Fancy Pantry" by Helen Witty

12 firm, fresh pickling cucumbers (6-inches long)
1 gallon cool water
1 cup pickling lime
64 ounces apple cider vinegar
5 cups sugar
1 tablespoon fine non-iodized salt
1 tablespoon mustard seed
1-1/2 teaspoon celery seed
1 teaspoon turmeric
1 teaspoon whole peppercorns
1/2 teaspoon whole cloves
1/4 teaspoon ground ginger
1 quart of sliced onions, cut 1/4-inch thick

Wash cucumbers. Cut off and discard both ends, then cut cucumbers into 1/4-inch thick slices.

Measure cool water into a ceramic, stainless steel or other non-reactive container (do not use an aluminum container) and stir in the pickling lime very thoroughly. It will not dissolve completely. Add sliced cucumbers, stir, cover, and set aside overnight or for up to 24 hours. Stir them once or twice.

Drain the cucumbers into a colander. Return them to the rinsed out container and rinse them in three more batches of cool water, stirring them well as you do so. Drain them again and add cool water to cover them by an inch or two. Set them aside for three hours.

Combine the vinegar, sugar, salt and other seasonings in a non-reactive saucepan. Heat the mixture to boiling, stirring until the sugar dissolves, then boil it, uncovered, for 5 minutes.

Meanwhile, drain the cucumbers well and return them to the first container along with the sliced onions. When the syrup has boiled 5 minutes, pour it over the slices. Stir the slices gently, then push them under the surface, cover the bowl with a towel, and set it aside overnight.

Transfer the cucumbers and syrup to a large preserving pan and cook the whole business, covered, over medium-high heat, stirring occasionally (be careful not to break the brittle slices), until the cucumbers are translucent, 20 to 30 minutes.

Using a funnel, spoon, long fork or tongs, arrange the pickle slices in 8 hot, clean pint canning jars, leaving about 1/2-inch of headspace. Divide the spices from the syrup among the jars, then add boiling-hot syrup to reach 1/4-inch from rims. Remove any bubbles and add more syrup, if necessary. Seal the jars with two-piece canning lids and process for 10 minutes in a boiling-water bath. Cool, label and store the jars. Be sure to let the pickles mellow for 4-6 weeks, then chill before opening.

If you're new to canning or using the water bath method, please refer to the latest Ball Blue Book of Preserving or the USDA-funded website, National Center for Home Food Preserving, for detailed directions.

Besides pickles, I put up cucumbers by drying them. They make a tasty vegetable cracker substitute similar to zucchini chips -- DS even prefers the cucumber chips to the zucchini chips. And they are wonderful to use for making cucumber dip. Just grind up a couple tablespoons of dried cucumber slices and add the powder to sour cream, yogurt, cream cheese or your favorite blend of the same. It also makes a delicious cucumber spread for sandwiches in the middle of winter.

Sunday, July 5, 2009

Lunch in a hurry, as usual

The garden's doing great this year and that means when we're home we're usually working out there or in the kitchen putting up produce. Strange as it seems, amongst all this food, it can be hard to get a meal on the table some days.

Saturday's meal, put together on the run between garden chores and a little holiday merry-making, was meatloaf made with local, grass-fed beef from the freezer, red cabbage and summer squash from our garden, grain from down the road in Raphine (Wade's Mill) and a few new potatoes I couldn't resist picking up at the farmers market that morning. The squash casserole and rolls included eggs from our backyard hens, plus butter and a bit of top cream from a dairy at Burnt Chimneys. The meatloaf and squash also included onions from the garden and the meatloaf utilized a few tablespoons of the wonderful tomato powder I made earlier this spring with what was left of last year's dried tomatoes. Red cabbage required a dash of homemade apple cider vinegar and local honey, too.

Too get it on the table fast, I prepared the squash casserole in the morning and refrigerated it, unbaked, till close to lunch time. The red cabbage went in the oven with the meatloaf a little over an hour before lunch. And the rolls were made with refrigerator dough I try to keep on hand so we can enjoy fresh hot bread with most meals. They spent most of the morning rising in their baking pan on the counter and then went into the hot oven as the meatloaf and squash casserole came out.

We had ice-cold apple cider we made and froze late last fall. I often can cider, too, but then it just becomes apple juice, in my book. This stuff was still the real thing and a perfect sweet yet refreshing drink to go with the rest of our local meal.

Sunday, June 28, 2009

Do you brown bag it?

Well, DH does. Though his employer provides a large break room complete with sandwich and snack machines, he prefers to pack his lunch every day. One reason is he's a thrifty guy and would rather not fork out a minimum of 5 bucks a day to eat a day-old sandwich, a handful of chips and a soda plus the closest restaurant is almost 4 miles away. But the main reason is he's envious of me and DS.

Yes, that's right. He's driven by jealousy. He thinks of us, at home, doing our usual chores, homeschooling, stretching out with a book and then enjoying home-cooked meals without him. He can handle it all right up to the point when DS describes some great tasting dish we cobbled together for dinner. Then, especially if the meal included fresh garden produce, he turns green.

Now for me, having to cook and preserve almost all our food, I sometimes dream of being served a meal I didn't have to prepare. Just goes to show, one man's bane is another's pleasure. And it's not even that DS and I dine on exotic dishes or seek out little known recipes to enjoy when DH is at work. I think it's just the idea that we're enjoying the fruits of his labor without him.

So what does he pack for lunch? Usually leftovers. Yep, all this fuss and the man eats leftovers. But since I usually cook extra chicken with the idea of making tortilla soup from the remains or turn a few slices of ham and boiled potatoes into a fritta with the addition of eggs and onions, it's not always traditional leftovers. More of the cook once, eat twice or plan-ahead cooking style.

One day this past week, I realized he'd packed a totally local meal to take to work. Here's what he packaged up: ruby red beets, steamed and sliced, zucchini and yellow squash in browned butter, sugar snap peas with garlic-soy sauce, Harvey House slaw, sliced cucumbers in vinegar and a slice of locally raised and smoked ham.Except for the ham slice (the last of a fellow homesteader's delicious Christmas basket), DH grew everything from beets, cabbage, cucumbers, garlic, onion, sugar snap peas, yellow squash to zucchini. The dried and crushed hot red pepper on the peas came from last year's garden.

The butter came from Burnt Chimneys, the soy sauce from Richmond, and the honey in the slaw came from an apiary on the next county road over. The apple cider vinegar was more of the batch we made last fall from (non-pasturized) local cider. Non-local ingredients included in the meal were celery seed, dry mustard, kosher salt, a teaspoon of brown sugar and salad oil.

Sugar Snap Peas in Garlic-Soy Sauce

1 pound sugar snap peas, ends clipped, strings removed
2 tablespoons garlic-infused olive oil (OR sub plain olive oil and 1 minced garlic clove)
2 tablespoons soy sauce
1 teaspoon brown sugar
dash of crushed cayenne pepper

Toss olive oil with peas to coat. Broil 2"-3" from heat for 5 minutes. Mix soy sauce and brown sugar together and pour over peas in broiler pan. Toss to coat. Season lightly with pepper. Serve.

These are good hot or cold.

Saturday, June 20, 2009

Cornbread

In my house cornbread is never sweet and is always made in an iron skillet. Just the way my mama made it.

Now, if you want to add sugar, corn, peppers, sausage, onion or cheese, I still may eat it but it's strayed from being cornbread and started taking on airs. Oh, and if there's any buttermilk or yogurt in the house, that's always used in the batter in preference to any other liquid such as milk. Though, if it's a poor month, water will work in a pinch.

Around here cornbread often serves as a kid-friendly extra or as a meal extender, stretching a few leftovers into a full meal. Plus everyone's always happy to see it on the table when they sit down to eat. Combine it with homemade preserves and it can serve as a between-meal snack, too.

Because corn grows in so many areas of the country, local cornmeal often can be found more readily than wheat flour. Besides nearby Wade's Mill, we have a couple of local folks who set up during the year to grind and sell cornmeal at local events such as the Virginia Fall Foliage Festival or sometimes under a tent on the fringe of a large parking lot sort of like the ubiquitous chicken barbeques -- serving as a fund-raiser or simply a way to make extra money. Since we have a grinder, I can prepare our cornmeal fresh as we need it. I like to use popcorn as it makes a hearty, good tasting cornmeal and is something we can grow ourselves.

Cornbread came to my menu-deprived mind again yesterday as I planned a late dinner that was more of the same garden fare we usually enjoy this time of year. We'd been on the go since early morning and wanted something quick and easy for supper. Preferably something that could cook as we showered and changed after the hot, tiring day. So I fixed a quick two-skillet meal that's one of DS's favorites: sweet salsa cabbage with ground venison and cornbread.

First I mixed up the cornbread and put it in the toaster oven to bake. My small iron skillet just fits in the little oven and lets me bake in the hot summer without heating up the house with the larger gas oven. The cornbread takes about 20 minutes to bake which is just enough time to get the main dish prepped and cooked.

The cabbage and venison dish is another variation on combining available vegetables with ground meat and adding a sauce. In this case I chopped onions and green cabbage from our garden as I browned the frozen ground venison in a tablespoon of oil. The venison was from a deer put in the freezer last fall. When we grind it for the freezer, it's all lean meat so needs just a bit of oil for cooking like this. And I package it in flattened three-quarter pound packages so it can be cooked right from the frozen state, no waiting for it to thaw.

I tossed the onions on top of the cooking meat and covered the pan with a lid while I finished chopping cabbage. The sauce was 2 cups hot salsa we'd put up out of the garden last year and 1/2 cup home-canned peach preserves made last year with fruit and honey from an orchard just over the mountain from us. I added a bit of salt and black pepper, stirring all the sauce ingredients together before pouring it over the now-combined cabbage, onions and venison in the pan. Put the lid back on and let it simmer on low while I grabbed a quick shower.

No real dessert necessary with this meal but we all enjoyed an extra slice of cornbread with some more of the peach preserves as a sweet finish to dinner. Another successful OLS meal and another meal elevated to something special by a pan of cornbread.

Cornbread

2 cups cornmeal
2 eggs
1-1/4 cups buttermilk or thinned yogurt
1/2 teaspoon salt
1 teaspoon baking soda
2 tablespoons vegetable oil or butter

Add the oil or butter to an 8-inch or 10-inch iron skillet and set in preheated 450ºF. oven while preparing rest of recipe.

Combine remaining ingredients in medium mixing bowl. Pour hot oil or melted butter from iron skillet into batter, stir quickly to blend then transfer to hot skillet for baking.

Bake 20 minutes at 450ºF.

Sunday, June 14, 2009

Packed lunch the OLS way

This was a busy week and it ended with us taking a day trip on Saturday to attend a homeschooling convention. There was a scheduled break for lunch between workshops but from past experience we've learned to pack a lunch to enjoy at the car instead of relying on the pre-packaged sandwiches available on site. Since the garden harvest is continuing to gain momentum, it seemed a good idea to build the menu around local, even homegrown food.

So today's lunch easily turned into our weekly all-local meal in the One Local Summer challenge. We just ate it in a parking garage in Richmond instead of at home. A few folding lawn chairs, a cooler serving as table and, in DS's case, a book purchased at the convention's used book sale, and we were all set.
In preparation for Saturday's meal I'd boiled eggs from our hens on Friday and used just-made mayonnaise to bind the resultant egg salad. Kept cold in the cooler with our frozen water bottles it was perfect with homemade crackers made from local wheat and Sugar Snap peas and peeled turnips, both from our own garden.

I liked dipping the peas in the egg salad but DH preferred scooping the egg salad onto crackers then sprinkling minced chives (again from the garden) over top. The last of our strawberries made a perfect sweet finish to the meal. And I appreciated that because it was all finger food we didn't need silverware beyond a butter knife for getting the egg salad out of the glass jar I packed it in.

As in years past, we weren't the only family tailgating in the parking garage but I bet we were the only one eating all locally-produced foods.

Friday, June 12, 2009

Garden harvest update


Welcome rains this spring are fueling our garden's explosion. I've been trying to weigh all the produce as it comes in but some days it's a hit-or-miss proposition what with the regular chores plus preparing or preserving all the veg. Here's what I've recorded so far this spring:

17.5 pounds - Sugar snap peas
5 pounds - Green cabbage
13 pounds - Beets
6 pounds - Turnips
7 pounds - Swiss chard (Ruby red and regular, combined)
16 pounds - Lettuce (Cos and Buttercrunch, combined)
12.5 pounds - Spinach
3 pounds - Daikon radishes
6 pounds - Bok choy
1.5 pounds - Cauliflower
8 pounds - Egyptian onions
8 pounds - Strawberries
18 pounds - Rhubarb

The list isn't complete but I'm pleased with my count so far -- over 120 pounds of produce so far. Most of the spring harvest went straight onto our table or the table of friends or family but I've frozen several pounds of sugar snap peas, rhubarb and greens, dried a few pounds of beets, and canned eight quarts of rhubarb punch for later use.

DH is still setting out hillbilly tomatoes and second plantings of summer squash among other things so the garden's shaping up to have a great year. Now if only I can hold up my end of the bargain by staying on top of the harvest, thinking of tasty ways to serve it up and preserve the extra for the winter months. Some days those seem like daunting tasks but when I can see the results totaled here, it motivates me to keep plugging away.

Monday, June 8, 2009

Daikon radishes - 2nd planting

Daikon radishes make great fresh pickles but before I could get a picture of our first crop, we ate them plain. Just peeled and sliced which left none for pickling.

Last week, DH started pulling radishes from the second planting so I gathered a handful to make pickles. They aren't too hot this year, probably due to the wonderful spring rains we've had. Some years they bring tears to my eyes and I pickle them in self-defense. A day or two in vinegar may make them sharp but it tones down the heat.

The idea for this recipe came from a Vietnamese restaurant in a nearby town. The restaurant's been gone for years but we still miss it and the founders. They served an appetizer comprised of thinly sliced, marinated beef rolled in grape leaves then grilled. It was accompanied by lettuce leaves and a daikon-carrot pickle. I loved the grape leaf skewers but would often ask for additional pickle to go with the main course, too.

The pickle's great on cold sandwiches, served with crackers and cheese or alongside a main dish. DS likes to cut the vegetables with a wavy knife but matchstick pieces look good jumbled together on a lettuce leaf, too.

The recipe's very simple. Use a 2-to-1 ratio of unseasoned rice vinegar and sugar (or about half as much honey, if desired) and add a dash of salt. Make enough liquid mixture to cover whatever amount of sliced radishes and carrots you have on hand. I put the veg in a quart jar then I can judge the amount of liquid by covering them with water and then pouring it off into a glass measuring cup if I'm unsure how much liquid mixture to make.

So the recipe looks like this:

Daikon-Carrot Pickle

1/2 pound daikon radish, peeled and cut into matchsticks
2 carrots, peeled and cut into matchsticks
1 cup unseasoned rice vinegar
1/2 cup sugar or 1/4 cup honey
1/8 teaspoon salt

Stir vinegar, sugar (or honey) and salt together till blended. Pour over sliced veg to cover and chill several hours before serving. Will keep a week or more in the fridge.

Sunday, June 7, 2009

One Local Summer 2009


As usual for this time of year, we're eating primarily out of our garden but this week I made a point of planning one whole meal comprised entirely of foods produced within a 100-mile radius (excepting oils, salt, pepper and spices) in order to celebrate the return of One Local Summer. I still relied on our garden's produce for the vegetables and berries but sourced the pork, cornmeal, wheat, honey, and dairy products locally.

It started with a huge dishpan of Swiss chard and bok choy which DH cut along with a couple heads of garlic and a few Egyptian onions pulled on the way to the house. I sent DS out to pick the sugar snap peas and strawberries and as usual a lot went directly into the picker before the rest were delivered to the kitchen. Fortunately this is shaping up to be the best year ever for peas and strawberries -- lots of rain has made a big difference in production amounts for both so DS's been able to eat his fill at each picking without causing any problem for the cook's supper plans.

The pork came from Staunton's BackDoor Butcher, a shop located one street over from the Staunton/Augusta Farmers Market. They don't seem to have their own website but the link will take you to their listing on the Eat Well Guide site. I cubed 12 ounces of meat and set it aside to marinate in a mixture of 1/2 cup soy sauce, 3 tablespoons sherry, and 2 teaspoons honey while I prepped the vegetables. The honey came from an apiary only a mile away as the crow flies -- who knows? Maybe the bees who produced the jars I have gathered pollen around our homestead...

I came close to exceeding the 100-mile radius with the soy sauce. It's brewed in Richmond, Virginia and I buy it locally but depending on the company's exact location in Richmond (I didn't look that up), it may exceed the desired distance by a mile or so. I decided to include it in the meal anyway for several reasons. We like soy sauce and I often use it to marinate meat destined for a stir fry plus I already had it on hand and one reason I like to participate in the OLS meal planning is to expand my knowledge of what I can find locally and then continue to buy those local foods as available year-round. So for the last couple of years I've started keeping a large bottle of San-J Organic Shoyu Naturally Brewed soy sauce on the pantry shelf in addition to my stand-by gallon-sized can of Kikkomann. I like San-J's slightly lighter, and I think, vinegary taste in lots of recipes.

So, if the soy sauce most likely falls within the allowed radius for OLS, I know the sherry I used doesn't. Again, it was from a bottle I had on the shelf but it hails from California as, tho Virginia vineyards almost always can provide me with great wines for drinking or cooking, I haven't been able to locate one that makes anything close to a sherry. If anyone knows of a Virginia winery that does, please let me know.

After washing the Swiss chard I chopped the stems and the first inch or two of each leaf for the stir fry. The bok choy leaves showed some insect (probably slug) damage so I treated it similarly. The garlic and onions were cleaned and chopped and I snapped the stem ends and pulled any tough strings from the peas. The rest of the chard leaves went into a pot for eating as cooked greens.At DH's request, I also scrambled three eggs from our hens and made a thin egg pancake to shred and toss with the stir fry before serving.

Before I started the stir fry I mixed up a batch of cornbread to go with the meal. Usually I would rely on brown rice as an accompaniment but I don't know of any rice still being grown on the East Coast, much less within 100 miles. Cornbread's always welcome here in any case and I even think some days DS would eat cornbread as the MAIN dish if he could get by with it. As always I used my mom's recipe which makes a hearty, non-sweet cornbread and uses more cornmeal than wheat flour. I soured the batter's milk (sourced from Homestead Creamery, Burnt Chimney, VA by way of a local market) with a few teaspoons of apple cider vinegar I made from last year's cider. Generally I can just transfer the vinegar mother from one jar over to a new jug of cider and let it sit till it's turned to vinegar, too.

The cornbread takes about 15 minutes to bake so once it was poured into the hot skillet and went into the toaster oven, I heated the wok for the stir fry. With everything chopped and ready, it didn't take long to drain the marinade from the meat, pour a tablespoon of peanut oil into the almost-smoking wok and quickly cook the pork, removing it from the pan as it cooked. I wiped the pan out after cooking the meat as the marinade leaves a slightly sticky residue which, with the high heat, often burns before I can stir fry the rest of the ingredients. So next in another tablespoon of oil and then the peas quickly followed by the garlic, onions, bok choy and chard. I'd also covered the separate pan of still-damp chard leaves and set it on the burner to steam for a couple of minutes. I tossed the meat back in with the veg, added the egg strips and called it ready. We served ourselves straight from the wok with a separate bowl for the cooked greens topped with a splash of cider vinegar. With a side plate of cornbread, the table was loaded and it was all produced within a 100-miles. (See note below for final breakdown of local vs. non-local.)

For dessert I whipped almost a cup of top cream with a few tablespoons of honey to sweeten and served it on top of the hulled strawberries DS had picked. The cream for the berries and butter for the cornbread both came from Homestead Creamery, too. And the corn and wheat I ground for the cornbread both came from Wade's Mill in Raphine, VA. They more normally sell the local grain already ground but will accommodate a home grinder if they have the whole grain on hand.

Locally sourced ingredients (H-produced at home, LP-local producer):

Garlic (H)
Walking onions (H)
Swiss chard (H)
Bok choy (H)
Sugar snap peas (H)
Pork (LP)
Eggs (H)
Honey (H)
Cornmeal (LP)
Wheat (LP)
Butter (LP)
Milk (LP)
Strawberries (H)
Cream (LP)
Vinegar (H)

Non-local ingredients:

Peanut oil (2 tablespoons)
Sherry (3 tablespoons)
Baking soda (1 teaspoon)
Salt (1 teaspoon)

Honey-sweetened Whipping Cream

1 cup whipping cream
3 tablespoons light-flavored honey
1 teaspoon vanilla, optional

Beat cream till soft peaks form. Slowly add honey and vanilla. Continue beating till stiff peaks form. Makes about 2 cups.

Friday, May 22, 2009

More rhubarb

I think the rhubarb we have is called "Victoria." I don't know for sure as I got my start from my mom's rhubarb patch which has been there forever or close enough to forever that I can't remember her not having the patch. And she doesn't remember the name of the variety either. So we're calling it Victoria until we learn differently.

But yesterday I stuck in two starts of "Canada Red" which should be a much redder variety. When I cook our rhubarb it usually turns sort of a chartreuse color tho when I make juice from it and drain away the solids, the juice is a pretty dark pink. Go figure.

Anyway, I was looking to increase our rhubarb production and decided if I was going to add a couple more plants I should consider a different variety. And the color was enough to sell me on Canada Red or Canadian Red (depending on who you ask for the name).

Now what are we going to do with more rhubarb? Well, pretty much the same thing we've been doing with it over the years. Make stewed rhubarb, rhubarb crisp, rhubarb-berry preserves, rhubarb fruit leather and rhubarb beverages. (See previous post "What do you do with rhubarb?" for ideas and recipes.) There's a rhubarb liqueur made with vodka that I like to have on hand and, a favorite with DS, rhubarb ade or rhubarb punch. I can even can the punch and have it ready to go straight from the jar.

This year I'm trying something a little different. When I cooked the rhubarb to make juice, instead of just separating the cooked fruit and the liquid (and tossing the strained fruit), DH ran the fruit through the ricer like we do with apples or tomatoes. Then I poured the juice into 2-quart jars and let them sit overnight in the fridge. In the morning I strained the juice to remove the sediment. I tried using a coffee filter but it was taking forever so I switched to a mesh strainer.

After straining over 10 quarts of juice, I ended up with almost 1 quart of pulp and 9+ quarts of juice.I used the pulp to make a rhubarb-strawberry fruit leather. I heated the rhubarb in a pan on low, added about a cup of honey, and stirred in maybe a quart of well-mashed strawberries. I stirred it over low heat and as soon as it appeared to be well-blended and the honey had dissolved, I put the fruit mixture in the dehydrator to dry. The rhubarb juice I used to make punch which I canned in the water bath canner. So now I can make punch and leather with one batch of rhubarb instead of doing almost the same steps twice to make two separate recipes.

Sunday, May 17, 2009

Frost advisory tonight and tomorrow

DH has set out about 60 of the 144 tomatoes we started from seed back in mid-March. The sugar snap peas are looking great, the lovage is 3-feet tall and bushy and I just bought a half-dozen geraniums on sale. So what's the latest weather forecast? Frost, of course.

And yesterday's early evening storm almost destroyed the rest of the tomato seedlings. They were setting in enamel dishpans under the house eaves and we didn't realize the pans had filled with water till this morning. DS and I carefully drained the water and set everything on the grass to dry out this afternoon under the overcast sky. Some of the newspaper pots completely disintegrated and several plants had enough dirt washed out that the roots were exposed. It's mainly the Heinz F1 hybrid plums, some of the Brandywines and a few of the Yellow Pears that were affected. Almost all the Mortgage Lifters went in the ground on Friday or Saturday. I think they'll all make it but we'll put them back in the garage overnight to be safe.

DH called me from work after hearing the weather report so I'm off to gather baskets, plastic containers and some of the 2-liter bottles he's planning to recycle as individual plant waterers. (He cuts the bottom off the bottle, inverts it and buries about one-third of it in the ground to one side of the vegetable transplant. See photo below.) We'll cover each garden-planted tomato, the emerging pole beans and anything else that should be protected from frost when he gets home later this evening. Maybe the next couple of nights will be the last of the frost warnings -- and, of course, this isn't as bad as a couple of years ago when we had a HARD freeze on May 30.

Saturday, May 16, 2009

First-time caving...

But I've been assured it won't be his last.

DS and DH (in orange hat) went on another Wild GUYde Adventure with Lester Zook and a group of fellow homeschoolers. This time they explored Glade Cave in the northwestern corner of our county. A quick search online prior to the trip told me that no matter what the time of year or drought/non-drought status of the surrounding area, the cave is muddy and wet. This proved true.

After seeing the online photos snapped by other Glade Cave trippers, DS hoped they'd be able to make it to the lake room but I guess Lester considered it too long of a trek for this group of mostly first-time cavers. Plus, from some reports, after all the rain we've had this spring (wonderful after several years of drought) the water would have been up to the necks of many in the group. Maybe next time. Because I've been told several times since Monday, the day of this trip, that DS's ready to go caving again. Just as soon as we get the mud rinsed out of his clothes and shoes...

Thursday, May 7, 2009

Spring Garden Update

We're finally getting rain this spring and the garden's showing its appreciation.Spinach, lettuce and radishes were on the menu by the first of April and two weeks ago we harvested the first of the asparagus and rhubarb. I even managed to stash about 2 quarts of rhubarb in the freezer but we tend to eat any asparagus available. We're a greedy bunch. [Photo shows lettuce and spinach after the fourth harvest and still producing.]

DH started bok choy, broccoli, and two types of swiss chard in the cold frames earlier this spring and has begun setting them out in the regular beds this past week. The tomatoes we seeded in mid-March are looking great and will probably go into the garden late next week. May 15 is the safe last frost date around here.

I'm starting Hillbilly Potato-leafed tomatoes for DS as they're his favorite and will also have winter and summer squash as well as gourds ready to go out in the garden beds by the end of this month when the nights should be consistently warmer.

The garden got pushed to the side the last few days as DS and DH spent Friday on a hike of Mud Pond trail with Lester Zook's WILD GUYde Adventures. The hike was supposed to happen earlier in the week but was postponed due to rain. And they went canoeing with the same group this past Tuesday -- the rain didn't bother DS in the least.
I had my own trip last weekend when a friend and I went to the Maryland Sheep & Wool Festival on Sunday. We left at 5am, I got back home about 7pm and it rained the whole time. The festival was oh so wet but we had a great time. Met some wonderful people at the Ravelry meetup and, of course, purchased a little fiber, too. I couldn't resist getting a skein of Blue Moon Fiber's Socks that Rock in the Hurdy Gurdy colorway -- for once I was glad it was raining as it meant The Fold's booth wasn't as packed as usual. I could even browse for a few minutes... Then I found some gorgeous dyed Coopworth wool at the Wild 'n' Woolly Farm booth and scooped it up for part of a Ravelry swap package I need to mail out this week.

Wednesday, March 25, 2009

Needle felting on a shirt yoke

My old cotton flannel shirt has seen better days but I thought it deserved a little decoration so needle felted a brown sheep on the back yoke last month.

I used a sheep-shaped cookie cutter to lay out the initial form. Outlined it with a strand of 2-ply natural brown wool handspun yarn and used one of my 38 gauge felting needles to attach the yarn to the fabric.

Once I had the main shape outlined, it was easy enough to fill it in with swirls of yarn. I added the face and legs using black tapestry wool I had in my stash.

DS thinks the design looks more like a bear than a sheep but I'm pleased with the results. The fabric underside has little tufts of wool sticking through (natural part of the needle felting process) so I don't think I'd use this decorative technique on a piece of clothing that would rest directly on my skin. I wear this shirt as a jacket though so that isn't an issue. And I've washed the shirt several times since needle felting without damage to the design. I do turn it wrong-side out before washing, tho.

Tuesday, March 17, 2009

Wondering what to do with that leftover corned beef?

I know, this is not a problem that confronts you today. Today is St. Patrick's Day and all across America many cooks have prepared corned beef for dinner. With cabbage, potatoes, carrots or whatever accompanies the corned beef, folks are pretty much satisfied. Dinner was good. It's tomorrow or maybe the day after, when you're looking at the remains of that corned beef still sitting in the fridge that I'm talking about.

There are a couple of old standbys for using up corned beef. How about corned beef sandwiches, perhaps on rye with mustard? Maybe a pickle on the side or try adding sauerkraut, a mild cheese and thousand island dressing and grilling it for a minute or two if you want to make it a little more special. And there's always corned beef hash either plain or red flannel (with beets AND potatoes). I know some people who only tolerate the initial meal of corned beef and cabbage because they know that within a day or two it will be time for hash, with or without eggs.

Believe it or not, corned beef can even make a decent pate with which to stuff a baguette. Or, if you don't care about presentation and want to eat it now instead of waiting several hours while it chills, mix minced corned beef with mayonnaise, pickle relish and the veriest bit of mustard. Spread it on your favorite cracker or make a sandwich.

A successful potluck casserole I've made on more than one occasion is Lazy Day Reuben Casserole. It's one of those layered meat, noodles, veg and sauce combos that use condensed cream of ____ soup or, my preference, a homemade alternative. Another favorite is a sandwich braid, Reuben Loaf, made by layering corned beef, cheese and sauerkraut on bread dough before baking.

There are many other ways to incorporate leftover corned beef into meals. Include a cup or so of diced corned beef in macaroni and cheese or scalloped potatoes. And if making scalloped potatoes, a layer of sliced cabbage and a 1/2 teaspoon or so of Dijon mustard mixed into the cream sauce adds to the mix. Use diced corned beef as a filling for pasties, crescent roll turnovers or empanadas. Whatever you call them, the corned beef can sub for the meat in your basic recipe. To make it individual to corned beef, I like to brush a light coating of mustard on the inside of the dough before sealing.

And there are more ideas all over -- I've read recipes for corned beef-potato pizza, a suggestion for using the reuben sandwich ingredients to create a baked potato topping, Emeril Lagasse's Cabbage-Potato Soup and Taste of Home's Reuben Soup each call for corned beef in small enough amounts to qualify as a way to use up leftovers. Just don't waste something that only today (yesterday?) you were enjoying so much.

Corned Beef Hash

4 tablespoons butter, divided
1 tablespoon oil
1/2 medium onion, finely chopped
1/2 medium green pepper, chopped - optional
1-1/2 to 2 cups cold cooked corned beef, free of all fat and gristle and finely chopped
2 to 3 cups cold cooked potatoes, coarsely chopped
5 tablespoons beef, chicken or vegetable stock
salt and pepper, to taste
2 tablespoons Worcestershire sauce
2 tablespoons fresh parsley, finely chopped - optional

Cook onions and green peppers in 2 tablespoons over medium heat in a 10-inch heavy skillet for about 5 minutes or until they soften without browning. Scrape them into a large mixing bowl. Add corned beef, potatoes, stock, salt and pepper, and Worcestershire sauce to bowl. Mix gently to combine. Let hash rest for a few minutes in bowl so liquid can be absorbed.

To cook hash, heat 2 tablespoons butter and 1 tablespoon oil in 10-inch skillet. When the fat is hot but not sizzling, add hash, patting it down in the pan gently with a large spatula. Cook over moderate heat about 40 minutes, shaking pan every now and then to make sure hash isn't sticking to bottom. As it cooks, the hash will inevitably produce some fat; tip the pan and skim it from the sides with a small spoon, or better still, with a bulb baster. During the last 10 minutes of cooking, to remove any extra fat, lay a double thickness of paper toweling on top like a blotter, pressing it down on the hash. Repeat this blotting procedure as often as you think necessary, being careful not to get paper toweling near flame.

To serve, turn the hash out onto large round platter. It's best to do this by holding the platter over the skillet and up-ending the skillet to turn the hash out. If part of the crust sticks to the pan, remove it and patch it into place. Sprinkle the top with parsley and serve alone or with condiments such as mustard, pickles, horseradish, and the like.


Red Flannel Hash

1/4 pound salt pork or thick bacon, finely diced
1/2 medium onion, finely chopped
1/2 medium green pepper, finely chopped
1-1/2 to 2 cups cooked corned beef, free of all fat or gristle, and finely chopped
1-1/2 cups cooked or canned beets, diced
4 tablespoons fresh parsley, finely chopped, divided
1-1/2 to 2 cups cold cooked potatoes, coarsely chopped
6 tablespoons heavy cream or evaporated milk
salt and pepper, to taste

Render the pork by frying it in a 10-inch heavy skillet over moderate heat. Stir almost constantly wtih a wooden spoon until the fat has dissolved, then remove the brown bits and put them aside. Pour half the fat into a dish and save it until later.

Heat remaining fat in skillet and over moderate heat, cook onions and peppers for about 5 minutes or until they soften without browning. Scrape them into a large mixing bowl. Add corned beef, beets, potatoes, 2 tablespoons parsley, salt and pepper to bowl. Moisten mixture with cream. Mix gently to combine. If you want you could add the brown pork bits left from rendering the fat. Let hash rest for a few minutes in bowl so liquid can be absorbed.

To cook hash, add remaining reserved pork fat to 10-inch skillet. When the fat is hot but not sizzling, add hash, patting it down in the pan gently with a large spatula. Cook over moderate heat about 40 minutes, shaking pan every now and then to make sure hash isn't sticking to bottom. As it cooks, the hash will inevitably produce some fat; tip the pan and skim it from the sides with a small spoon, or better still, with a bulb baster. During the last 10 minutes of cooking, to remove any extra fat, lay a double thickness of paper toweling on top like a blotter, pressing it down on the hash. Repeat this blotting procedure as often as you think necessary, being careful not to get paper toweling near flame.

To serve, turn the hash out onto large round platter. It's best to do this by holding the platter over the skillet and up-ending the skillet to turn the hash out. If part of the crust sticks to the pan, remove it and patch it into place. Sprinkle the top with parsley and serve alone or with condiments such as mustard, pickles, horseradish, and the like.

Of course, if you wish, you can omit rendering fat from the pork called for and substitute butter and/or oil as in regular hash recipe just above.


Pate of Corned Beef

1/4 pound butter, creamed
2 cups cooked corned beef, ground -- twice, if possible
1 tablespoon onion, grated
3 tablespoons heavy cream or evaporated milk
2 teaspoons prepared mustard
1 teaspoon dry mustard
1 teaspoon lemon juice
2 tablespoons fresh parsley, finely chopped
2 tablespoons chives, finely chopped
1/4 teaspoon salt
1/4 teaspoon black pepper
2 teaspoons Worcestershire sauce
loaf of French or Italian bread, about 12" long and 3-1/2" in diameter

Cream the butter in a mixing bowl by beating it with a large spoon for a few minutes until it is smooth. Then, a few tablespoons at a time, beat in the corned beef and, one after the other, the onions, cream, mustards, lemon juice, parsley, chives, salt and pepper, and Worcestershire sauce. You could use an electric mixer wtih a whisk beater or use a food processor or beat the pate by hand until it is as smooth as you can possibly get it. Just be careful not to overmix it if using the processor. Taste for seasoning, remembering that when the pate is chilled, its flavor will be considerably muted.

Slice 2 inches or so off the ends of the bread, save for another use. With your fingers and the aid of a long thin spoon, remove as much of the soft insides of the bread as possible without damaging or breaking through the crust. When the bread is a hollow tube, stand it on one end on a sheet of waxed paper and carefully fill it with the soft pate, packing it down as you proceed. If there isn't enough pate to fill the bread, simply cut off the hollow portion.

Wrap filled bread in waxed paper and refrigerate for a few hours or until the pate is firm. Slice into 1/8- or 1/4-inch rounds with a serrated knife and serve. You may briefly heat the bread in a hot oven to crisp the crust but do this with caution as the pate will soften too much to slice if the loaf becomes too hot.

Source: Michael Field's Culinary Classics and Improvisations (1967)


Reuben Loaf

1 batch bread dough *see note
1/4 cup thousand island salad dressing or a grainy mustard, whichever you prefer
1 to 2 cups cooked corned beef brisket, diced
4 ounces Swiss cheese or mild cheese of your choice, shredded or thinly sliced
1 cup sauerkraut, rinsed and drained
1 egg white, beaten - optional

Preheat oven to 400F.

Turn dough out onto a lightly greased (15x10-inches) baking sheet. Roll dough to a rectangle that almost fills the pan.

Spread dressing down center third of dough. Sprinkle area spread with dressing with layers of beef, cheese and sauerkraut.

Make cuts from filling to edges of dough 1 inch apart on both sides of the filling. Alternating sides, fold the strips at an angle across filling. Brush dough with egg white.

Bake for 25-30 minutes or until lightly browned. Serve immediately; refrigerate leftovers.

Yield: 6 to 8 servings.
Source: Country Woman

*Note - Use your favorite plain bread dough. Can be made by hand, in the bread machine on dough setting or use a loaf of thawed frozen dough. If making yourself, a recipe which uses 3 to 4 cups flour or will yield a 1.5-pound loaf would be about right.


Lazy Day Reuben Casserole

2 cans condensed cream of chicken soup, **see note
1-1/3 cups milk or thinned yogurt
1/2 cup onion, chopped
3 tablespoons mustard
2 pounds sauerkraut, drained (and rinsed if too salty)
8 ounces egg noodles
12 ounces corned beef brisket, diced
2 cups Swiss cheese, shredded
3/4 cup rye bread crumbs, toasted
2 tablespoons margarine, melted

In bowl, mix soup, milk, onion and mustard until blended.

In greased 13"x9"x2" baking dish, spread drained sauerkraut; top with uncooked noodles. Spoon soup mixture evenly over noodles. Sprinkle with crumbled corned beef, then cheese.

In bowl, stir together rye bread crumbs and melted butter until well blended; sprinkle over top of cheese. Cover tightly with foil.

Bake in 350°F oven for 60 minutes or until noodles are tender.

I've had this recipe so long I don't know exactly where it came from but I think it was in an old Progressive Farmer from the '70s.

**Note -- I use a homemade version of cream soup most of the time. Here's one recipe that will make several "cans" worth as you need it.


Homemade Cream Soup Substitute

2 cups instant non fat dry milk
3/4 cup cornstarch
1/4 cup chicken bouillon, instant or other preferred bouillon flavor
2 teaspoons dried onion flakes
1 teaspoon each basil and thyme - optional
2 teaspoons pepper

Combine dry milk, cornstarch, bouillon, onion flakes, basil, thyme and pepper.

To make the equivalent of one can of condensed soup, use 1/3 cup of the mix and 1-1/2 cups water and cook over moderate heat until thickened.

NOTE: Beef or vegetable bouillon may be used in place of the chicken. Mushrooms may be added to the sauce for a mushroom soup base. I like to cook a little celery in butter and add to prepared recipe when it calls for celery soup.

For more kitchen aids check out Kitchen Tip Tuesday at Tammy's Recipes.

Sunday, March 15, 2009

Seed-starting

We planted most of our tomato seeds this morning. None of them were from seeds we'd saved -- those few will go in later this month.

Today's batch included some organic tomato seed from Southern Exposure Seed Exchange that DH picked up at Countryside Natural Products last week. Radiator Charlie's Mortgage Lifter, Brandywine, Arkansas Traveler and the smaller Yellow Pear tomatoes, which DS and I like to pop straight off the vine, filled about 30 cells each.

After DH went to work, DS planted this year's Tomatosphere tomato seed (Heinz 9478 - a plum tomato hybrid). Tomatosphere is an educational outreach program co-sponsored by the Canadian Space Agency, Heinz Canada Ltd., etc. This is the first year DS has participated -- we're signed up as a group with some other homeschooling families. He received two packets of seed as part of this year's blind study. One is a control group and the other batch was exposed to a simulation of the atmosphere on Mars.

He'll monitor their germination and any growth till they produce their first tomatoes. Then we submit his results so they can be compiled with all the other students' reports. After he turns in his summary, he'll learn which of the two packets was the control group, too. And, of course, any tomatoes produced will be absorbed into our usual canning and preserving process.

I'm not wild about planting the F1 hybrids when we hope to save tomato seeds this year but they'll go into a bed at least 50 yards from the other tomatoes so that should lessen the chance of cross-pollination. And DS is excited about the experiment which outweighs any qualms I might have.